
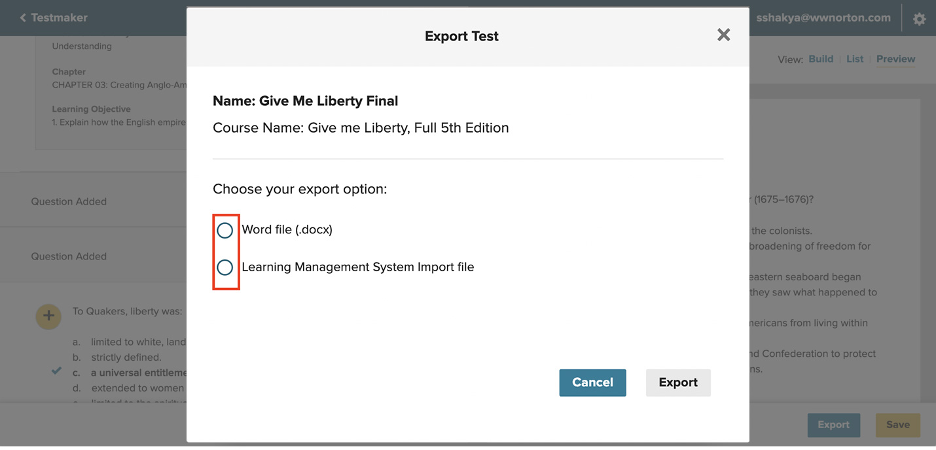
Norton Testmaker allows exports to DOCX format and ZIP format (which can be imported to learning management systems). Exported tests will be downloaded to your Web browser's default download location.
Exported DOCX files contain both the test and its answer key.
In addition to Microsoft Word, DOCX files that have been exported from Testmaker can be uploaded to Google Drive and opened in Google Docs.
Exported ZIP files have been tested in the following learning management systems (LMS):
- Blackboard
- Canvas
- D2L/Brightspace
- Moodle
- Schoology
For help importing ZIP files into your LMS, see here.
Note: The following special characters should not be used in the Test Name and Course Name when importing a test through a Learning Management System: # & - – / \ ( ) : ; @
Export from the “Build Test” screen
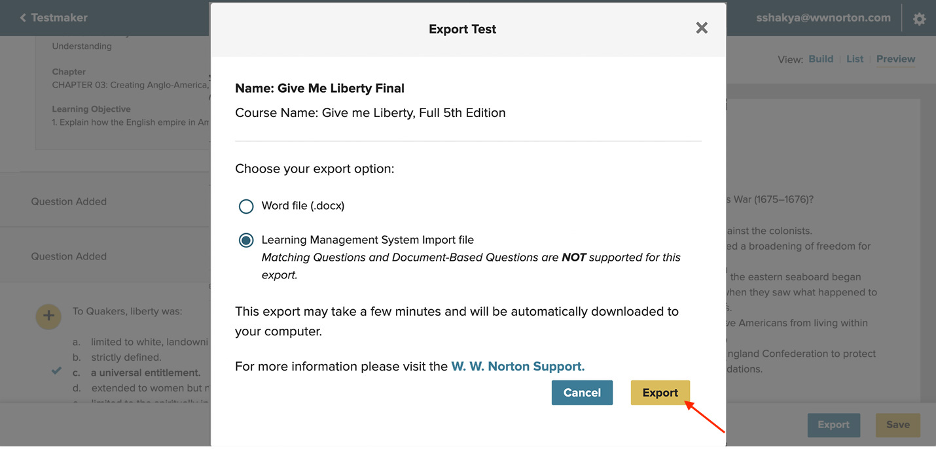
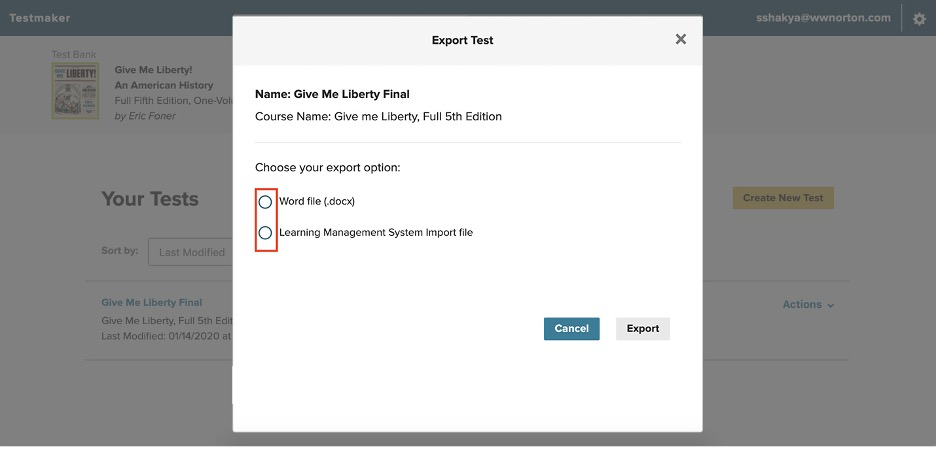
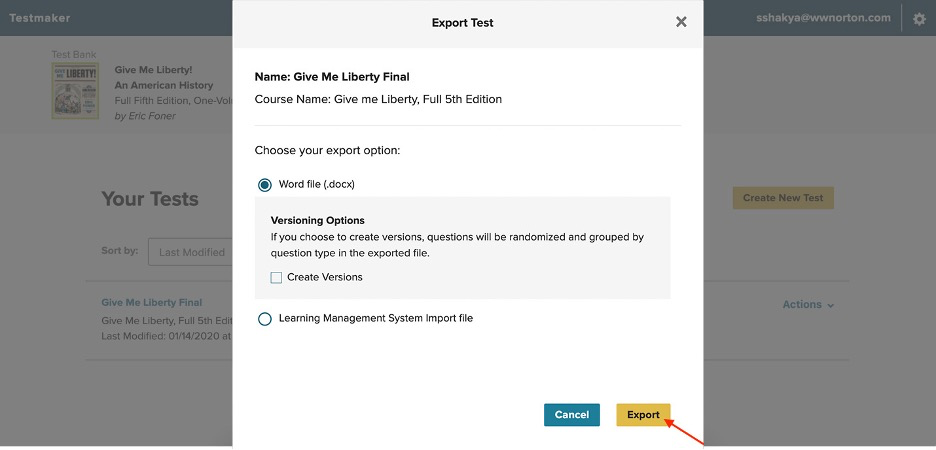
- Click the "Export" button at the bottom of the "Build Test" screen.
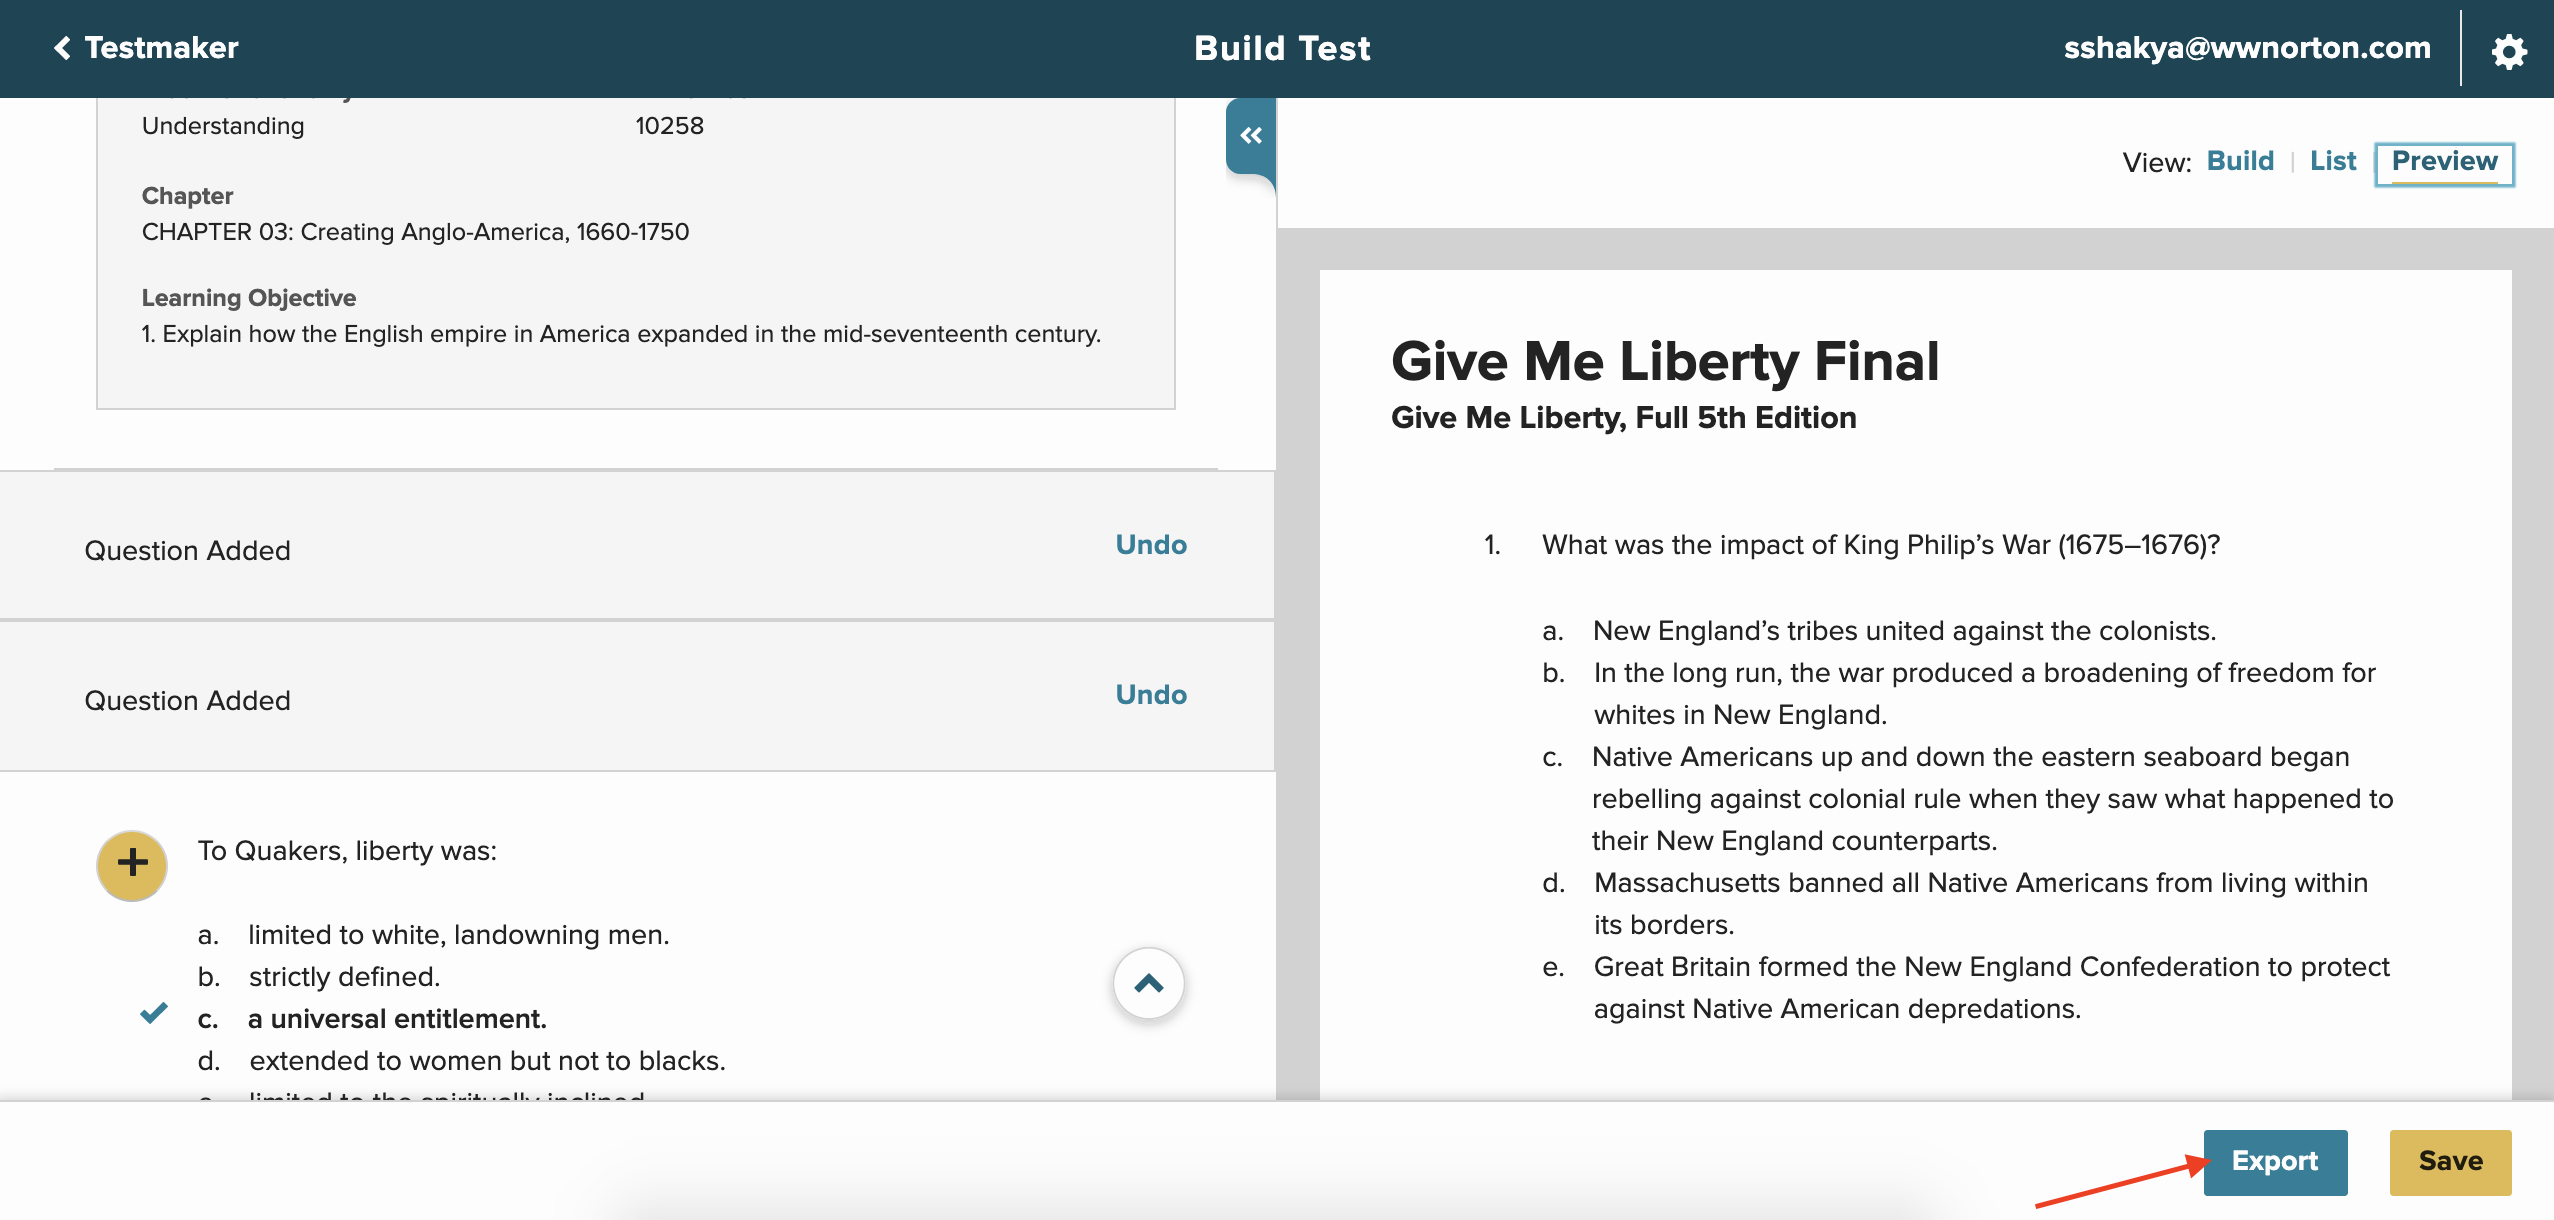
- Select either of the options in the modal.
- Click the "Export" button in the modal.


Export from the "Your Tests" screen
- Choose "Export" from the "Actions" drop-down menu.
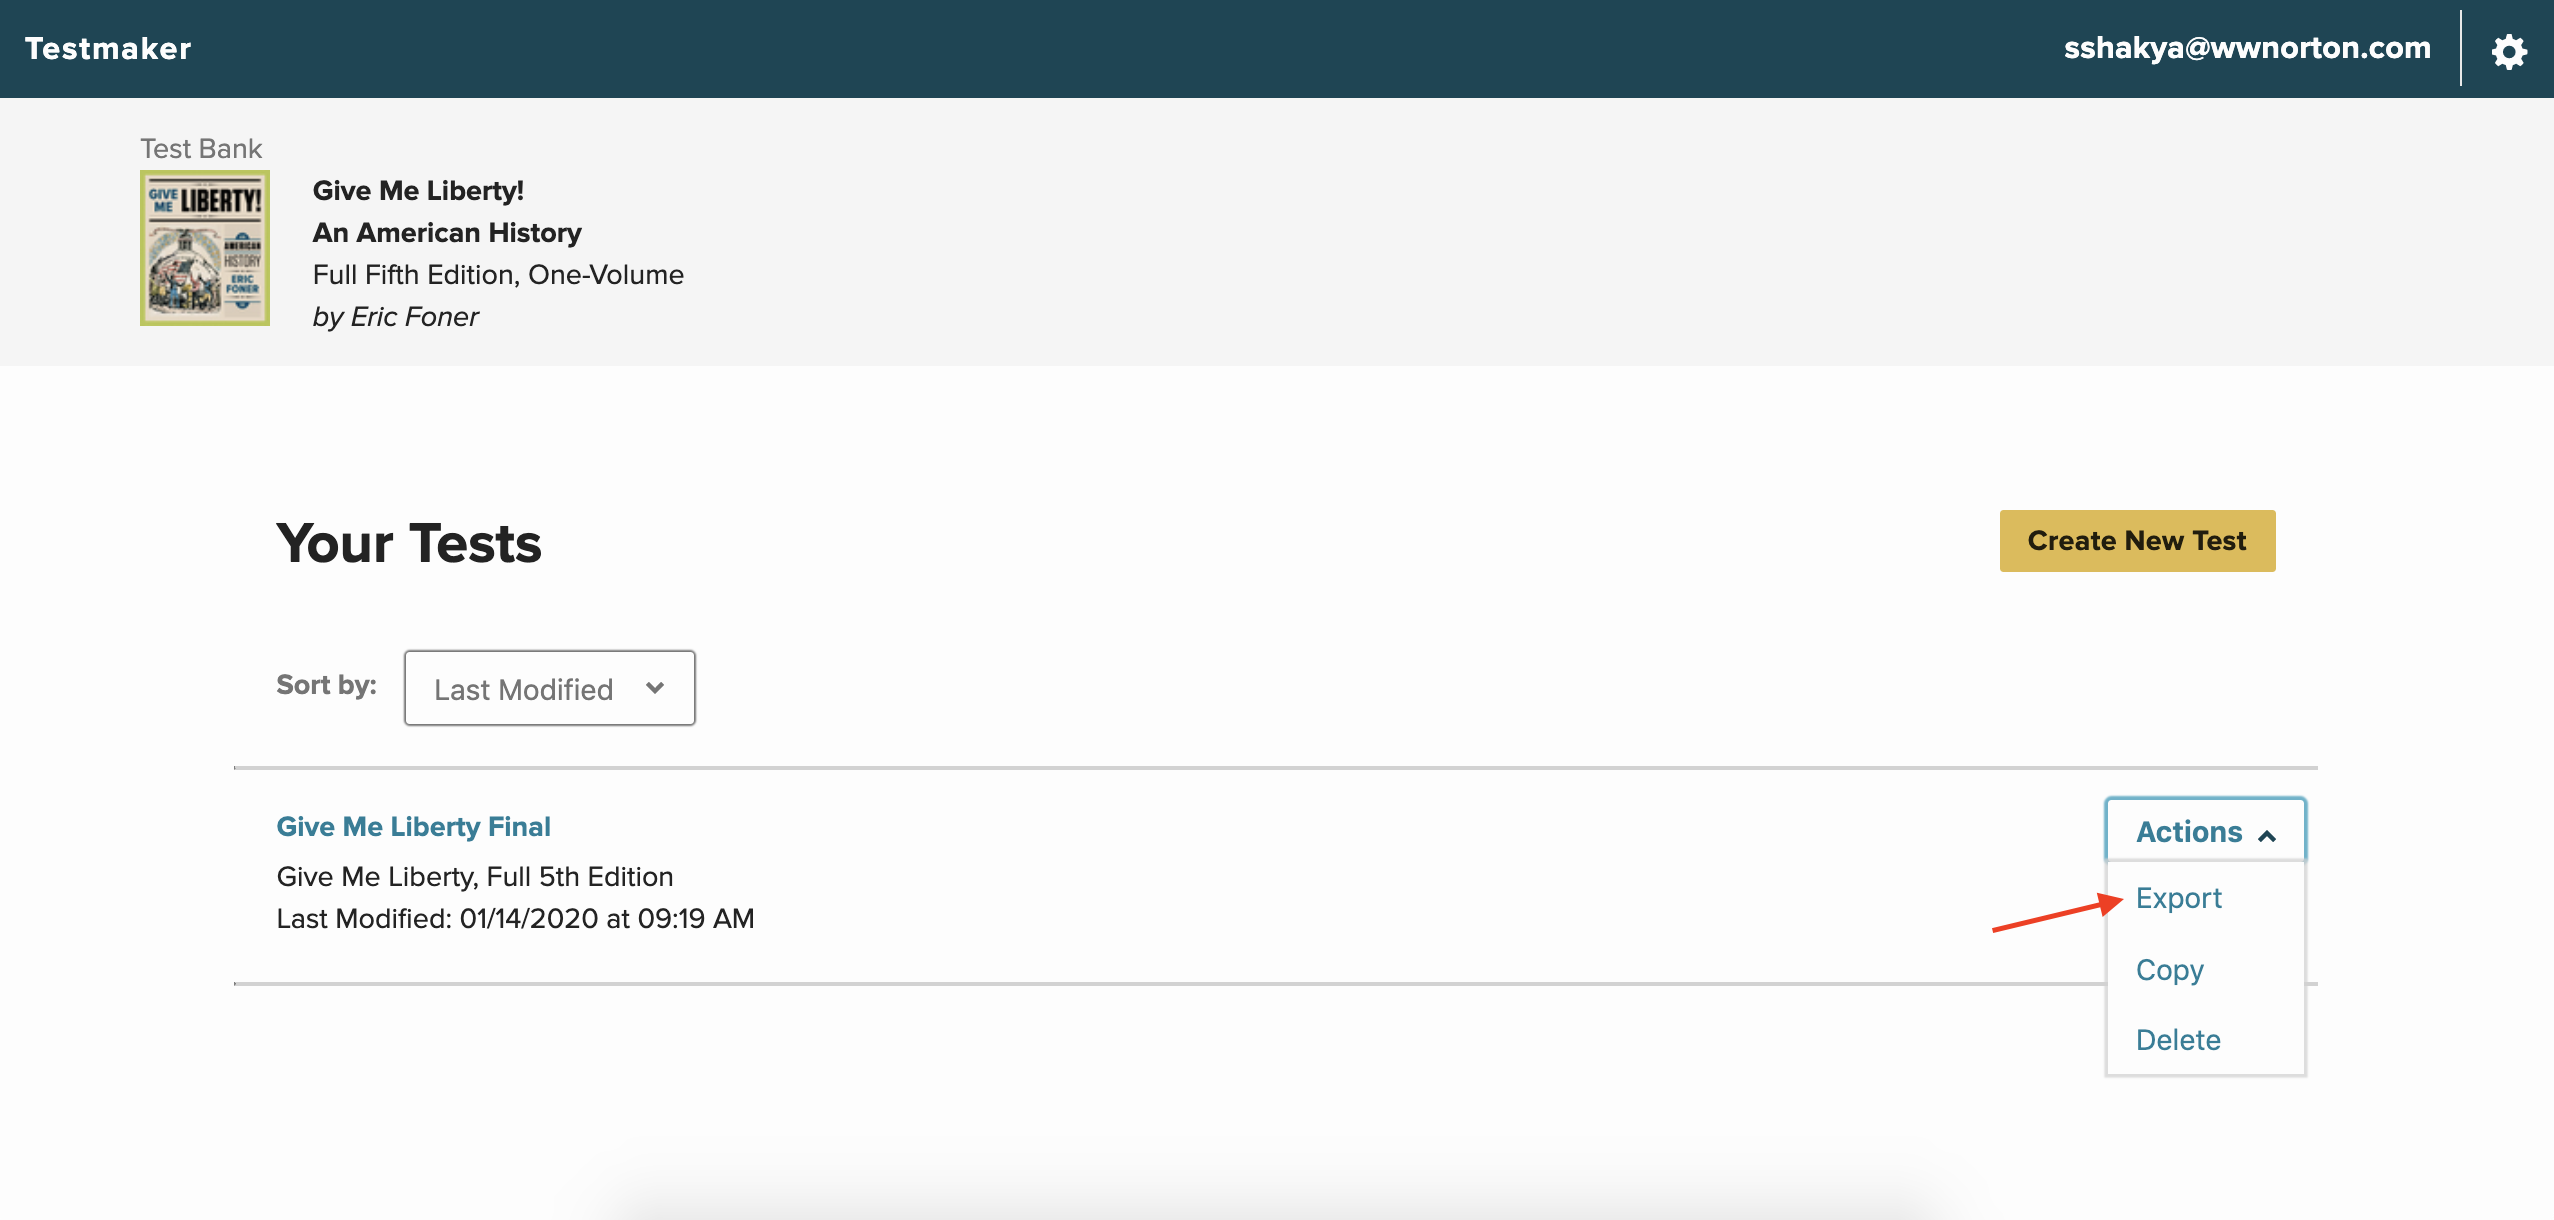
- Select either of the options in the modal.
- Click the "Export" button in the modal.


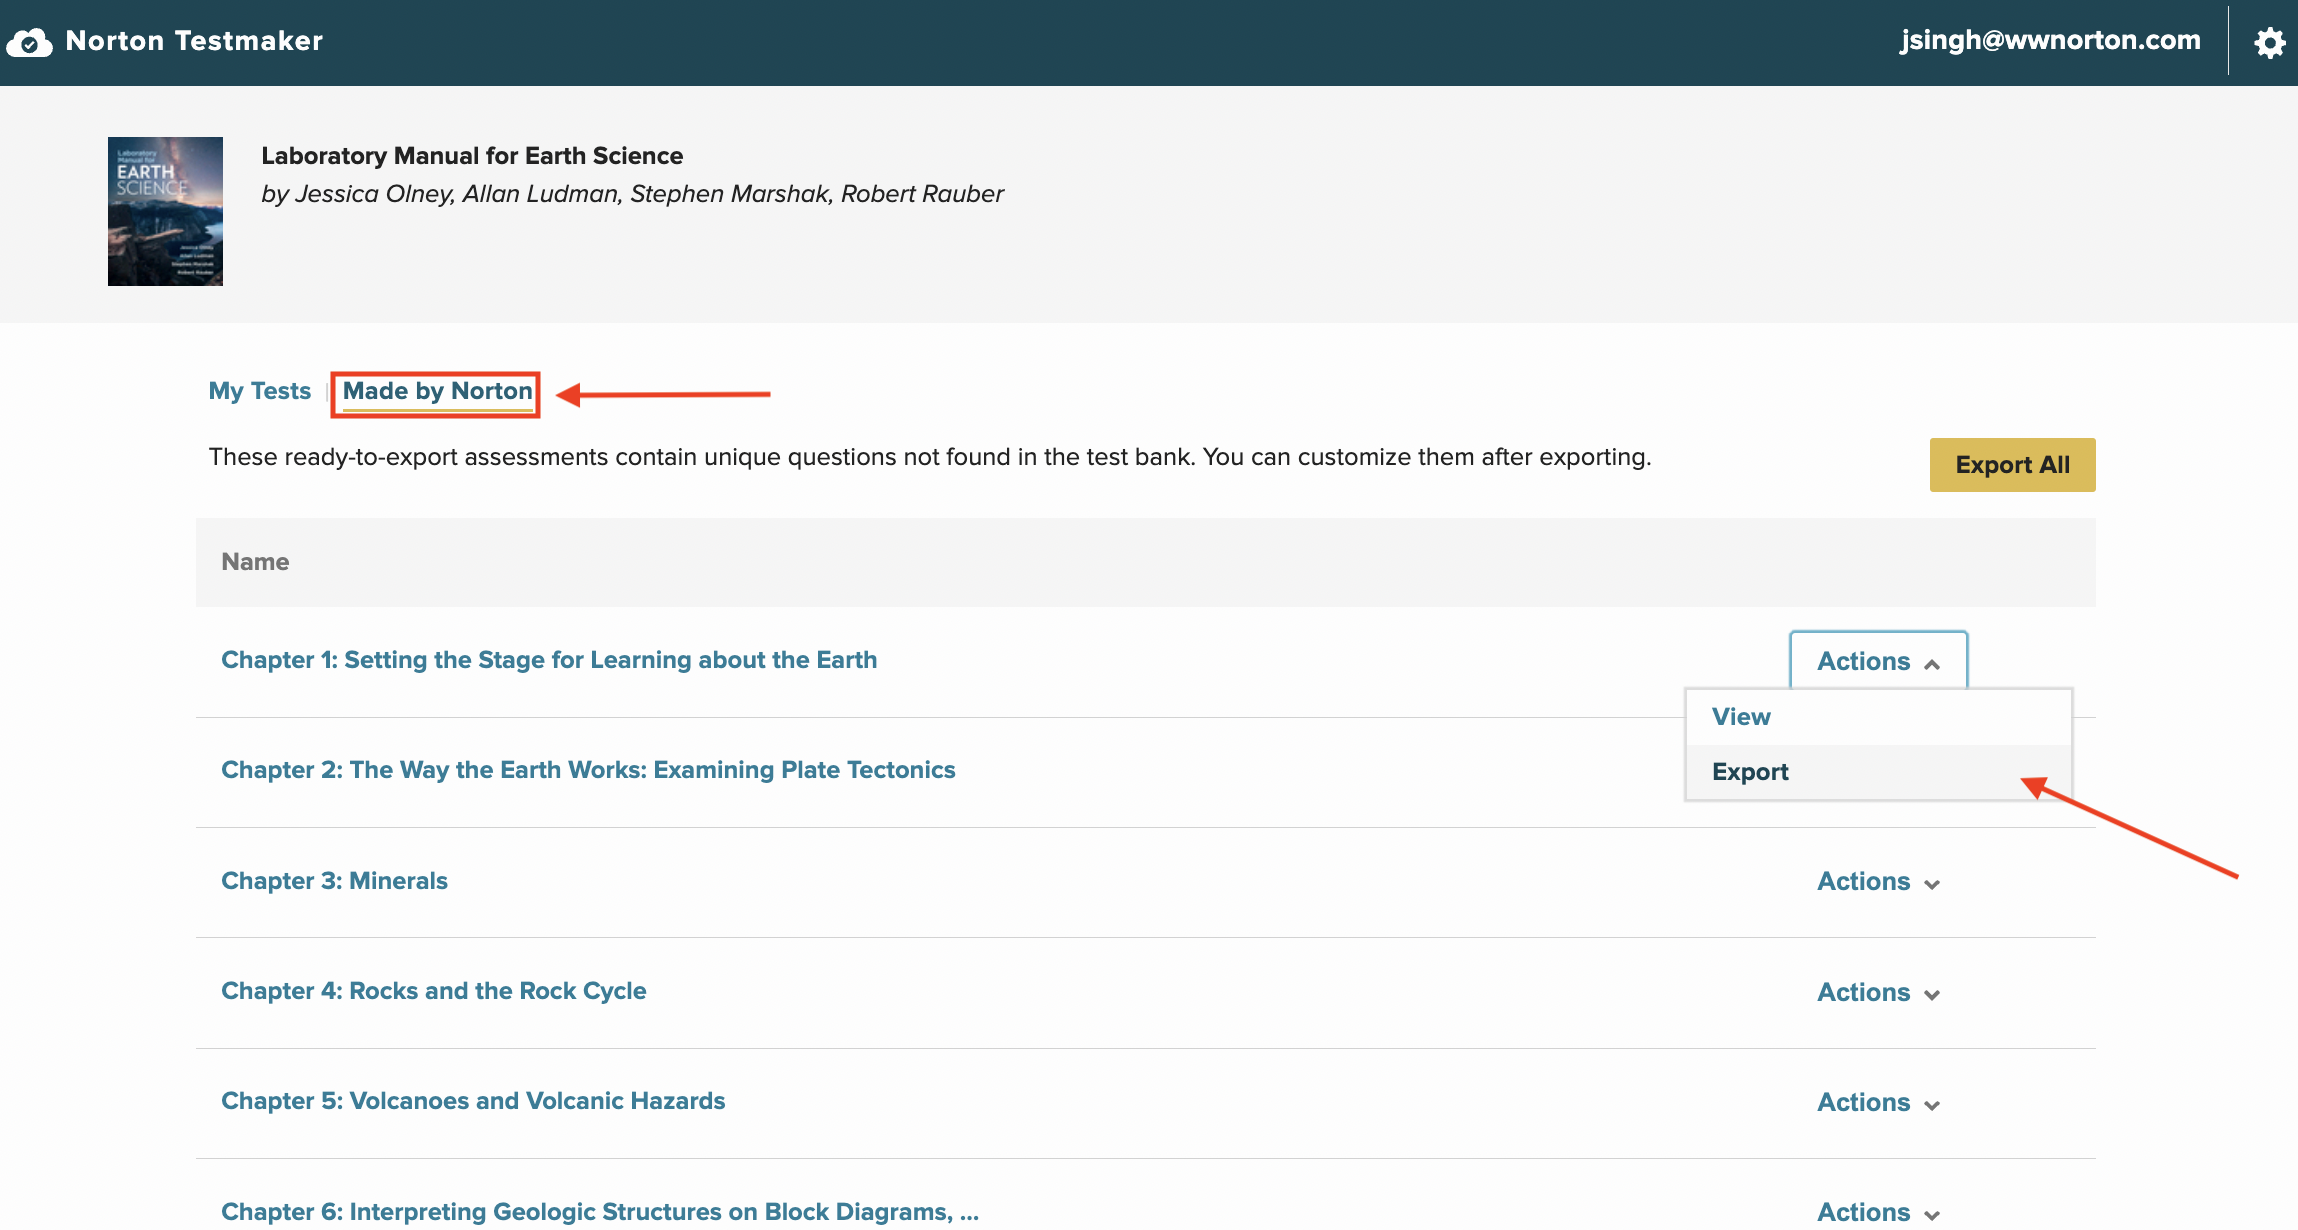
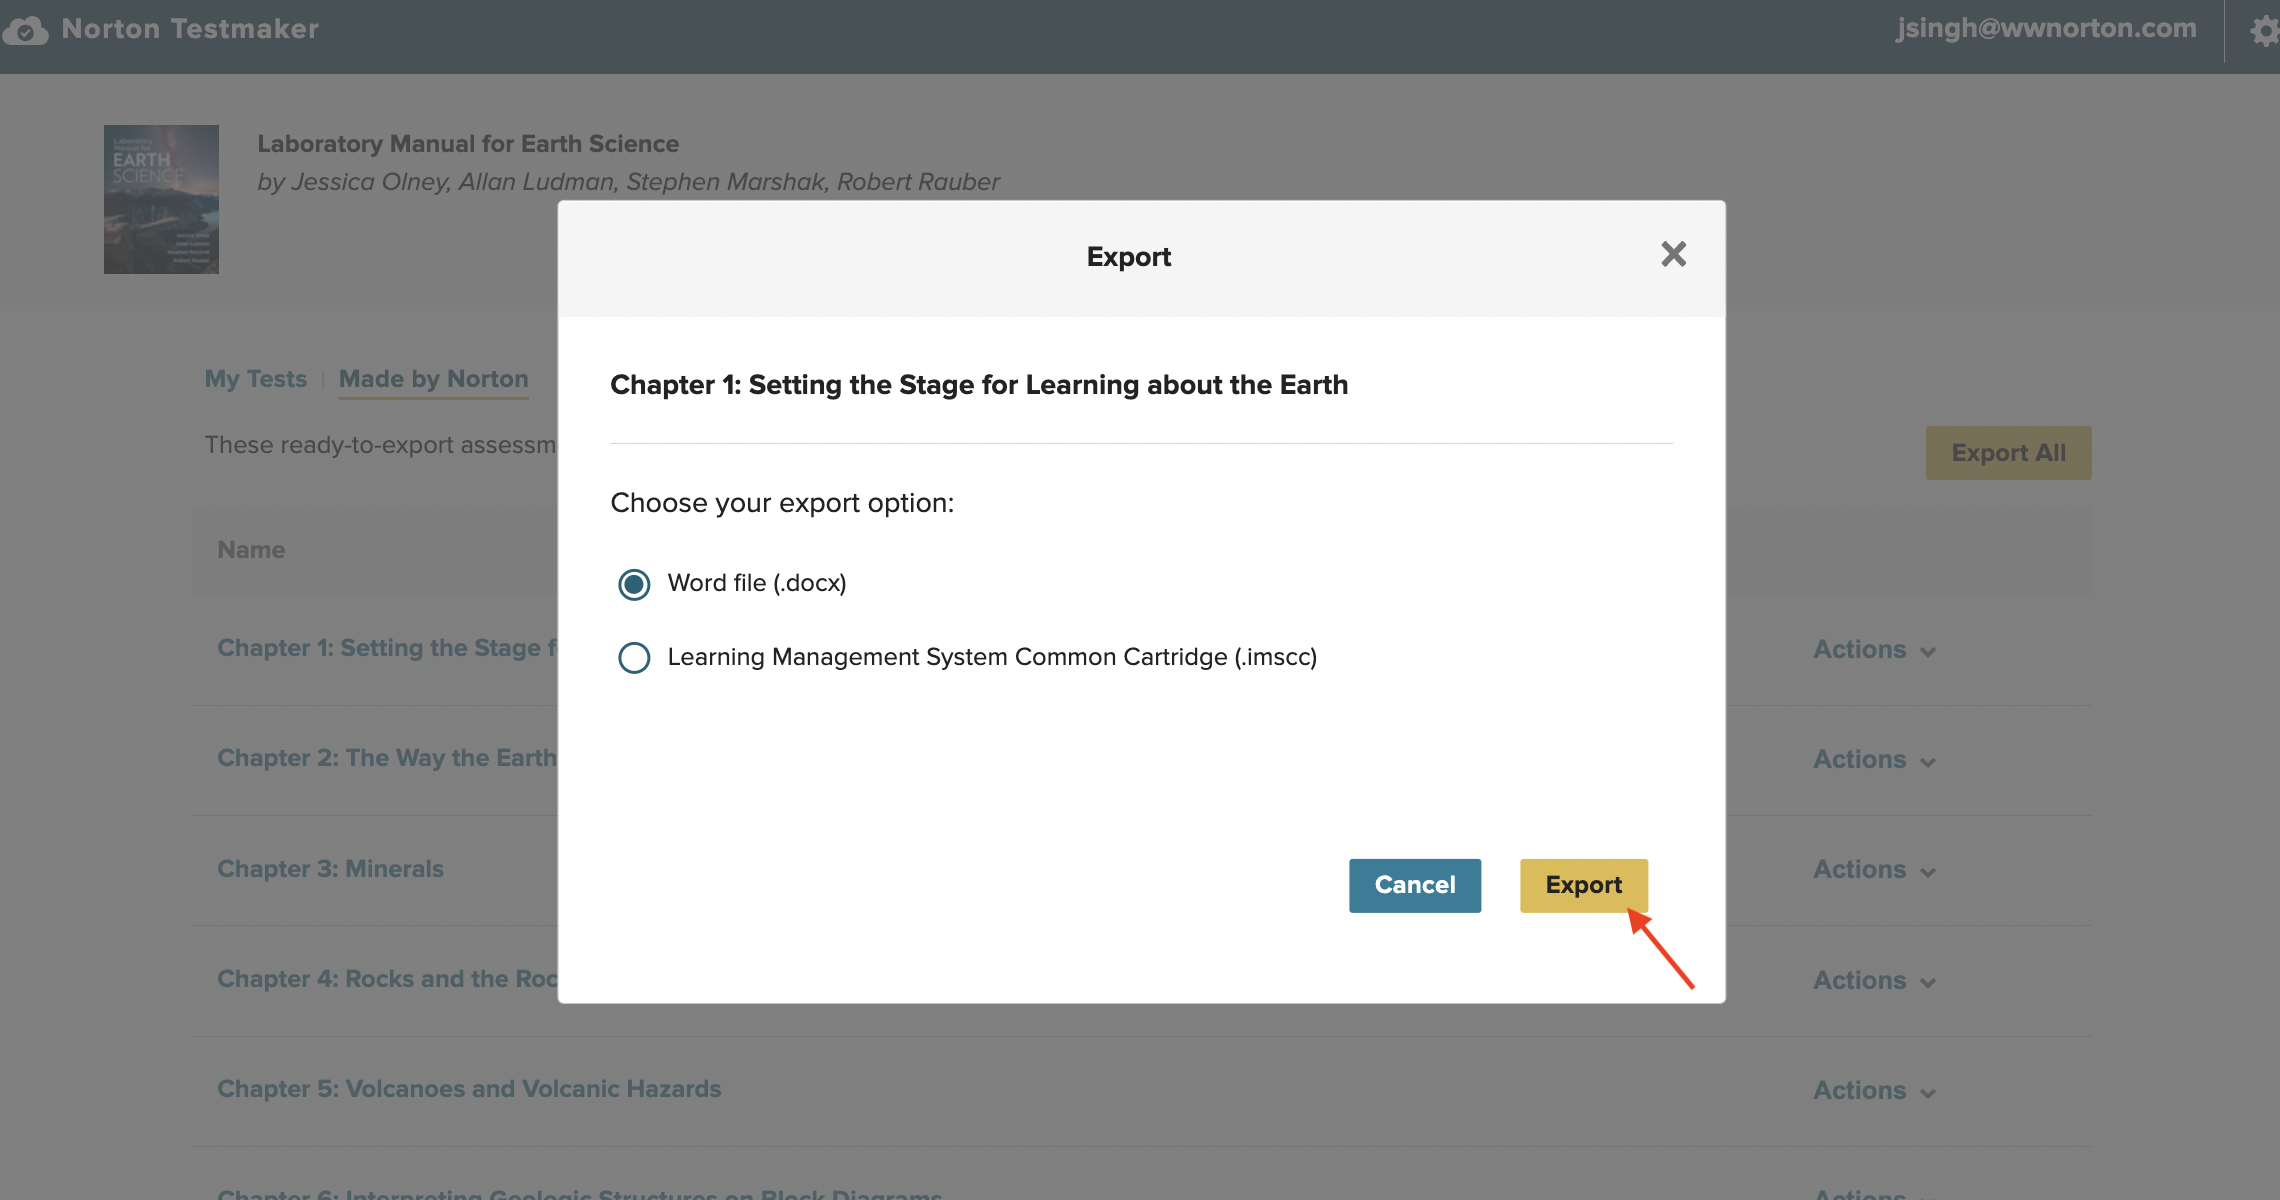
EXPORT FROM THE "MADE BY NORTON" SCREEN
If premade “Made by Norton” assignments are available for your title, follow these instructions to export these files.
- Start by locating the “Made by Norton” link on the login screen. Then click the “Actions” dropdown and select “Export.”
- Select either of the options in the modal.
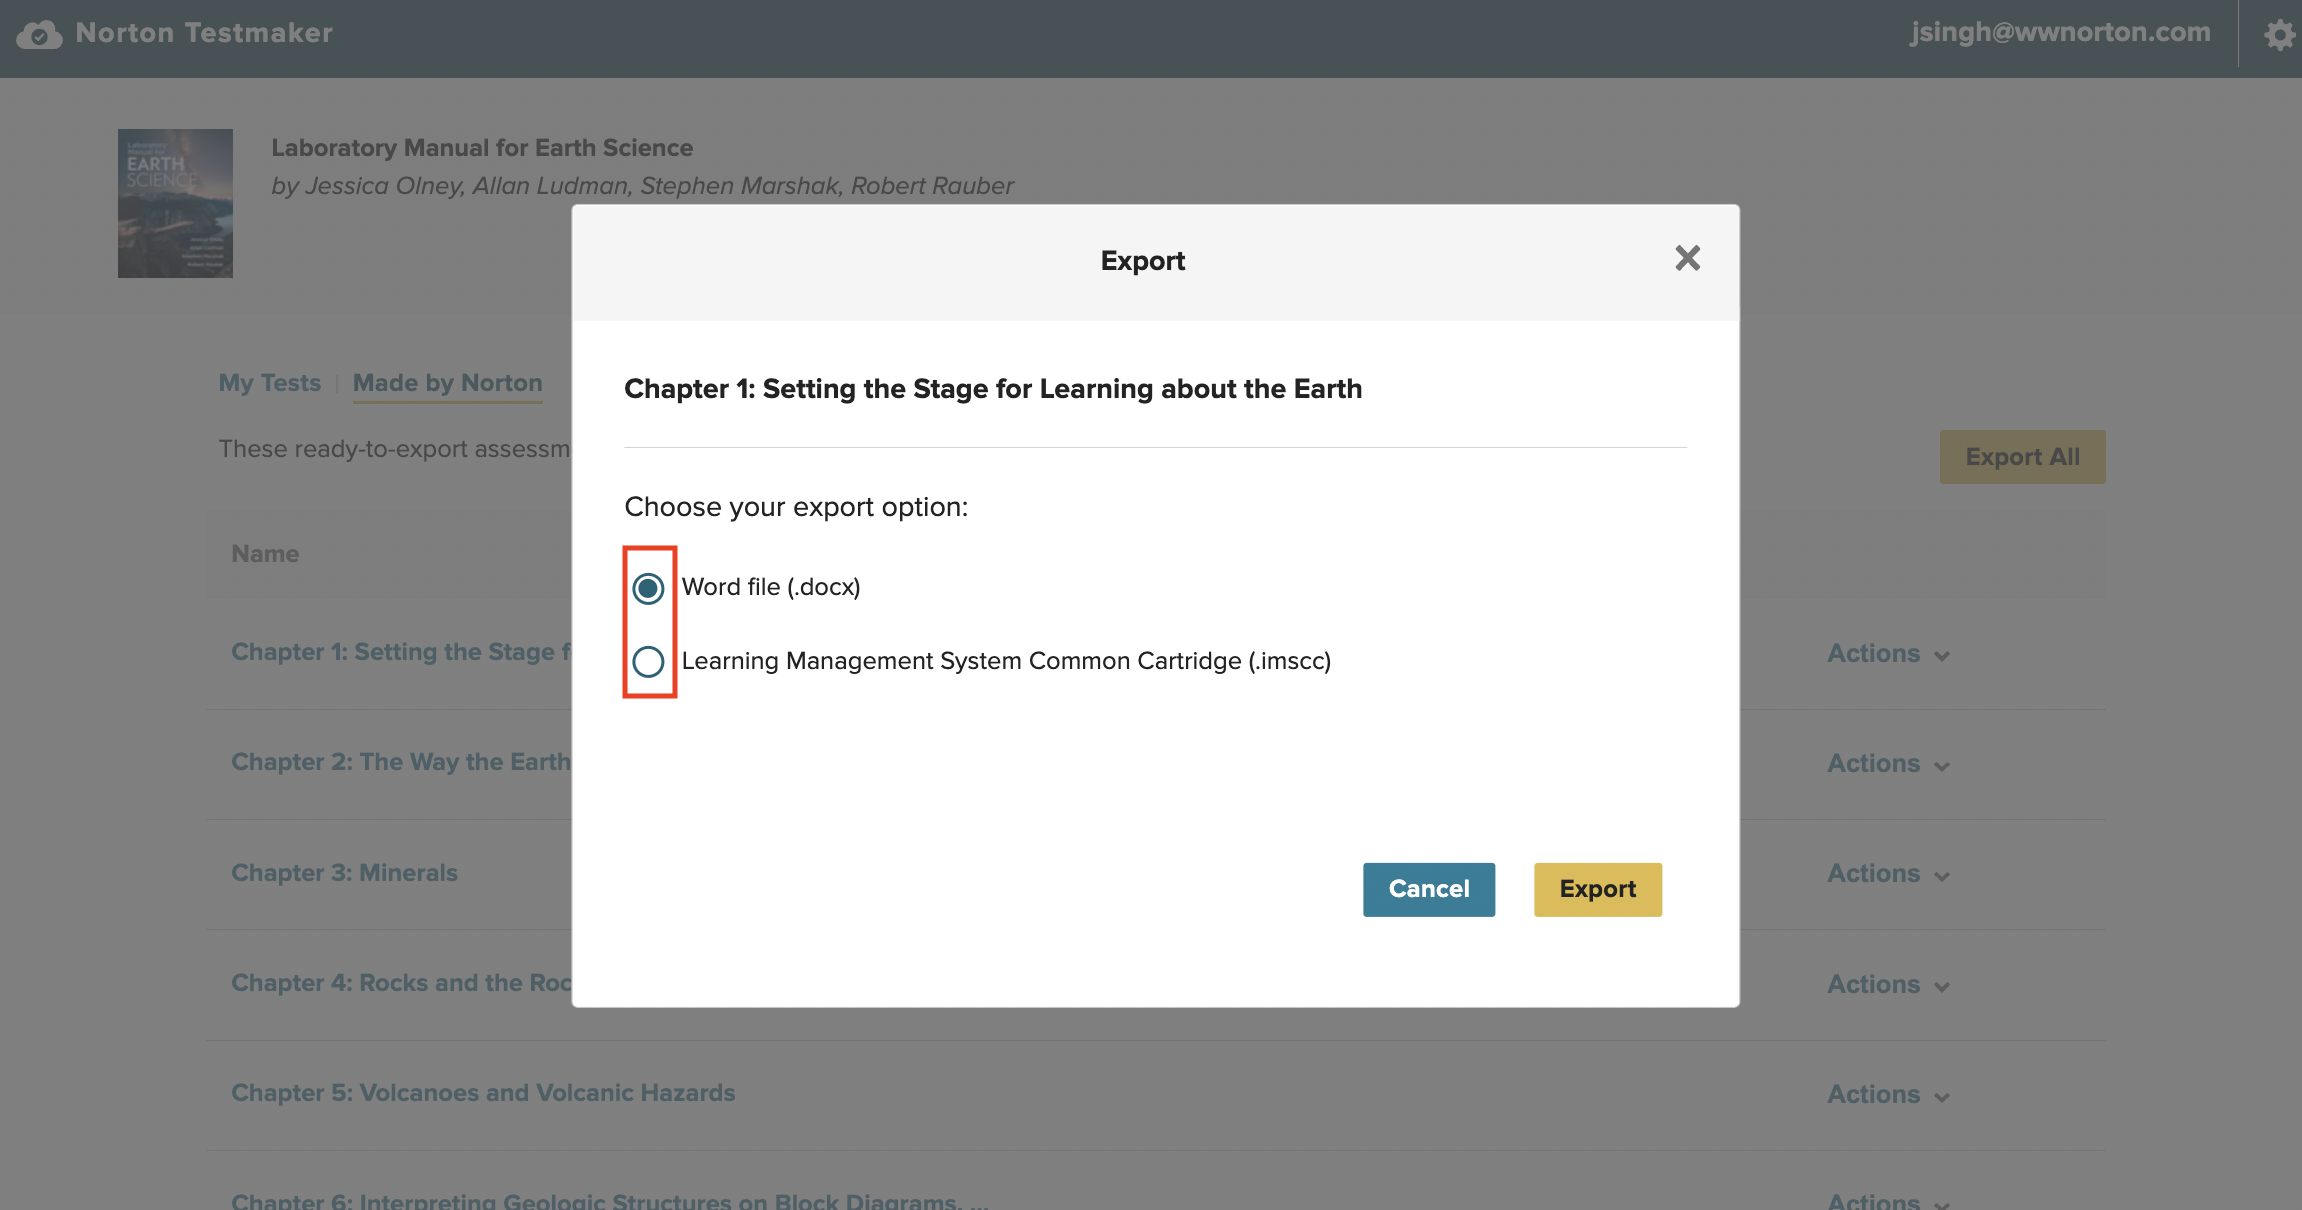


- Click the "Export" button in the modal.

FormaTting Your Test After Exporting to Docx
Here are some tips to help format your DOCX tests in Microsoft Word based on feedback from fellow instructors.
Format single column Multiple Answer choices into two columns
Some Multiple-Choice questions will have answer choices containing a single word or numbers in single column. That single column can be modified into two columns by using options in Microsoft Word, which will help to save space and make your file more print efficient. To do this:
- Highlight all answer choices for a question requiring conversion into two columns.
- Select the "Layout" tab at top of Microsoft Word.
- Click "Columns" and select "Two".
- The single column answer choices will be converted into two columns.
Adding space before Multiple Choice question number
Adding a space before Multiple Choice question numbers can provide students with a space to insert the letter of the correct answer choice. (Note that this will add space in front of all the question numbers in the test, so the formatting is best for tests containing Multiple Choice questions only.) To do this:
- Click on the number of the first Multiple Choice question in your test. This should select all of the question numbers in the test.
- Under the "Home" tab at the top of Microsoft Word, select the down arrow next to Numbering.
- In the window that appears, select "Define New Number Format.." at the bottom.
- Under the field below "Enter formatting for number:" add an underline before the number and click OK.
This should add an underline before the number for every Multiple-Choice question in your test.
Submit a Support Request
Still need help? Submit a support ticket and a customer support specialist will be happy to assist you.
Opened a request already? Click here for an update.