
Integrating links into your Canvas course
This article describes how to add Norton digital learning tool links with Learning Tools Interoperability (LTI) integration that provides single sign in for students and automatic grade reporting to your Canvas Learning Management System (LMS) course.
Prerequisites:
In order to add a Norton digital learning tool link, the Norton app must be enabled as an LTI Tool Provider in your LMS. If your Norton rep or campus Canvas administrator has confirmed that the app has been enabled, proceed to Step 2: Add integrated links. To check whether the app and has been enabled and enable it if that functionality is available to you, go to Step 1: Enable Norton as an app in your course.
In addition, you will need a Norton instructor account. If you do not have a Norton instructor account, please visit our Instructor Resources page, or contact your Norton representative to request one.
Step 1: Enable Norton as an app in your course
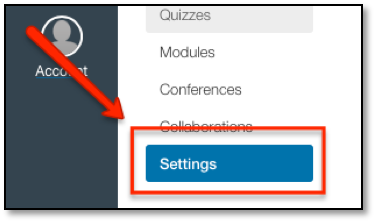
- Login to your Canvas system with your instructor account and enter your course.
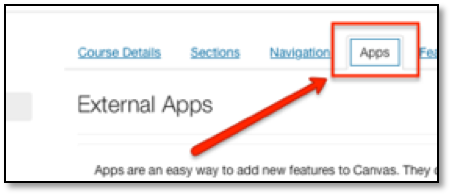
- In the Course Navigation menu on the left side of the page select Settings, then select the Apps tab.
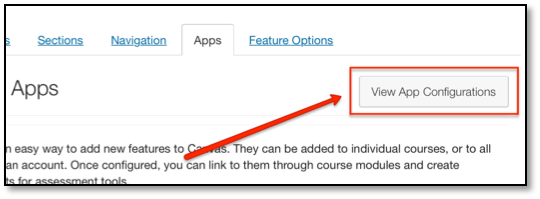
- Select the View App Configurations button.
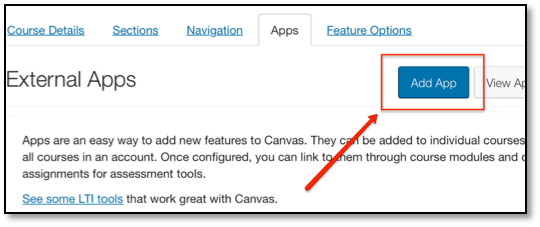
- If you already see W.W. Norton in the list of External Apps, then integration has been enabled at the institution level. Click Here to Add a Norton external tool assignment. If you do not see W.W. Norton listed, continue to Step 4.
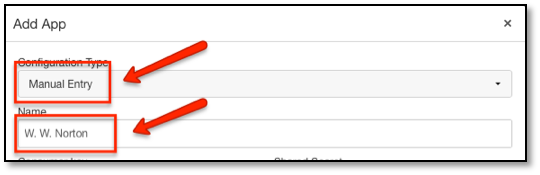
- Select Add App.
- Set the Configuration Type drop-down to Manual Entry.
- In the Name field, enter a description name (e.g., W. W. Norton).
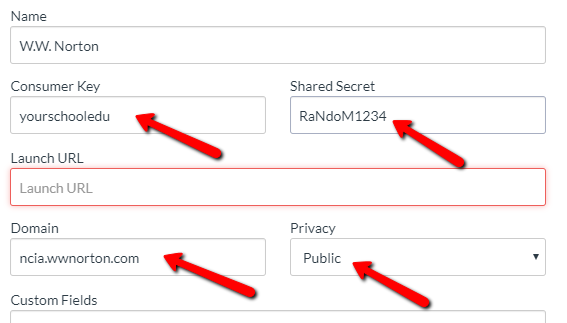
- Fill in the following fields:
- Consumer Key: Copy and paste the Consumer Key provided by your Norton representative, which will look like yourschooledu.
- Shared Secret: Copy and paste the Secret provided by your Norton representative, which will be a random 10 character code.
NOTE: When entering the key and secret, be sure there are no spaces before or after either the key or the secret, as this will create an error message.
- Leave the Launch URL field blank.
- In the Domain field, enter ncia.wwnorton.com.
- Set the Privacy drop-down to Public. If you are not using Inclusive Access, you have the option to set the Privacy setting to Anonymous. We recommend using the Public setting.
- Click Submit.

Step 2: Add integrated links
Option A: Individual Activity Link Integration
- Export a Common Cartridge file with your W. W. Norton links.
- While you're logged into your Norton instructor account on your textbook's Digital Landing Page, open the account menu in the upper right-hand corner and select "Export Content to LMS."
- If you don't see this menu option, it may mean that you don't have instructor credentials on your account yet. Please contact your Norton representative for help.
- Follow the steps provided on screen to select your course materials.
- As you select graded activities, The left-hand checkboxes control which assignments are pulled into Canvas, so those are the ones you’ll want to select. If you look at the right-hand checkboxes, you’ll see that those correlate to Grade Points in Canvas; if the assignment points are standard and you know how many points you would like each assignment to be worth, you can set the point value in the “Gradebook Points Per Quiz” box (default is set to 10 points). If you would prefer to set your grade values in Canvas at a later date, you can remove any text from the box (this will bring the links in without any points associated; if you leave this blank for now, you must set a point value in Canvas Assignments later in order for grades to transfer).
- On the final screen, click the "Generate Common Cartridge" button to save it to your computer.
- Import the Common Cartridge into your Canvas course.
- In your Canvas course, go to the Settings area
- Choose “Import Course Content.”
- From the dropdown menu, choose “Common Cartridge 1.x Package.”
- Click “Choose File” and select the attached file that you saved to your computer.
- Select “All Content.”
- Click “Import.”
- Check that your links appear correctly in Canvas.
- Your links should be ready once Canvas finishes importing the Common Cartridge file, but double-check that everything looks good.
- You might notice a number of “errors” in the file import log. Those are just warnings that the Norton app needs to be installed in order for these links to work successfully. If the Norton app is installed, you should ignore these warnings. To check whether the app has been installed, go back to Step 1: Enable Norton as an app in your course.
- Open the Modules section of your Canvas course.
- If you imported any ungraded items, like the ebook or a video playlist, those links will appear here in a module called "Other Course Materials."
- You can move these into other course modules if you want to.
- By default, the links will be "published" – that is, available to your students right away.
- Unpublish them if you don't want your students to see them yet.
- Next, open the Assignments section of your Canvas course.
- If you imported any graded items, like InQuizitive activities, those links will appear here.
- Once again, the links will be "published" by default.
- Unpublish them if you don't want your students to see them yet.
- Graded activities will all be worth the same number of points, but you can change these freely in Canvas if you want.
- You can add assignments into a Canvas module if you want, but they won't appear in one automatically after you import them.
- Next Steps
- If you haven’t already created a Student Set in your W. W. Norton product, you must do that to complete your course set up. Follow the steps below under "Create a Student Set."
- If this is the first time you're using LTI integration with W. W. Norton, you should test your tool integration too. Follow the steps below under "Test Integration."
Option B: Product Home Page Integration
NOTE: If you use Modules in your course, you will still need to first create the assignments, then add those to your modules, rather than creating an External Tool item directly in the module itself.
To add a link to a graded product (InQuizitive, Smartwork, ZAPS, etc.).
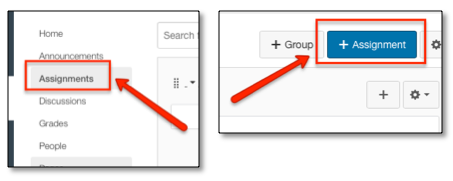
- Add an assignment by clicking Assignments in the left-hand menu of your course and then click the + Assignment button.
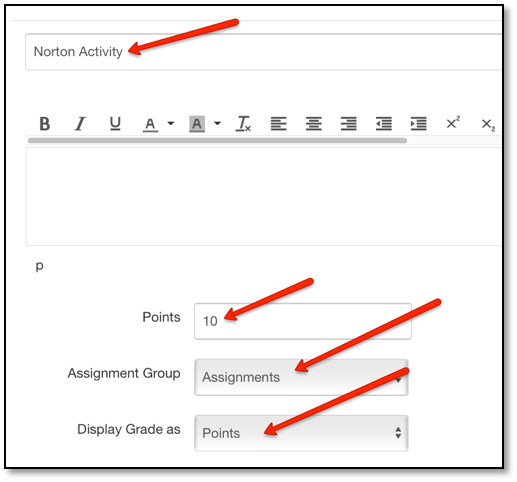
2. Give it a descriptive name (e.g., Norton Activity). Set the Points to some non-zero value. Set Assignment Group and Display Grade As as you wish.
3. From the Submission Type list, choose External Tool.
4. Click on the External Tool URL text.
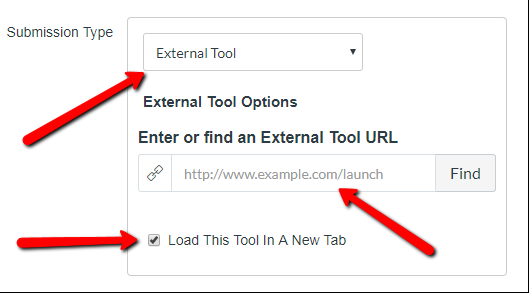
- If using a product homepage, the URL will look like: https://ncia.wwnorton.com/productname-BOOKCODE, where productname is replaced with the name of the Norton tool and BOOKCODE is replaced with the code for the book you are using. *Do not click Find.
6. Click the Load This Tool In A New Tab checkbox.
7. Click Save & Publish so that the assignment will be available to students.
To add a link to an ungraded product (Ebook, Playlists, etc.):
- Click on Modules from the left-hand menu of your course. If you don’t already have a Module, click the blue “+ Module”, name it, and click Add Module.

2. In the upper right corner of the Module click the + sign, then choose External Tool from the dropdown.
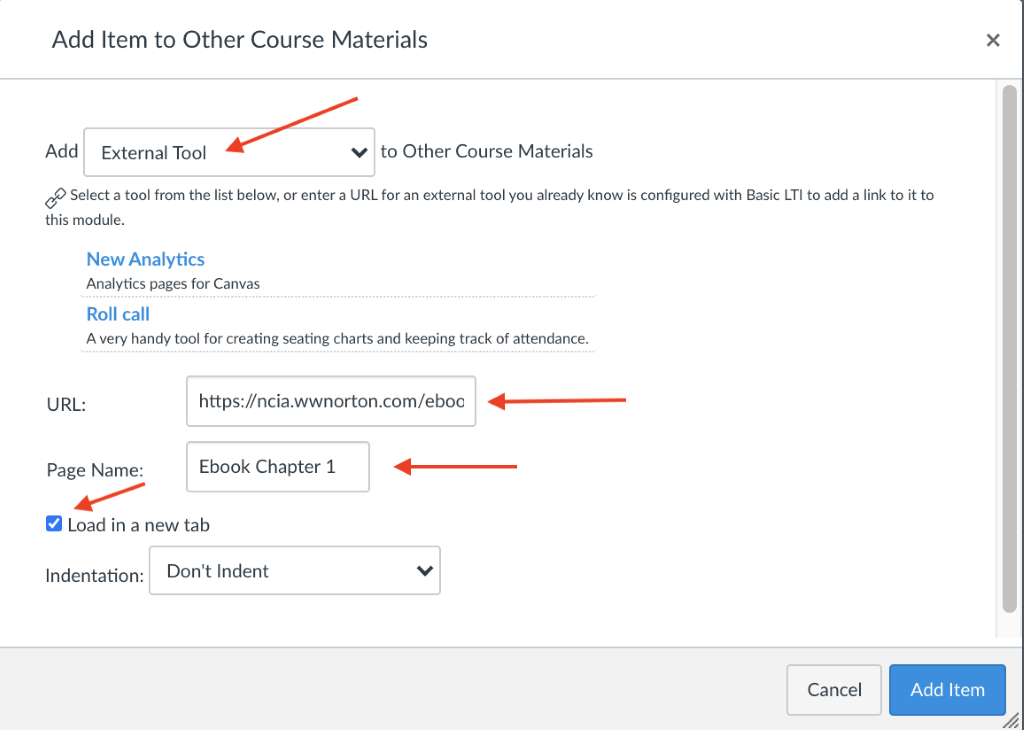
3. In the URL field, enter the URL provided by your Norton representative.
- If using a product homepage, the URL will look like: https://ncia.wwnorton.com/productname-BOOKCODE, where productname is replaced with the name of the Norton tool and BOOKCODE is replaced with the code for the book you are using.
4. In the Page Name field type the name you want to use for the link
5. Click the Load This Tool In A New Tab checkbox. Then Add Item.
Step 3: Create a student set
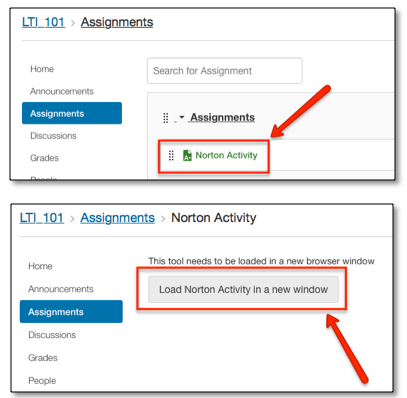
- Navigate to the assignment containing the Norton Activity link you just created and click the Load Norton Activity in a new window button, which will launch the Norton digital learning tool in a new browser tab.
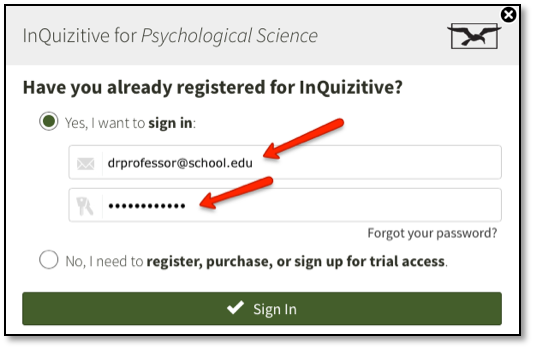
2. When prompted to sign in or register, please use your Norton account email address and password to sign in.*
- If you do not have a Norton instructor account, please visit the Norton Instructor Resources Instructor Resources page, or contact your Norton representative to request one. You will need to have an instructor account before continuing.
3. The first time you access a Norton digital learning tool from your course, you will be prompted to create a new student set, or to copy an existing student set. For instructions on creating and copying student sets, see our InQuizitive-instructors-lms-integration article or Smartwork-instructors-getting-started article
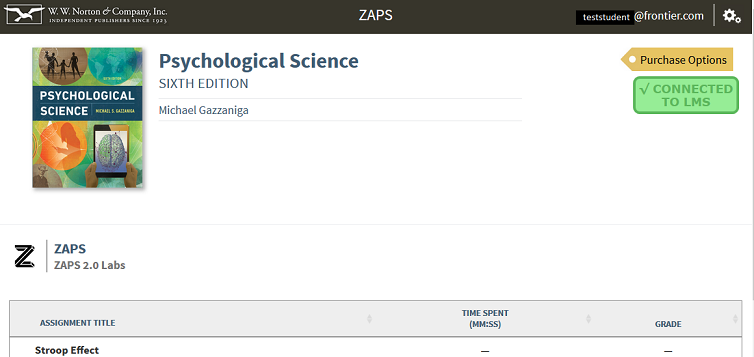
4. Once you’ve created your Student Set, you will land on the Norton product home page or the specific activity for the book you're using (product homepage is pictured below). You should see a green Connected to LMS badge and the new Student Set ID associated with your course in the drop-down menu.
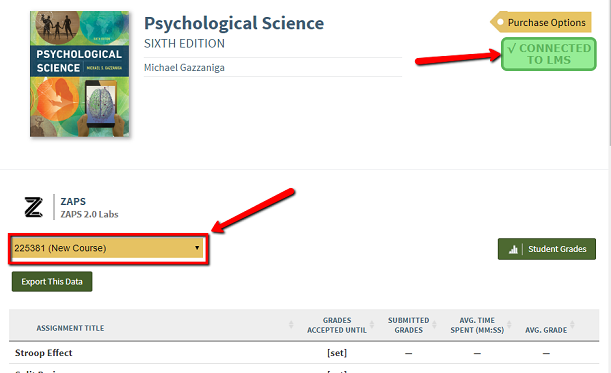
- If you’re using Smartwork or ZAPS individual activity links, the Connected to LMS notification appears in the user options menu, which you will see by clicking your username in the upper right of the activity page.

5. After signing in, close the tab with the Norton digital learning tool page.
IMPORTANT: In the future, to access any Norton digital learning tool, always use the link from your course and you will be automatically signed in. You can confirm this by looking for your school email address in the upper right of the Norton tool page.

Step 4: Test integration
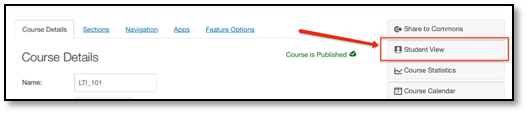
- From your Canvas course, switch to student preview mode (using the Student View button on the Canvas Settings page) or log in to your course with a test student account.
2. Locate the link to the Norton tool (e.g., Norton Activity) and click it.
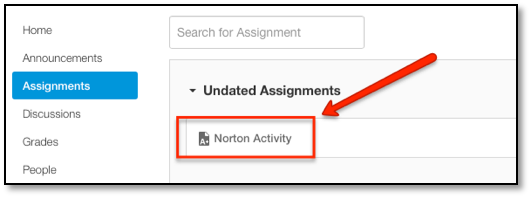
3. The Norton product launch page or specific activity for the book you are using will open in a new browser tab. You will be prompted to sign, opening the tool as a student. However, you can still use your Norton instructor account to sign in.
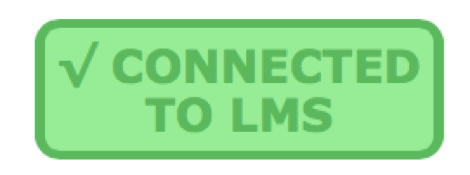
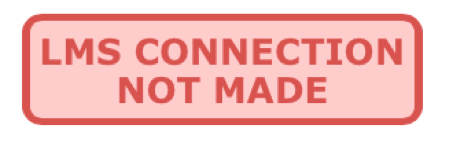
4. On the Norton product page, confirm that you see a green badge labeled Connected to LMS. If instead you see a red LMS Connection Not Made badge, Click Here or go to Reporting error messages below.
- If using Smartwork or ZAPS individual activity links, the Connected to LMS notification appears in the user options menu, which you will see by clicking your username in the upper right of the activity page.

- If you do not see Connected to LMS in the user options menu, Click Here or go to Reporting error messages, below.

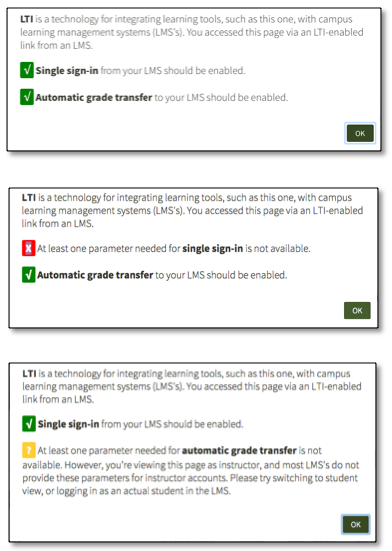
- If you see a red X next to Single sign-in or Automatic grade transfer, Click Here or go to Reporting error messages, below.
- If you see a yellow ? next to Automatic grade transfer, close the Norton product tab in your browser and reconfirm that you launched the link from your Canvas course in Student View or are using a student account.
6. If you added an eBook link or if you added a link that is not a gradable activity, Click Here or go to Next steps, below
7. Click on the green checkmark icon next to Automatic grade transfer, then click OK in the confirmation message pop-up window to send a test grade back to your Canvas course.
![]()
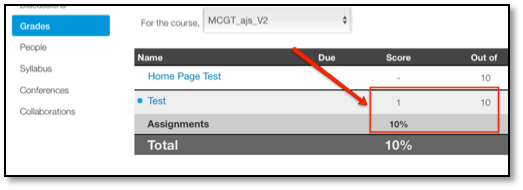
8. Confirm that a Test successful! message appeared below Automatic Grade Transfer. Click OK in the box to continue.
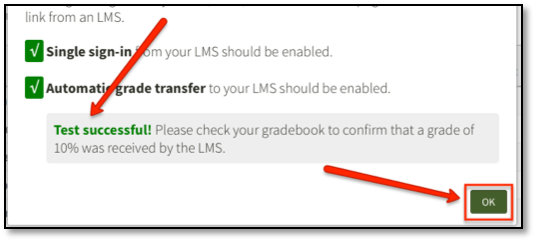
- If you did not see a Test successful! message, or the grade did not appear in the student's grades, Click Here or go to Reporting error messages, below.
10. Close the browser tab with the Norton product launch page.
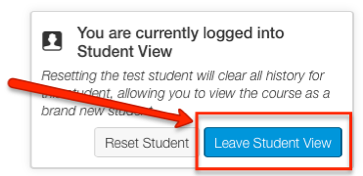
11. You should now exit student view or log out of the student account. The link is ready for use by your students. Click Here for additional instructor suggestions.
Step 5: Grading and due dates
Review Settings
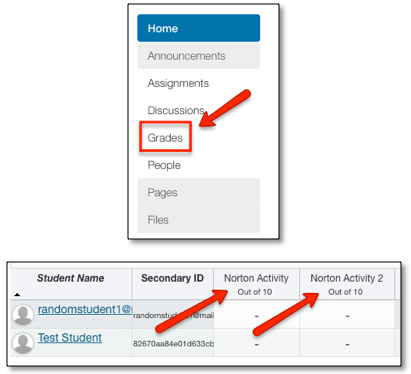
1. By default, Canvas creates a column in your course gradebook for any gradable Norton tool whenever you create an assignment. Take a moment to review the points and other settings for this assignment by using the Grades link in your course.- If you're not using the Norton product launch page, but rather adding multiple tool activities directly to your course, Click Here to repeat steps 12-21 in Add a Norton external tool assignment above as needed for each activity URL. It's not necessary to perform the grade transfer test for each additional link you create
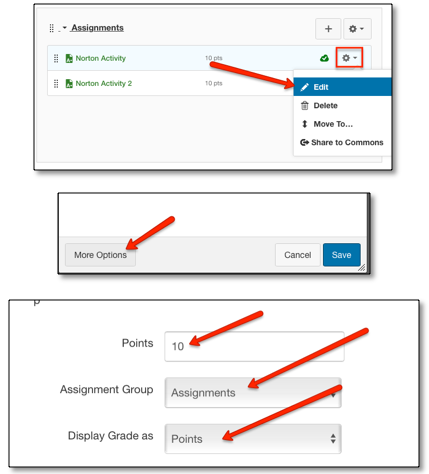
2. To adjust an assignments points and other settings, navigate to the link in your course, click the gear icon to the right of the link and select Edit.
3. Select More Options in the popup window.
4. Adjust the points and/or other settings accordingly, then click Save
Set GAUs (Grade Accepted Until)
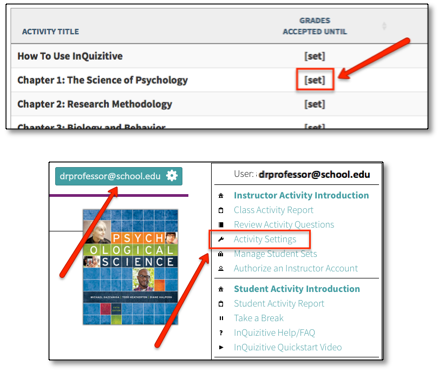
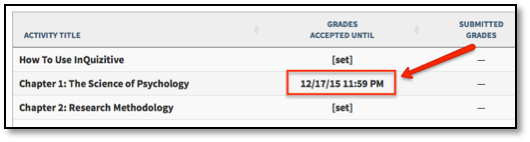
5. If you would like to set GAUs for your Norton activities, click the Norton tool link in your course.- If you have linked to a Norton product homepage, click [set] next to the activity whose GAU you’d like to set from the list of activities.
- If you have linked to an individual activity, click your Norton username in the upper-right of the page, then click Activity Settings from the menu
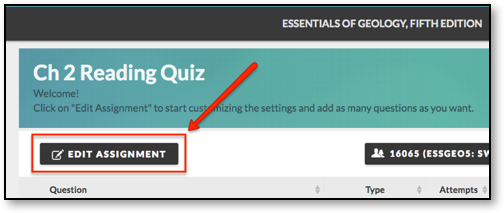
- If you have linked to an individual SmartWork activity, click the Edit Assignment button located below the activity’s title.
6. Click the empty field next to Grades Accepted Until and select the desired date from the calendar.
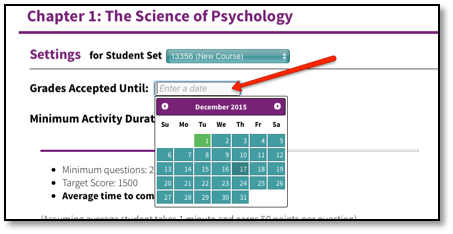
7. By default, the GAU time is set to 11:59 PM of the date you selected. To change the GAU time, click the drop-down menu containing the time and select a new time. Be sure to choose your time zone in the next drop-down menu as well!
8. Click Save Settings at the bottom of the page when you’re done.

9. The GAU for this activity is now set and you will receive notifications should a student attempt to submit a grade for this activity after the GAU has lapsed.
For even more tips on configuring Norton digital learning tool links in your course, check out our Instructor Help Notes.
Reporting error messages
Copy the text from any error message box and/or take a screenshot and send it to W. W. Norton LTI Support, LTIsupport@wwnorton.com . You will then be contacted by a support specialist who will assist you with further troubleshooting.
Submit a Support Request
Still need help? Submit a support ticket and a customer support specialist will be happy to assist you.
Opened a request already? Click here for an update.