
After building your test, you’ll want to export it from Norton Testmaker before uploading to Brightspace/D2L. See instructions to export the test from Norton Testmaker.
For a video walkthrough of the import process, click here.
Importing a Test to Brightspace/D2L
- Log into your Brightspace/D2L course and navigate to Course Admin.
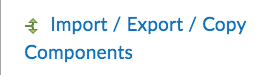
- Click on the Import/Export/Copy Components tool.
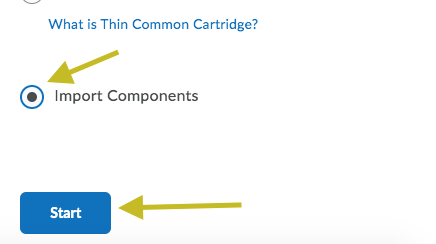
- In the next window, select Import Components and click the Start button.
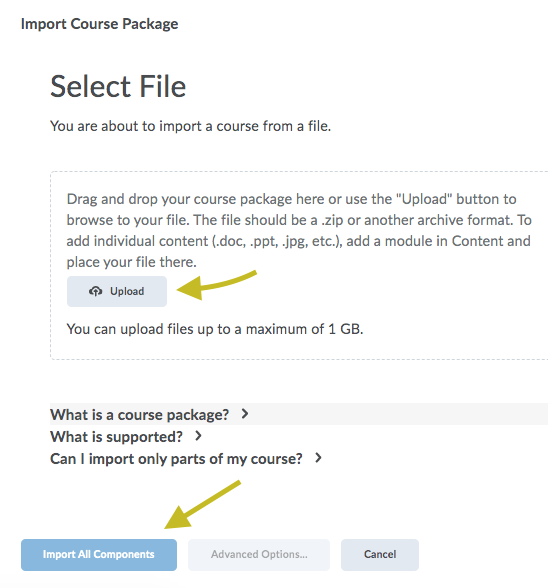
- In the pop-up window Import Course Package, click on the Upload button.
- Locate the ZIP file exported and downloaded from Norton Testmaker and select it. (Note: for “Made by Norton” premade quizzes, the file exported from Testmaker will be an imscc file.)
- Click the Import All Components button and allow the import process to complete.
- Click the View Content button to return to your course.


Setting Availability, Reporting, and Display Options
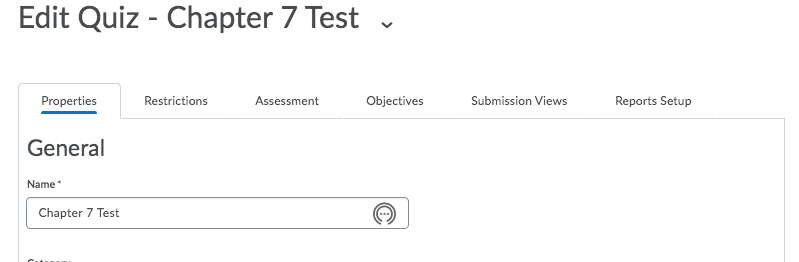
1. When you open the quiz to be edited, you will see six tabs.
2. Navigate to each of these tabs to select the options needed for your quiz.
Restrictions Tab
- Status – Select Active from this dropdown menu to activate the quiz and make it available to learners. Inactive (or draft mode) is the default when a quiz is created and will prevent learners from seeing and accessing the quiz.
- Availability – You can enable Quiz Start and End Dates. This section is used to specify the timeframe in which the quiz will be available for learners to access it.
Assessment Tab
- Automatic Grade – Select this checkbox to allow users to see their score as soon as they submit their attempt.
- Grade Item – If the quiz is a graded assessment, it is recommended to associate a grade item with the quiz so the results can be automatically linked to the Grades tool.
- Number of attempts allowed - the default is one.
Submission Views Tab
- Add Additional Views – By default, learners won’t be able to see questions, their responses, or correct answers after completing a quiz. Selecting the Add Additional View button will allow you to specify what a learner can see after completing a quiz. To maximize learning from a quiz, it is beneficial to show learners what questions they got right and wrong.
3. When you have adjusted all your settings, click the Save & Close button.
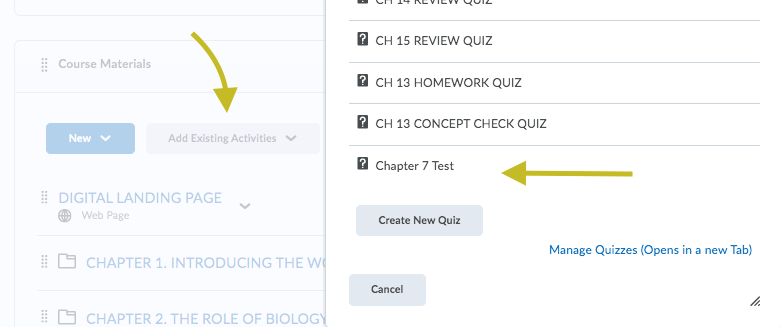
Make the Test Available to Students in the Content Area
- Navigate to the content area of the course.
- Click the Add Existing Activities button.
- Scroll down until you find your test and select it.

Using Norton Testmaker Test Imports to Build a Randomized Test in Brightspace/D2L
Draw from a random set of questions to build a quiz.
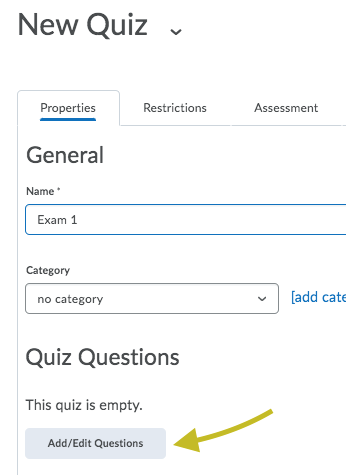
- In the New Quiz window, name your quiz in the Name field.
- Click the Add/Edit Questions button to open the window where you'll create your new question pool.
- Click on the Add button, then use the drop-down menu to select Question Pool.
- Title your new pool in the Question Pool Title filed.
- Enter the number of questions you want and assign points per question.
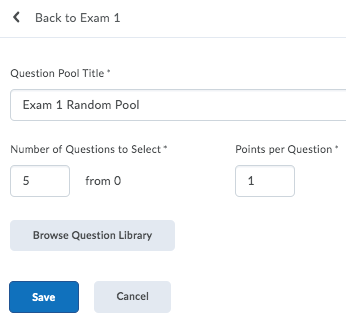
- Click on the Browse Question Library button. You’ll see a message “Nothing found in the Question Library” and that’s okay.
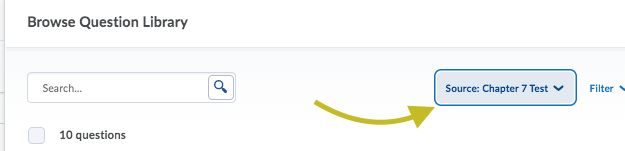
- On the right side of the window, look for Source: Question Library with a drop-down menu.
- Select the quiz you’ve uploaded and check off the questions you want to add to the pool. Or, select all questions by clicking the radio button at the top.
- Click Import. Repeat this step if you are using multiple chapters.


Submit a Support Request
Still need help? Submit a support ticket and a customer support specialist will be happy to assist you.
Opened a request already? Click here for an update.