
2D Molecule Module - Toolbar Introduction for Organic Templates
The 2D Molecule Module in Smartwork has unique tools for organic chemistry problems that are not present for general chemistry problems. The availability of organic chemistry-specific tools may vary depending upon settings defined by the authors of the questions.
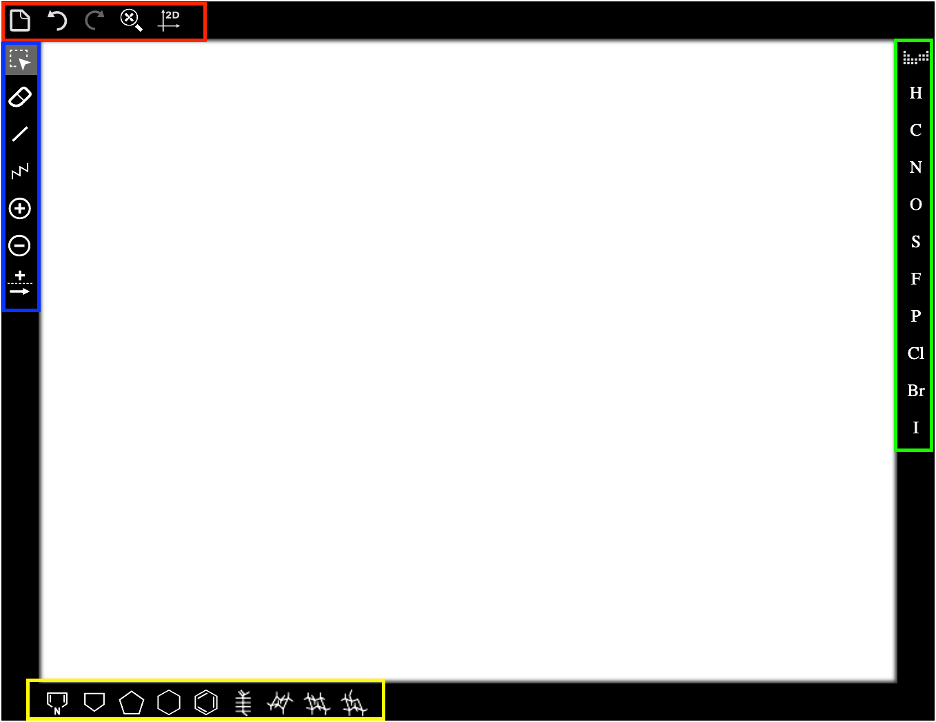
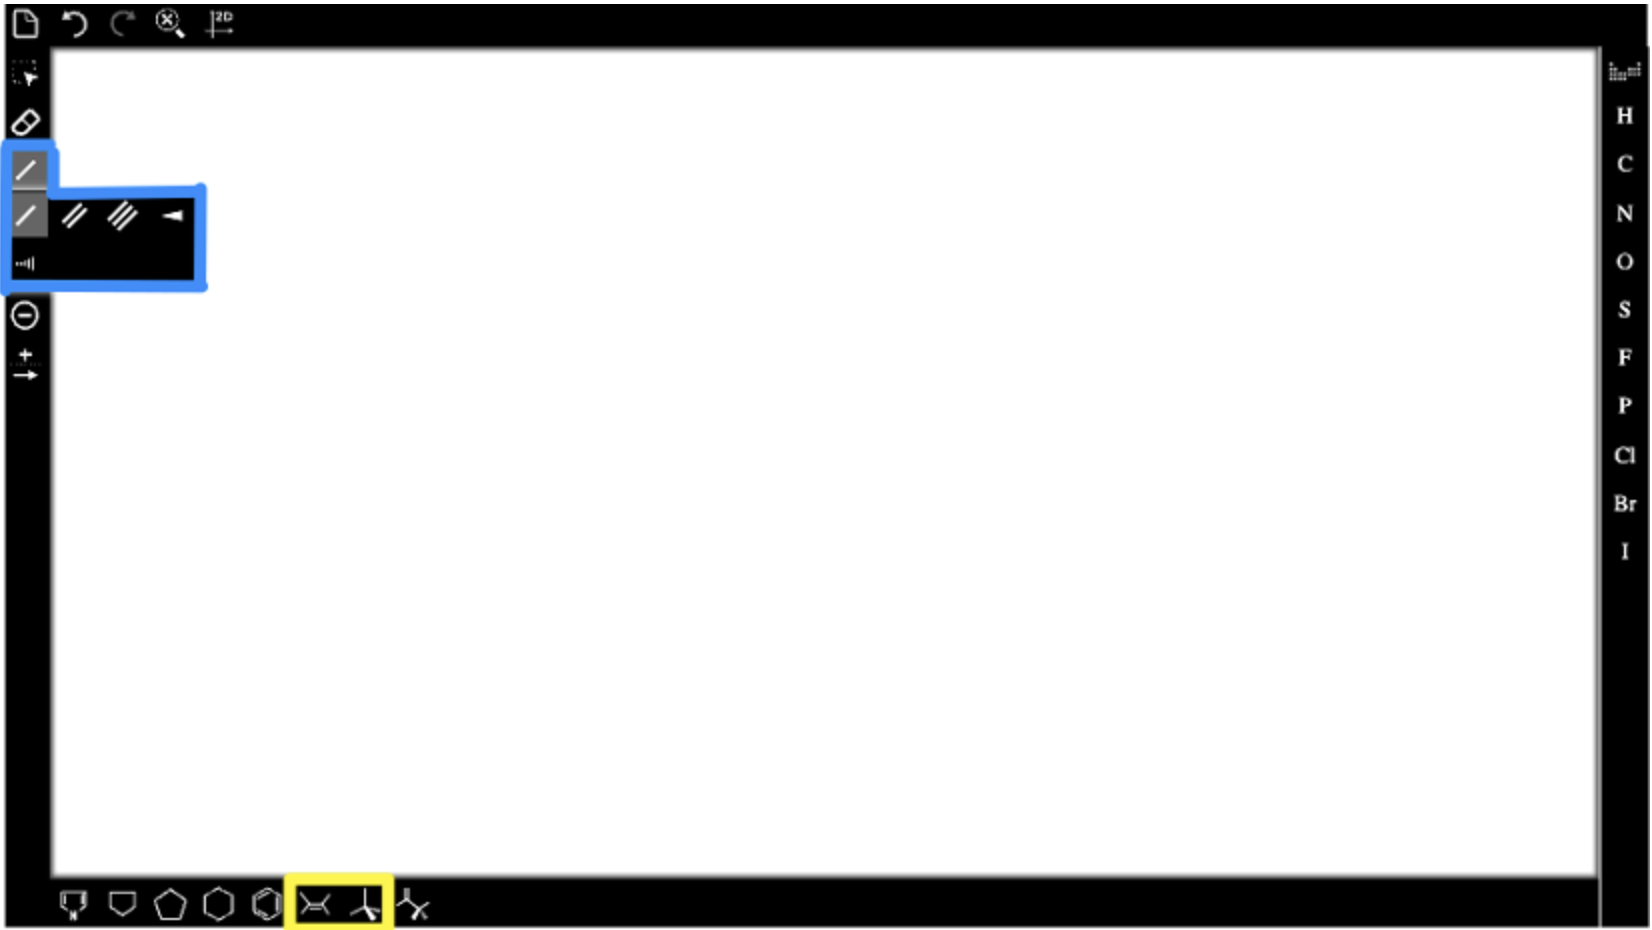
If you used Smartwork for general chemistry, you are already familiar with the drawing tools in the left drawing toolbar. Some of the tools specific to organic chemistry are found in the left drawing toolbar (highlighted in blue) and the additional drawing toolbar at the bottom of the drawing window (highlighted in yellow). Formatting tools (highlighted in red) and the Elemental Symbols toolbar (highlighted in green) retain the same functionality described in the introduction to the 2D Molecule Module.
This table lists the tool options available in the Organic Chemistry 2D Molecule Module and provides a brief description of the function of each option.
Drawing Toolbar Icon | Tool Name | Tool Function |
| Chain | The Chain tool allows you to draw an unbranched carbon chain containing a desired number of carbon atoms. |
| Pyrrole | The Pyrrole tool is a template for drawing a pyrrole molecule. |
| Cyclopentane (house) | This tool is a template for drawing a cyclopentane molecule in house shape. |
| Cyclopentane | The Cyclopentane tool is a template for drawing a cyclopentane molecule as a pentagon. |
| Cyclohexane | The Cyclohexane tool is a template for drawing a cyclohexane molecule as a hexagon. |
| Benzene | The Benzene tool is a template for drawing a benzene molecule. |
| 2,3,4,5,6-pentahydroxyhexanal | This tool is a template for a Fischer projection and draws the open-chain form of glucose. |
| Cyclohexane-L | The Cyclohexane-L tool draws a chair conformation of cyclohexane with all axial and equatorial bonds shown. |
| Cyclohexane-R | The Cyclohexane-R tool draws the alternate chair conformation of cyclohexane with all axial and equatorial bonds shown. |
| 6-(hydroxymethyl)oxane-2,3,4,5-tetrol | This tool allows one to draw a glucose molecule in its lowest energy chair conformation. |


Here is a video introduction to the 2D Molecule Module organic templates:
Examples of Using Organic Templates in the 2D Molecule Module
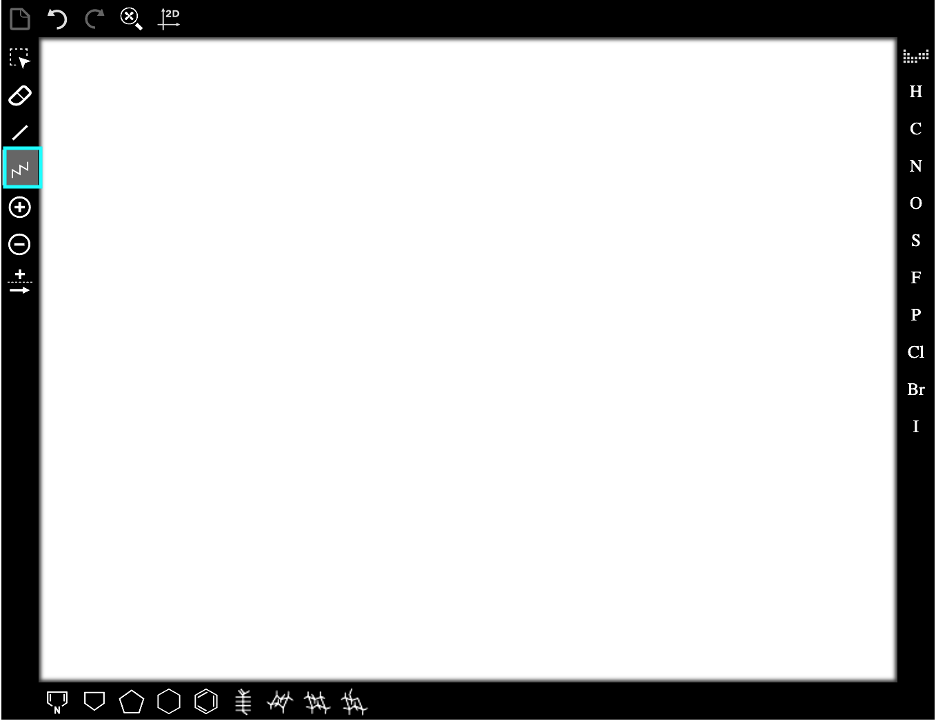
Example 1: 1-Bromopentane
Start by clicking on the Chain tool icon (highlighted in blue in the screenshot below).
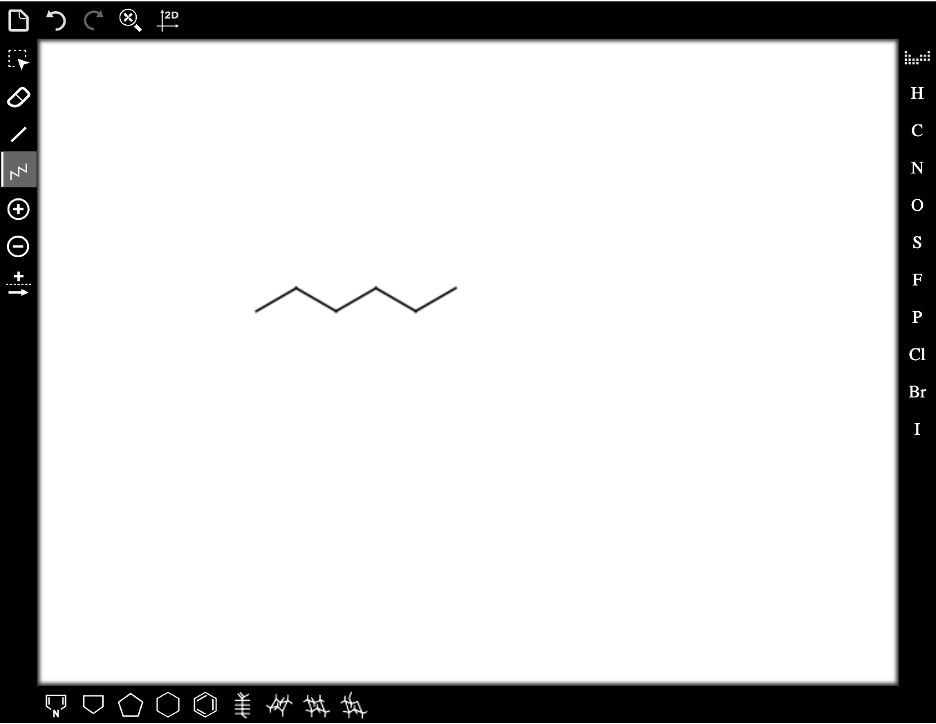
Then click and drag the mouse in the drawing window to create a chain of carbon atoms. Because the bromine is attached to the first carbon atom in the chain, we can first draw a chain of six atoms:
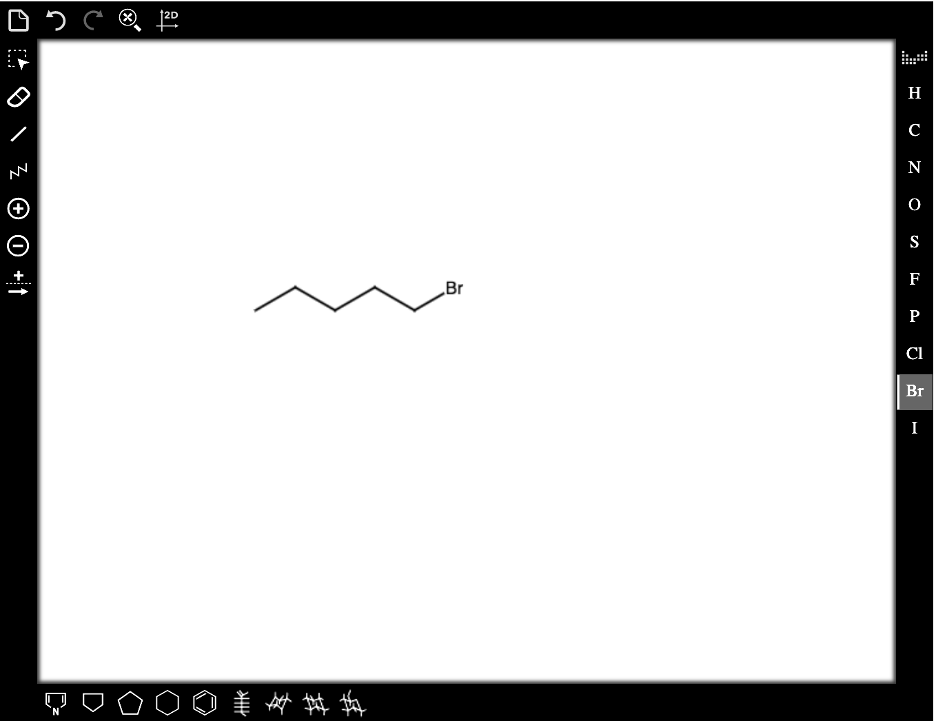
Then we change the atom on either end of the structure from a carbon to a bromine to complete the drawing. Do this by clicking on the bromine atom in the Elemental Symbols toolbar to select it, and then click on either of the terminal atoms in the structure:
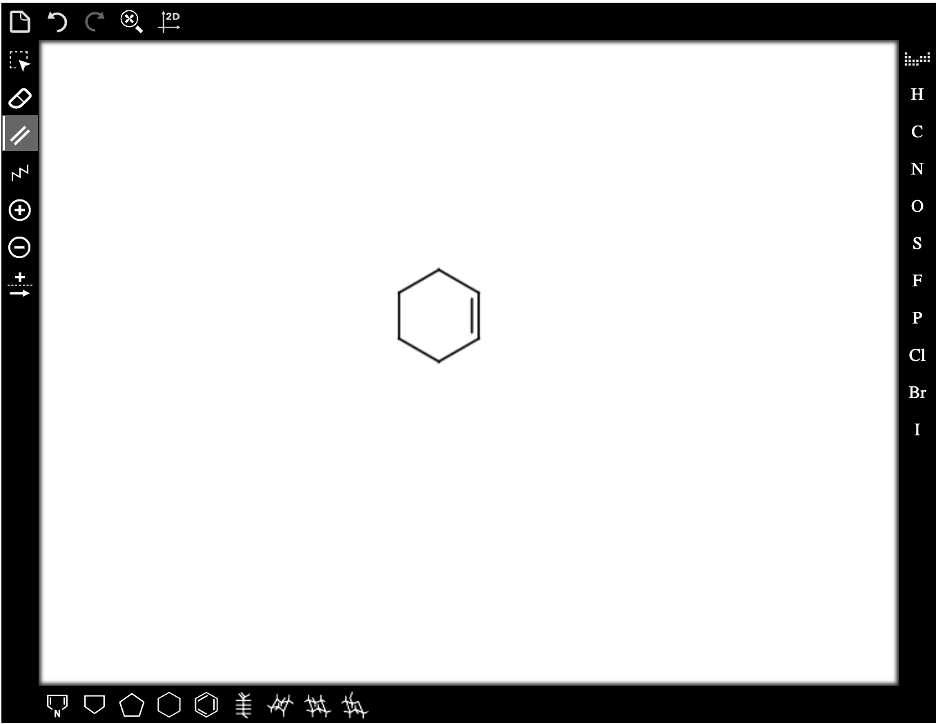
Example 2: Cyclohexene
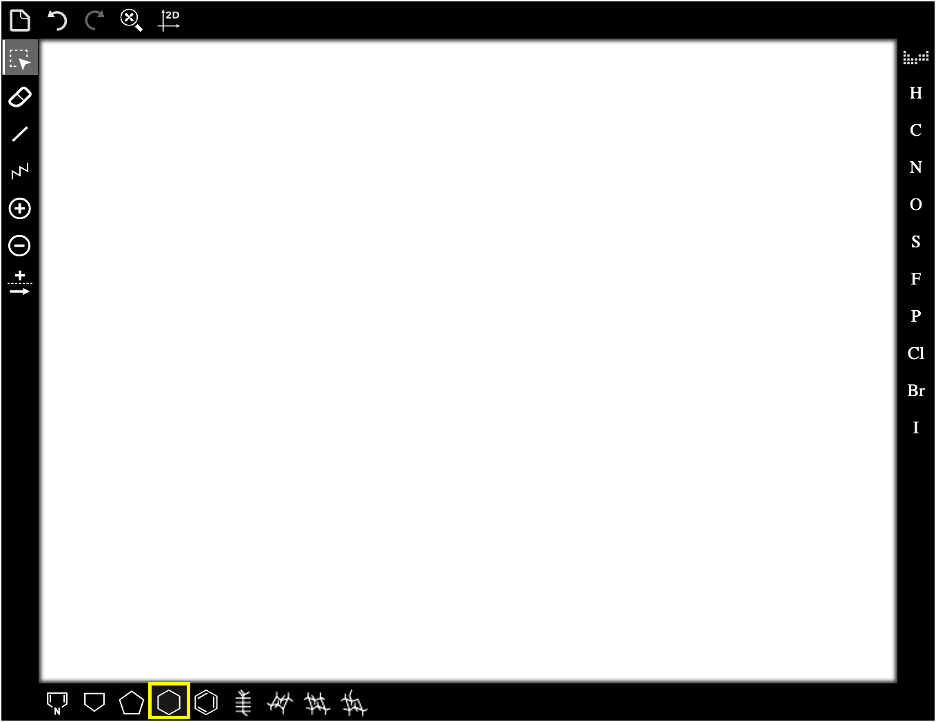
First, select the Cyclohexane tool icon in the bottom drawing toolbar (highlighted in yellow in the screenshot below) to insert a cyclohexane template:
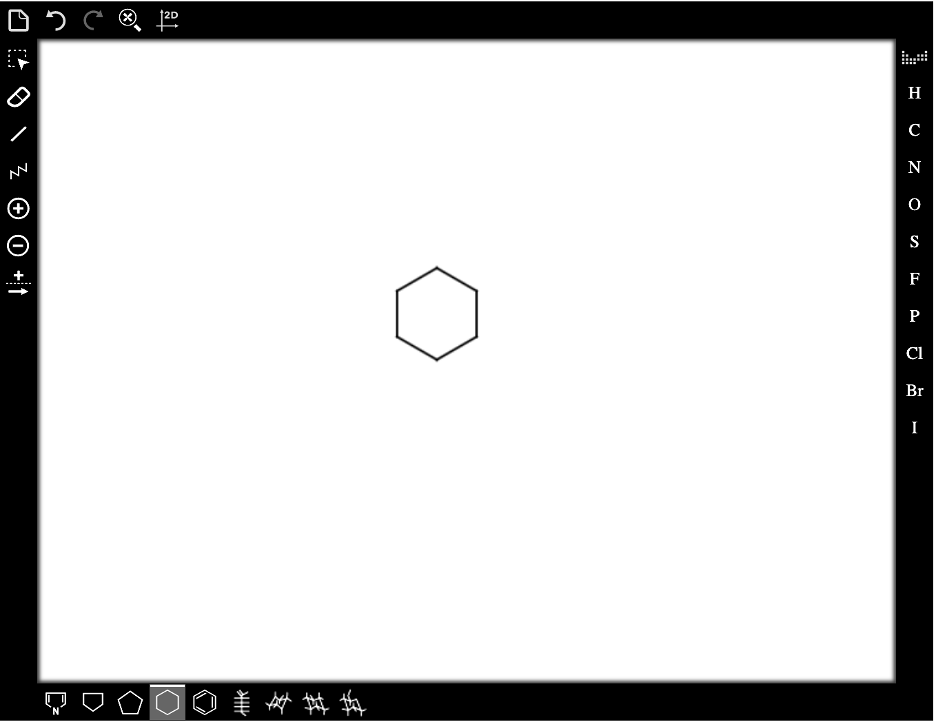
Once you’ve selected the Cyclohexane tool icon, then click in the drawing window. A cyclohexane template will appear:
Then, to convert one of the single bonds in the template to a double bond, click the Bonds tool in the left toolbar twice. In the menu that drops down, select the single bond setting.
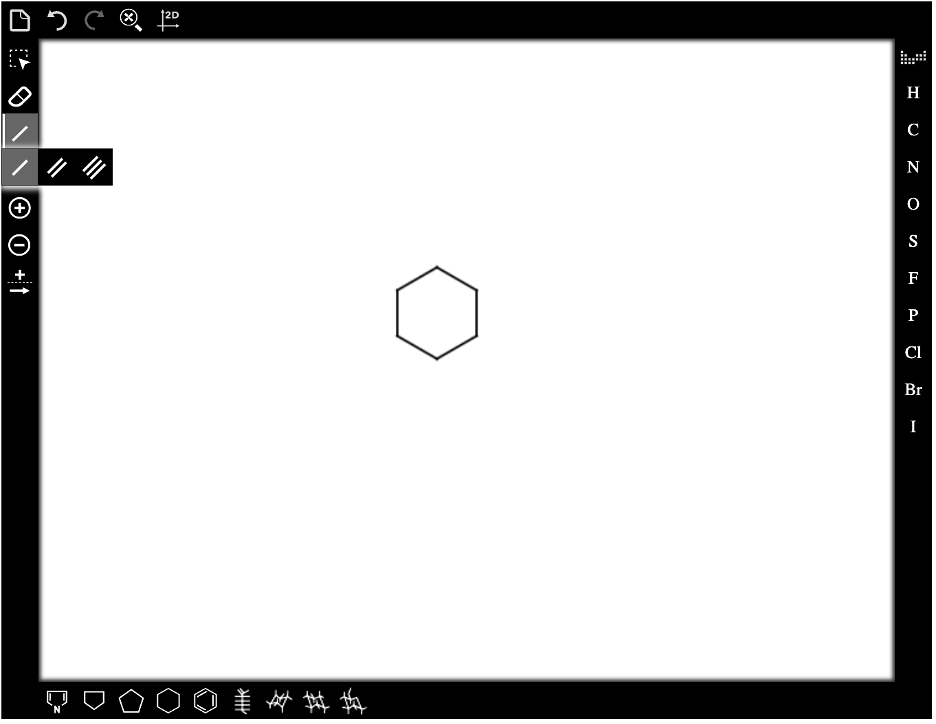
When you move the cursor over the bond you’d like to change from double to single, it will become highlighted with a blue circle. Now click on the desired bond to change it to a double bond.
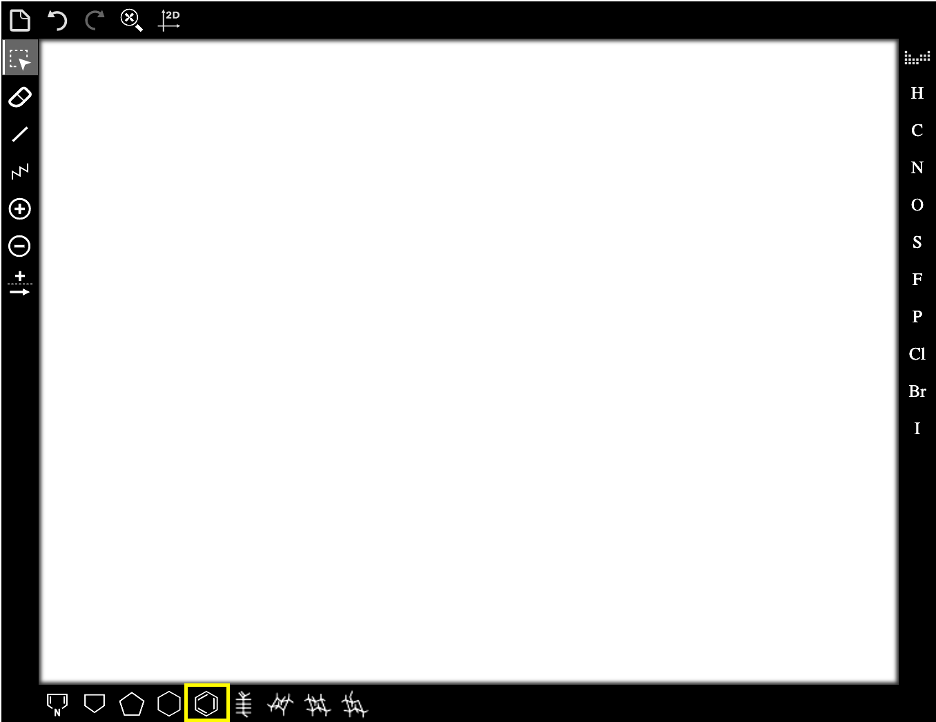
Example 3: Butylbenzene
Butylbenzene is a benzene ring with a four-carbon chain attached to it. Drawing butylbenzene involves using two of the organic drawing templates available in Smartwork. Start by selecting the Benzene tool icon (highlighted in yellow in the screenshot below) in the bottom drawing toolbar by clicking on it:
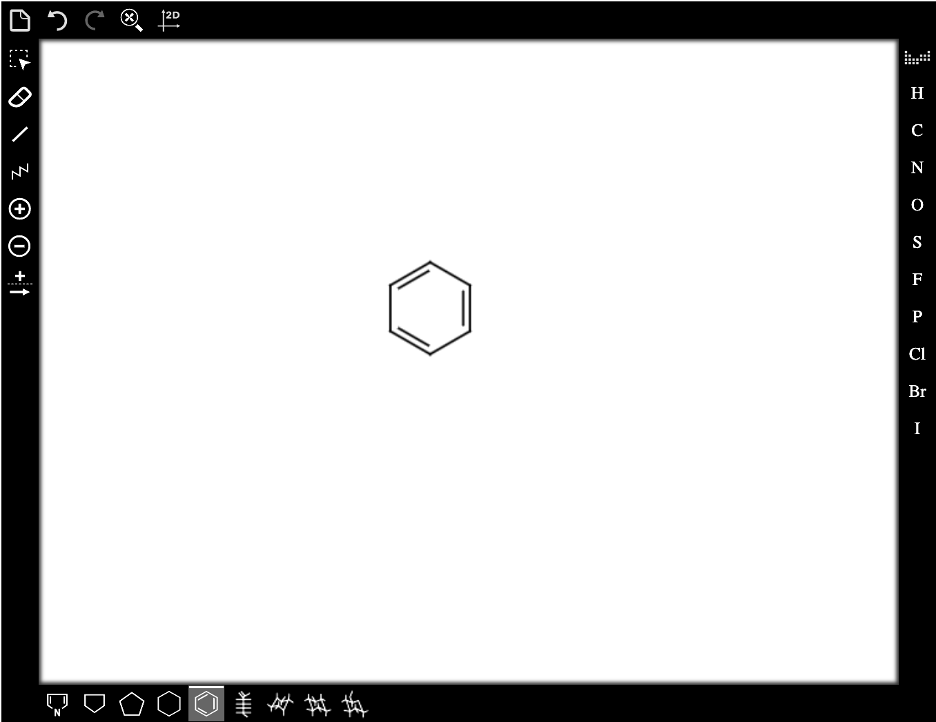
Then click in the drawing window to insert the benzene template:
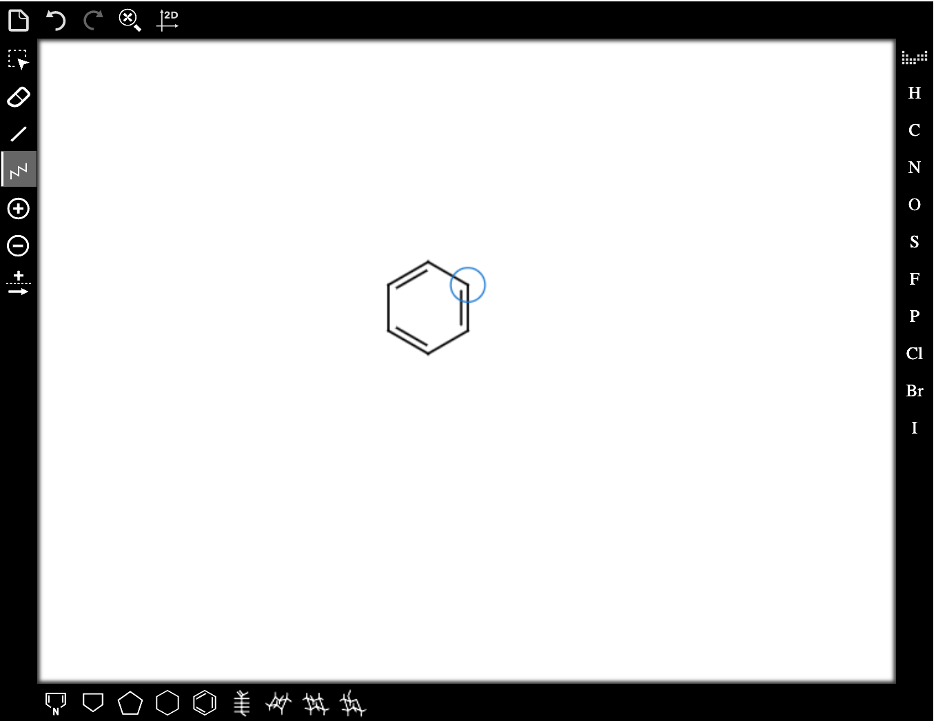
To attach a chain of four carbons, click on the Chain tool icon in the left drawing toolbar. Once you’ve clicked on the Chain tool icon, moving the cursor over an atom or bond will highlight it with a blue circle. Highlight the carbon atom at which you want to attach the chain of four carbons (the butyl group):
Click and drag the mouse until you have attached the correct number of carbons: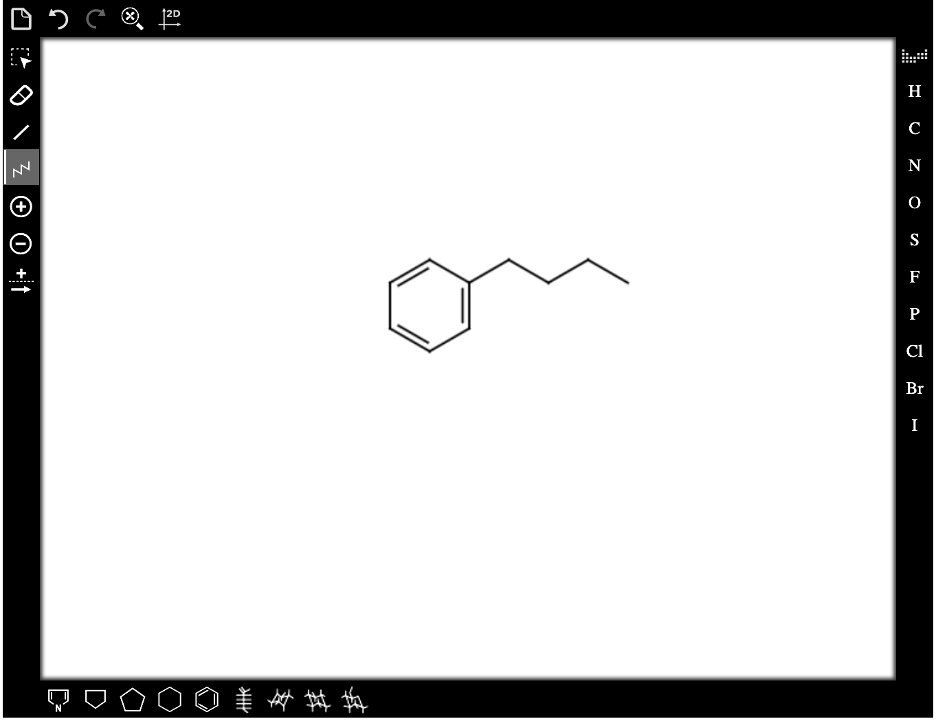
Example 4: Chair Conformation Template
Four of the templates available on the bottom drawing toolbar (Fischer projection, both cyclohexane chair forms, and glucose chair form) insert a structure in the drawing window as soon as you select them. For example, using the Cyclohexane-L tool inserts a cyclohexane chair conformation template in the drawing window:
The structure will be highlighted when it appears in the drawing window. Moving the mouse over any bond or atom in the structure will add an additional outline over the bond/atom and allow you to move the entire structure. In the screenshot below, the cursor was positioned on the ring bond on the right side of the structure:
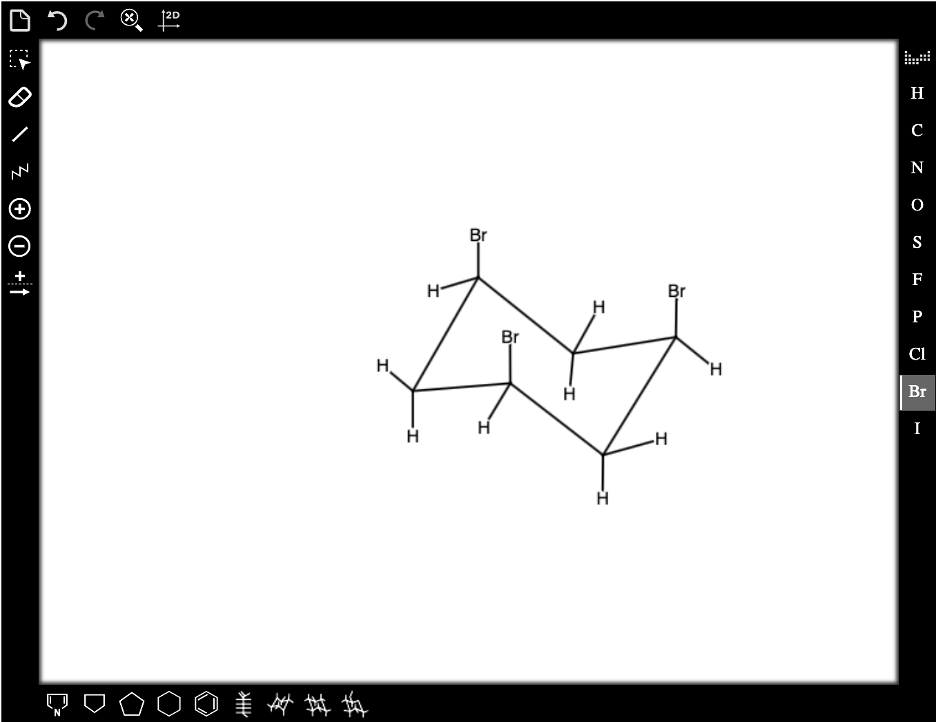
To begin working, click anywhere in the drawing window away from the template to remove the highlighting. Then, as with all the organic drawing templates, you can modify the structure using the Bonds tool and the Elemental Symbols toolbar. In the screenshot below, we’ve replaced a few of the hydrogen atoms with bromine atoms:
Setting Variations: Terminal Carbons On/Off; Lone Pairs On/Off
Your Smartwork organic chemistry problems will always be preset for two structural features that we will call “Terminal Carbons On/Off” and “Lone Pairs On/Off.” These settings are already established by the author for each problem and can’t be changed by students.
First, some definitions:
A terminal carbon is one at the end of a chain.
A heteroatom is an atom that is not carbon or hydrogen.
Nonbonding electrons are electrons not involved in bonds. These are either lone pairs or single electrons (called “radicals”).
The Terminal Carbons On/Off setting determines whether or not you need to explicitly draw hydrogens on heteroatoms (atoms other than carbon). You’ll know which setting is being used when you draw your first structure. If hydrogens automatically appear on heteroatoms, you do not need to draw them in.
The Lone Pairs On/Off setting determines whether or not you need to explicitly draw nonbonding electrons on atoms in your structures. The presence of the Increase Lone Pair button in the left drawing panel means you need to include these electrons. If that tool does not appear, you do not need to draw electrons.
This table summarizes the possibilities for these settings, and detailed explanations follow with examples.
Setting | Effect on Drawing |
Terminal Carbons ON | • Automatically labels terminal carbon atoms with the element symbol “C” and explicitly includes all hydrogens attached to them. • Automatically draws all necessary hydrogen atoms on heteroatoms. |
Terminal Carbons OFF | • Does not explicitly label terminal carbon atoms. All hydrogen atoms attached to terminal carbons are implicit (not shown). • Does not automatically draw all necessary hydrogen atoms on heteroatoms. You will have to draw them in. |
Lone Pairs ON | • The Increase Lone Pair tool button will be present in the left drawing tool bar. • You must explicitly include all nonbonding electrons in your structure(s). |
Lone Pairs OFF | • The Increase Lone Pair tool button does not appear in the left drawing tool bar. • You do not need to explicitly include nonbonding electrons in your structure(s). |
Terminal Carbons On/Off
There is no icon around the drawing window that lets you know in advance whether you need to explicitly draw hydrogen atoms on heteroatoms. Rather, when you draw your first structure, you’ll be able to tell whether or not the hydrogens have been automatically included (and if not, you will have to draw them).
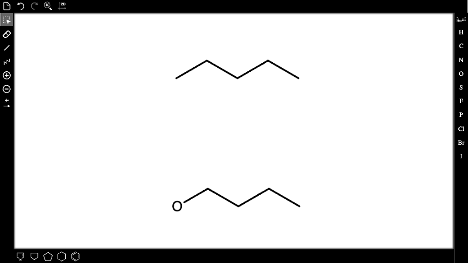
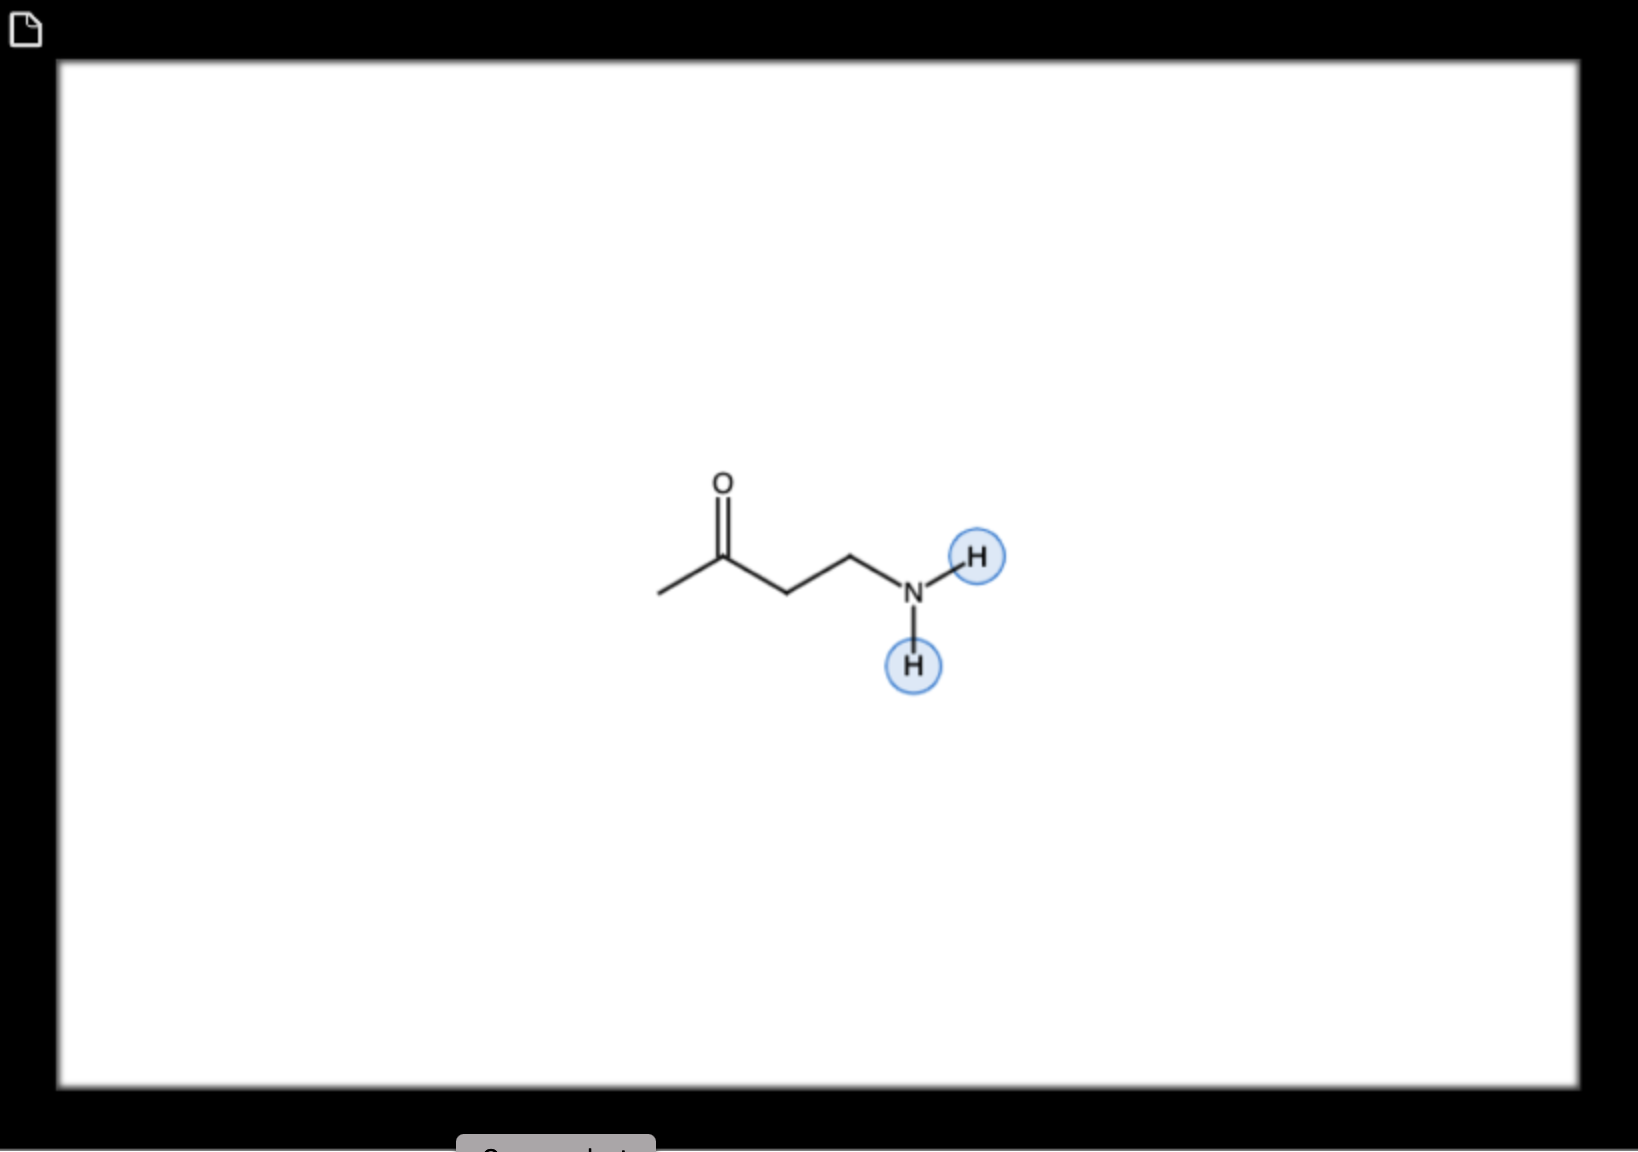
This screenshot shows two structures drawn with Terminal Carbons ON. Notice that the carbon atoms at the ends of the chain in each structure are explicitly labeled and that the hydrogens attached to them are included. Also notice that the hydrogen on the oxygen is included:

In the following screenshot, the same two structures were drawn with the Terminal Carbons OFF setting. Compare these structures to the ones in the first screenshot: Terminal carbons are not labeled, hydrogens on terminal carbons are implied, and the hydrogen on the oxygen atom is not included:
When the Terminal Carbons setting is OFF, be aware that the system will mark your structure as incorrect if you do not draw in all necessary hydrogen atoms on heteroatoms. The structure will also be marked as incorrect if you don’t have the correct number of hydrogen atoms on any heteroatoms.
Finally, whether the Terminal Carbons setting is ON or OFF, you can always explicitly include hydrogen atoms in your structures. As long as you do not exceed the correct number of hydrogens for a particular carbon atom, the structure will be marked correctHere is a video describing a situation where you need to draw a molecule with the Terminal Carbons OFF setting:
Lone Pairs On/Off
For some problems, you may be asked to include all lone pair electrons in the structures that you draw. In such problems, the Lone Pair tool will appear on the left drawing toolbar. Clicking twice on the Lone Pair tool icon reveals a dropdown menu where you can select either a lone pair or a single electron (a radical):
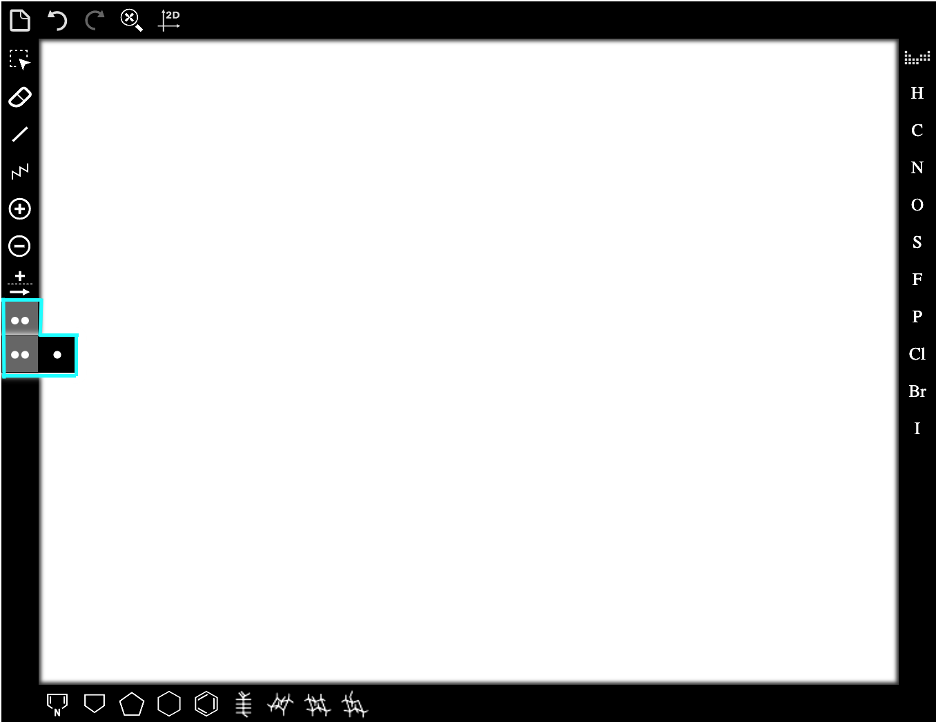
Lone Pair Tool Dropdown Menu Options | Tool Name | Tool Function |
| Increase Lone Pair | Draws a lone pair on an atom when you click on the atom. A maximum of four lone pairs can be drawn on an atom. |
| Increase Radical | Draws a radical (unpaired electron) on an atom when you click on the atom. A maximum of four radicals can be drawn on an atom. |


To draw lone pair or single electrons around a particular atom, select the desired tool (Increase Lone Pair or Increase Radical), and then click on the atom to draw the electron(s). Each click will draw one lone pair or one radical. As you draw more electrons, Smartwork will automatically adjust the drawing to arrange the electrons around the atom. Clicking four times adds four lone pairs or four radicals, depending on which tool you’ve selected. The fifth click erases all these electrons and lets you start over.
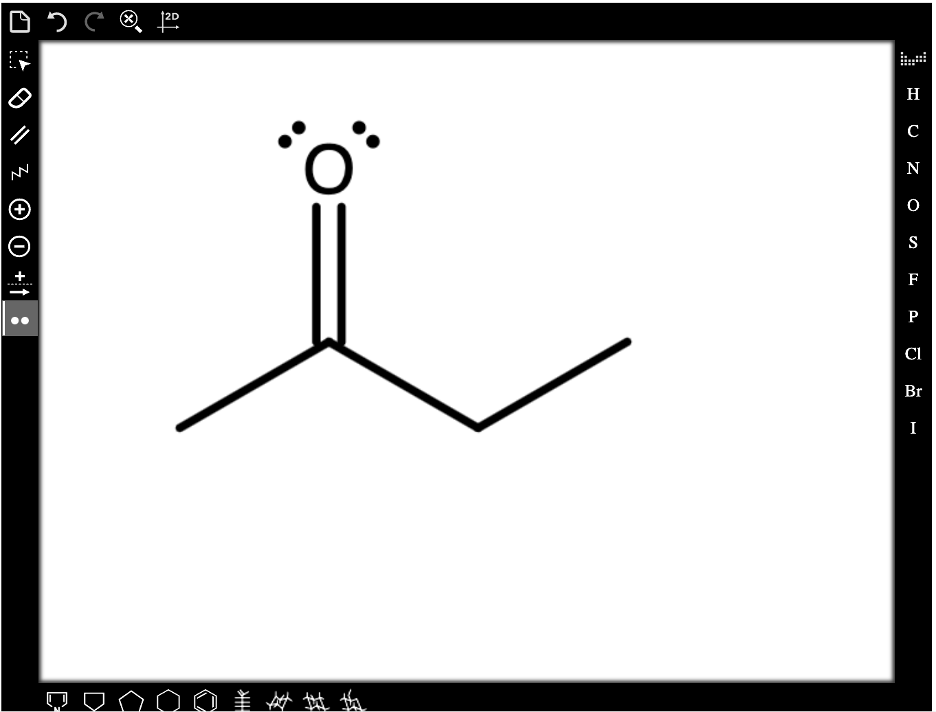
This screenshot shows an example structure in which two lone pairs have been placed on the oxygen atom using the Increase Lone Pair tool.
It is important to know that you cannot delete unwanted lone pairs or radical electrons using the Clear tool. If you’ve added too many electrons, keep clicking on the atom until the electrons disappear (i.e., when you get to the “fifth click” described above); then you can start over.
Here is a video describing the process of drawing lone pairs on an atom:
Stereochemistry: R/S and Z/E
In some problems, you will be asked to show stereochemistry when you are drawing a molecule. The term stereochemistry refers to the particular spatial arrangement of atoms in a molecule that distinguishes it from other molecules with the same formula. You will either have to draw the correct absolute configuration (organic chemists identify this configuration as R or S) at a chiral center (often called a “chirality center” or “asymmetric carbon”) or show the correct arrangement of groups around a carbon–carbon double bond (an “alkene”) to reflect a configuration identified as either E or Z. The explanations that follow will help you learn how to accomplish each of these tasks.
When a problem asks for stereochemistry, there will be additional options available in the Bonds tool (highlighted in blue, along with its dropdown menu choices, on the left palette), as well as two templates (highlighted in yellow on the bottom palette).
The functions of each of these options are summarized in the tables below:
Bonds Tool Dropdown Menu Options | Tool Name | Tool Function |
| The three bonding options from left to right are: Single, Double, and Triple. | Draws a single, double, or triple bond in the plane of the drawing window. |
| Single Up | Draws a bond coming forward, toward the viewer and in front of the plane of the drawing window. |
| Single Down | Draws a bond going back, away from the viewer and behind the plane of the drawing window. |


Drawing Toolbar Button | Tool Name | Tool Function |
| Ethene | Draws an alkene template showing all four bonds to the alkene carbons. |
| Methane | Draws a template for a chiral center showing two in-plane (flat) bonds, one wedge (forward) bond, and one dash (backward) bond. |


Chiral Centers
The four bonds around a chiral center are always drawn as follows: two bonds in the plane of the paper (“in-plane” or “flat”), one bond coming forward out of the plane of the paper (“wedge”), and one bond going back behind the plane of the paper (“dash”). In Smartwork, you must always draw all four bonds around a chiral center, and in questions asking you to draw stereochemistry, Smartwork will recognize whether you have correctly arranged these groups. To answer these types of questions, you can either use the Bonds tool or the Methane tool.
a) Using the Bonds tool. For questions requiring you to show stereochemistry, the Bonds tool will have additional options available. Right-click on the Bonds tool button to reveal these options in the dropdown menu:
Then, to draw stereochemistry around a chiral center using the Bonds tool, simply select the desired bond type: in-plane (flat), wedge (forward), or dash (backward). Keep in mind that there is a convention typically used to draw the bonds around a chiral center:
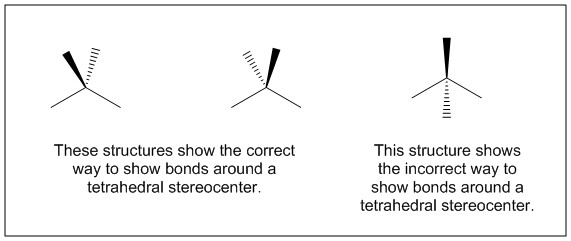
If you draw your structure in the format shown in the far right structure (the wedge and dash bonds on opposite sides of the two flat bonds), Smartwork will not recognize it as correct.
b) Using the Methane tool. There is another way in Smartwork to draw stereochemistry at a chiral center: You can use the Methane tool in the bottom drawing toolbar. The Methane tool is highlighted in yellow in this screenshot:
To draw a template of a chiral center, select the Methane tool and click in the drawing window to insert the template:

The template will appear with highlighting. Click anywhere in the drawing window (away from the template) to remove the highlighting. Then use the Elemental Symbols toolbar and Bonds tool to modify the structure by changing atom labels and attaching bonds.
Alkene Stereochemistry
The stereochemistry of an alkene is based on the spatial arrangement of the four groups attached to the carbons in the double bond. In this picture, the red dashed line drawn through the double bond separates the two “sides.” “A” and “B” are on one side of the double bond, and “C” and “D” are on the other side:
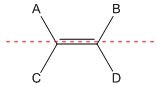
The location of these groups varies depending on which stereoisomer you want to represent. Smartwork will recognize the exact spatial arrangement of groups as correct or incorrect depending on which isomer you are trying to draw.
You can either draw an alkene using the Bonds tool or using the Ethene tool found in the bottom drawing toolbar:
To draw an alkene using the Ethene tool, click on the tool, and then click in the drawing window to insert the template:
The template will appear with highlighting. Click anywhere in the drawing window (away from the template) to remove the highlighting. Then use the Elemental Symbols toolbar and Bonds tool to modify the structure by changing atom labels and attaching bonds.
This video summarizes how to use the tools available in Smartwork for showing stereochemistry in your drawings:
Select Tool
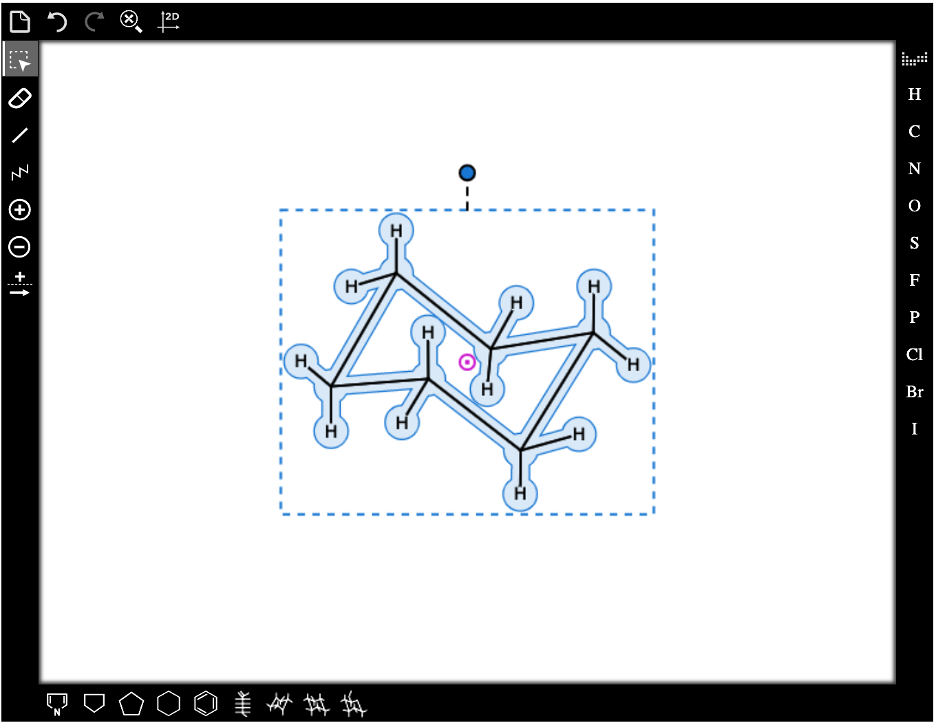
Some questions may ask you to select an atom or atoms in a given structure, or to select entire structures.
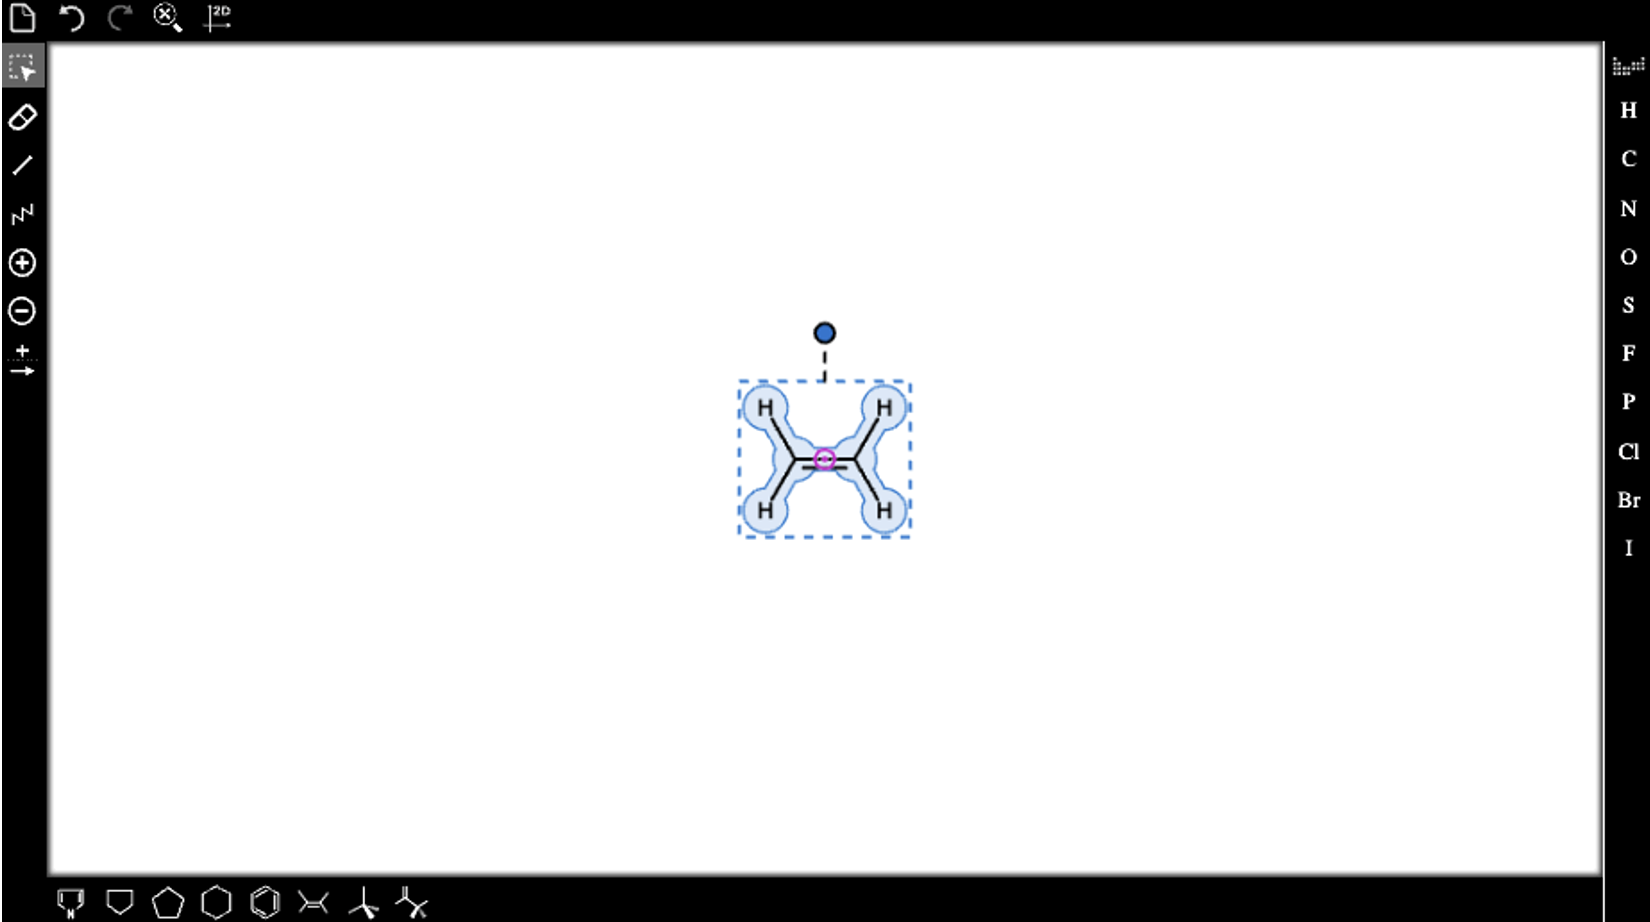
Selecting atoms. To select an atom, simply place the cursor on the atom so that it is highlighted with a blue circle, and then click. Once you move the cursor away from the atom, the highlighting will remain, meaning that the atom is selected. Notice that you can select more than one atom in a structure just by clicking on each desired atom to highlight it. For example, in the screenshot below, both hydrogen atoms have been selected:
If you no longer want a particular atom selected, just click on it again.
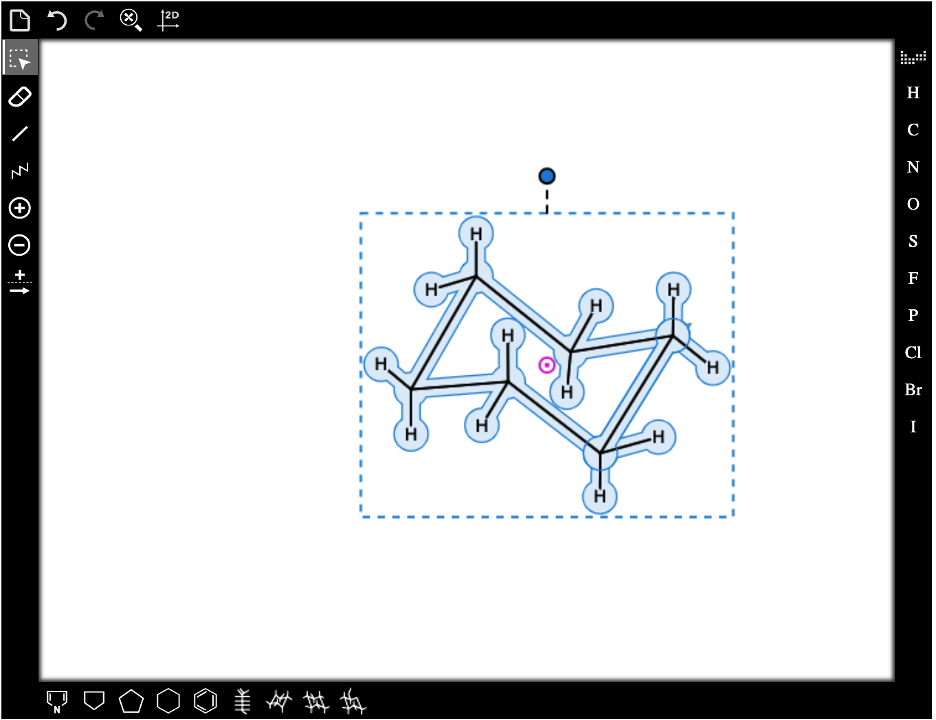
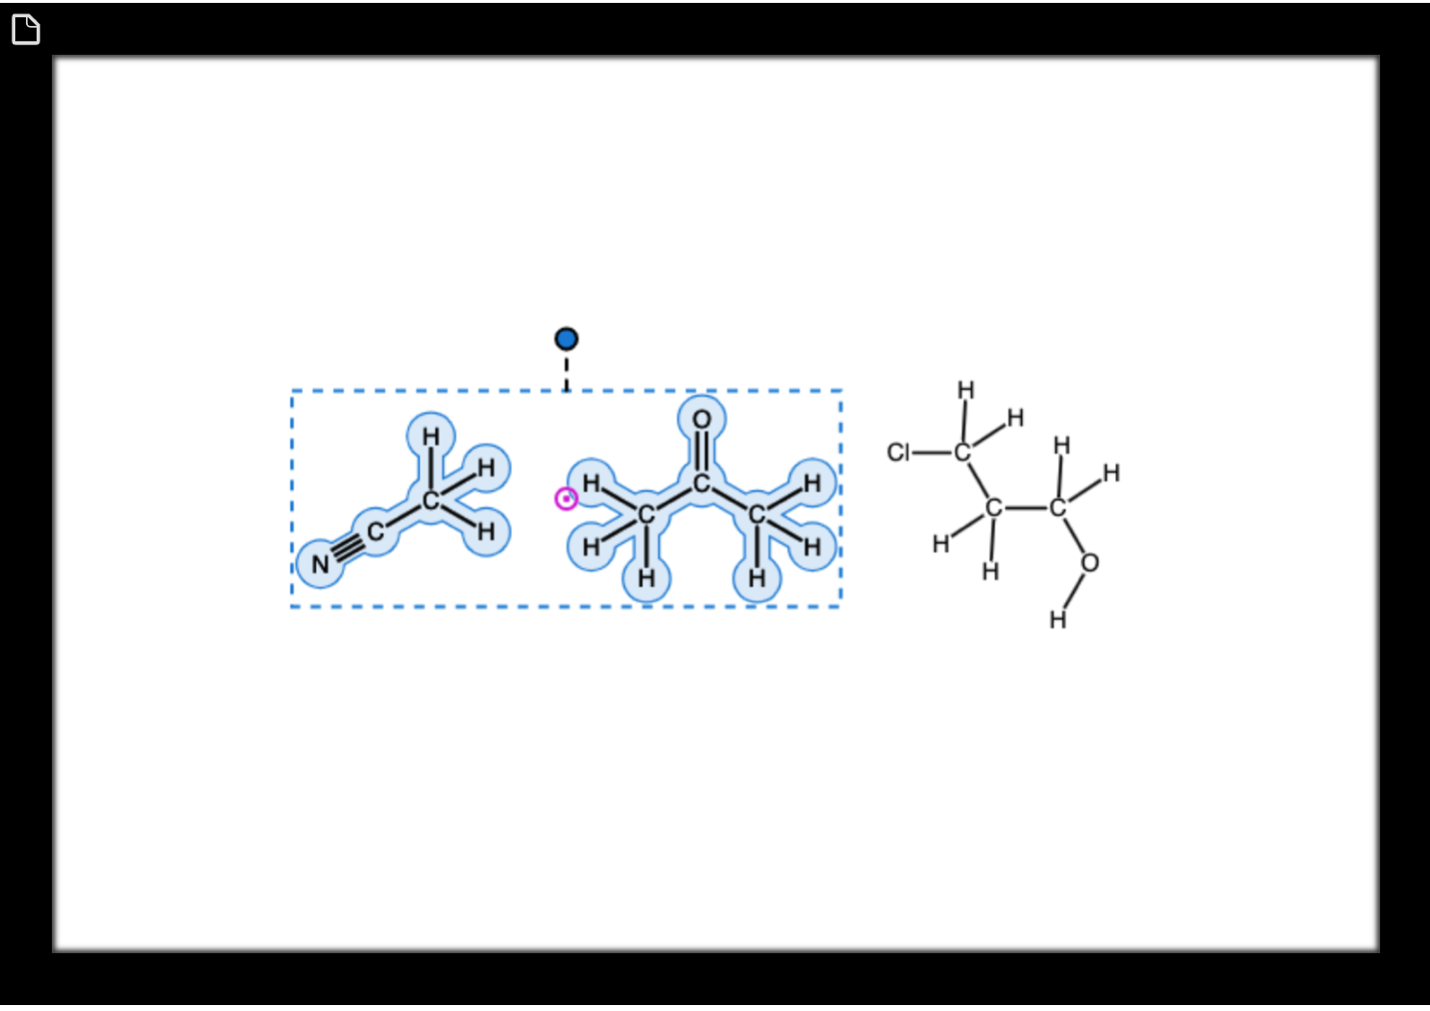
Selecting structures. To select an entire structure, click and drag a box around it so that the entire structure is highlighted in blue.

If you’ve selected the incorrect structure, simply click and drag a box around the correct structure. The highlighting will disappear from the incorrect structure and the correct structure will become highlighted.
To select more than one structure, click and drag a box around the first structure you wish to select, and then hold down the shift key as you click and drag boxes around any additional structures.
Remember that when you’re selecting either atoms or structures, you can always restore the problem to its original status by clicking the Clear tool icon ![]() in the upper left corner of the drawing window.
in the upper left corner of the drawing window.
Here is a video summarizing the instructions for how to select atoms and structures:
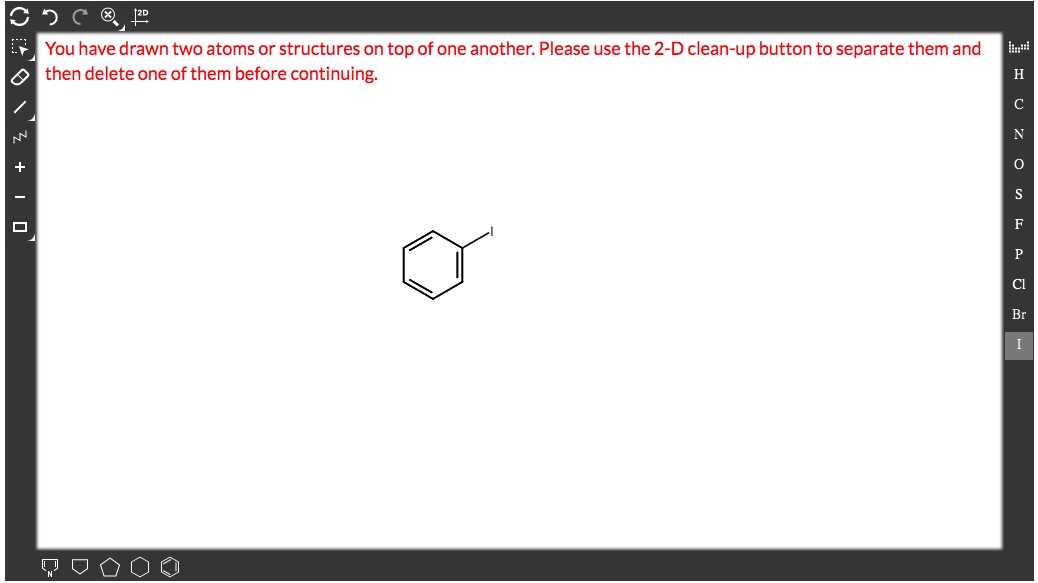
Drawing Errors
A warning message will be displayed if you draw two atoms or structures on top of each other. To dismiss the message, use the 2-D clean-up button to separate the atoms or structures and then delete the duplicate before continuing.
Submit a Support Request
Still need help? Submit a support ticket and a customer support specialist will be happy to assist you.
Opened a request already? Click here for an update.