
Tutorials provides instructors with the ability to assign due dates, create Student Sets to collect student results and activity data, add and remove students from Student Sets, and to copy assignments and settings between Student Sets.
How do I set due dates?
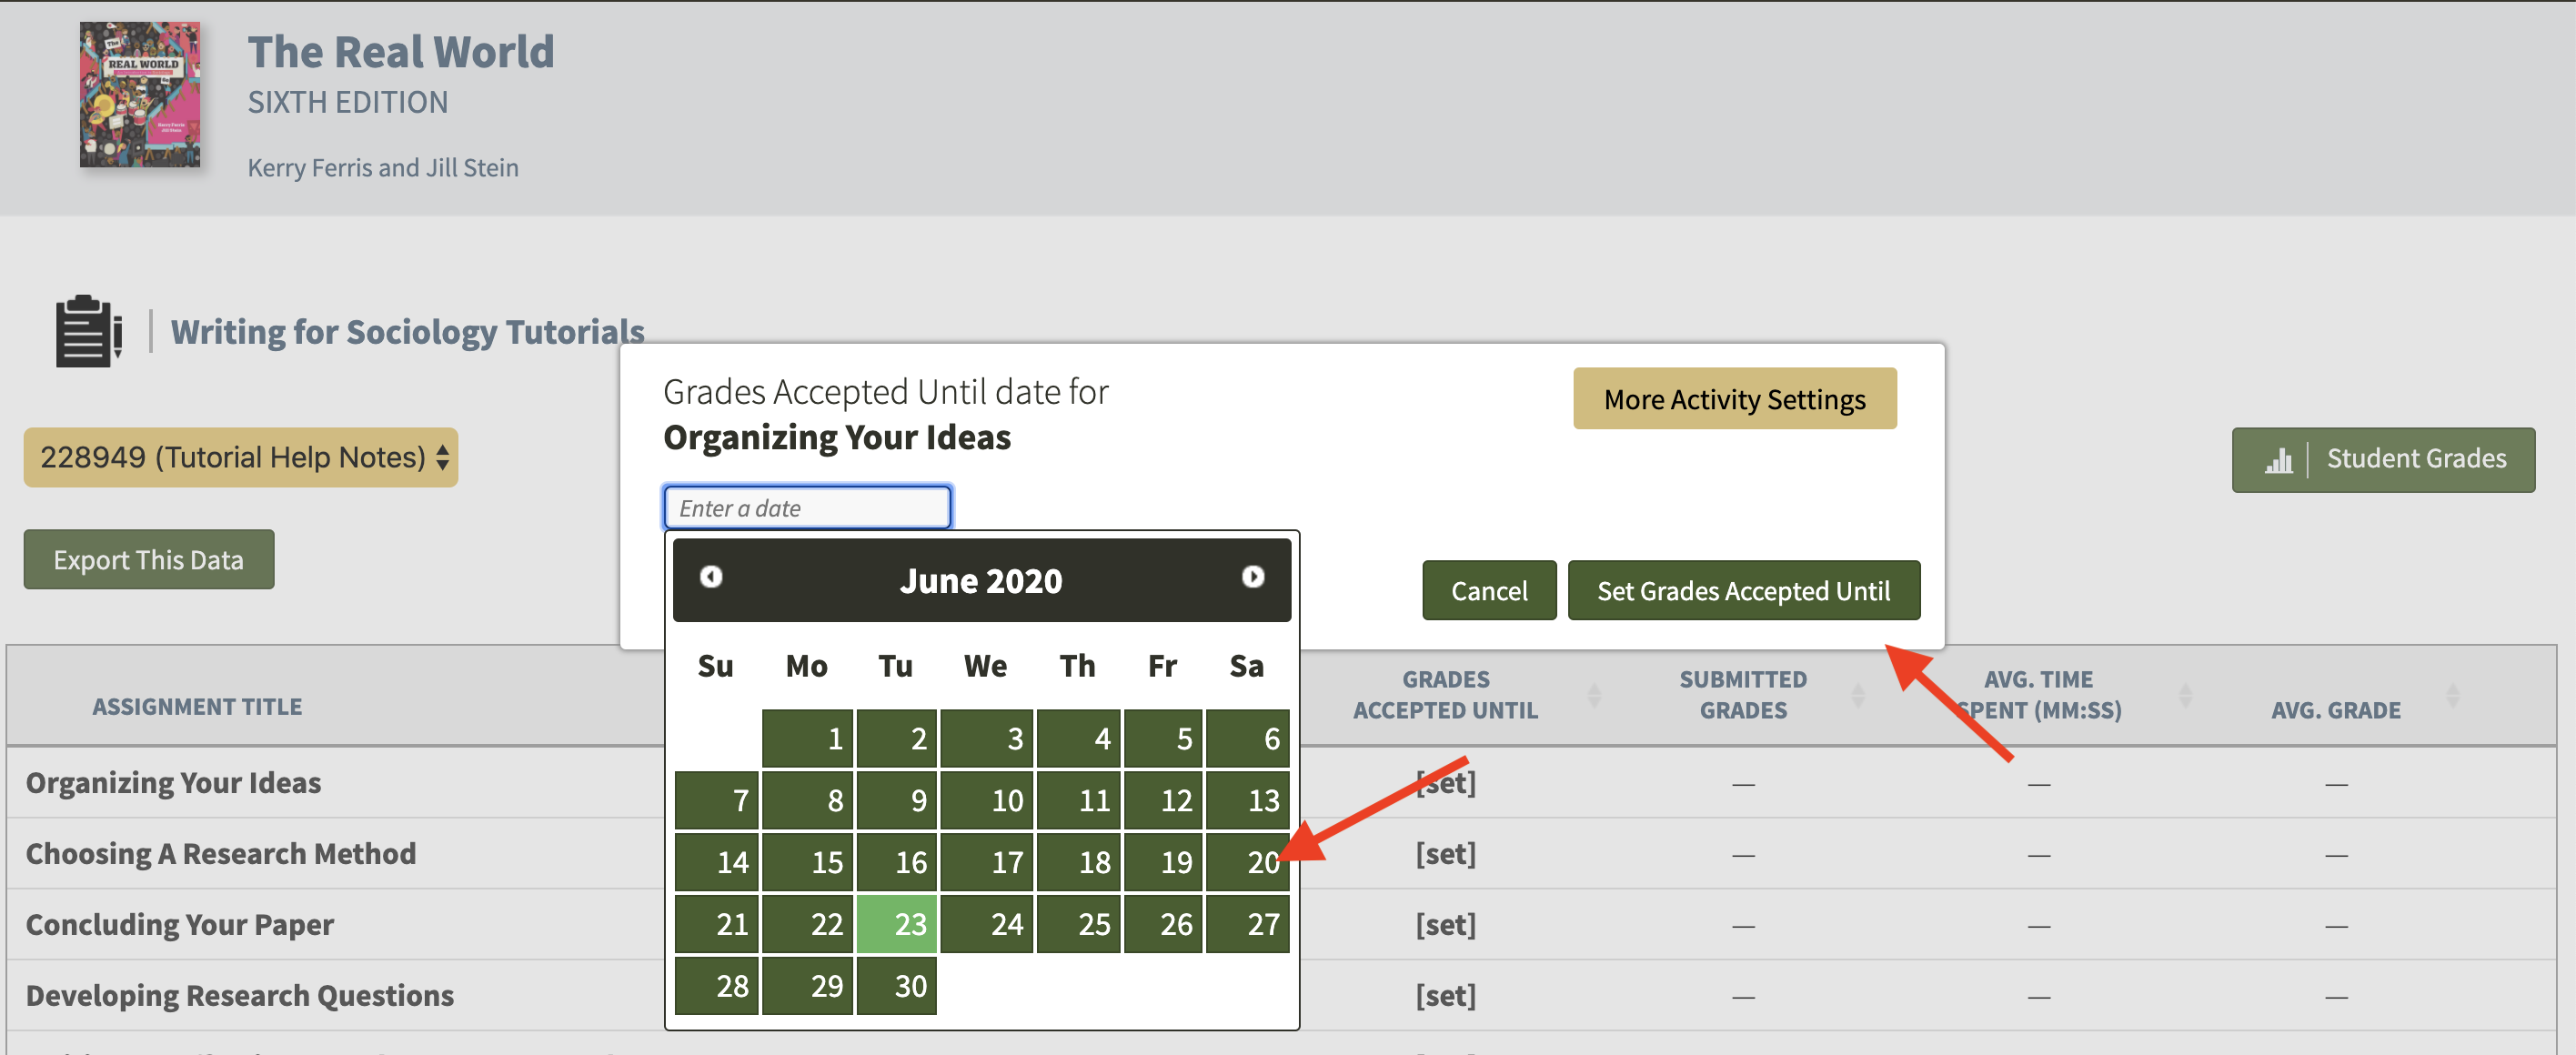
You can set Grades Accepted Until dates for Tutorial assignments. In fact, Tutorial assignments work best when a due date has been set. After a Grades Accepted Until date for an assignment passes, students can continue to answer questions, but will no longer be able to improve their grade on that assignment.
Here’s how to set up Grades Accepted Until dates:
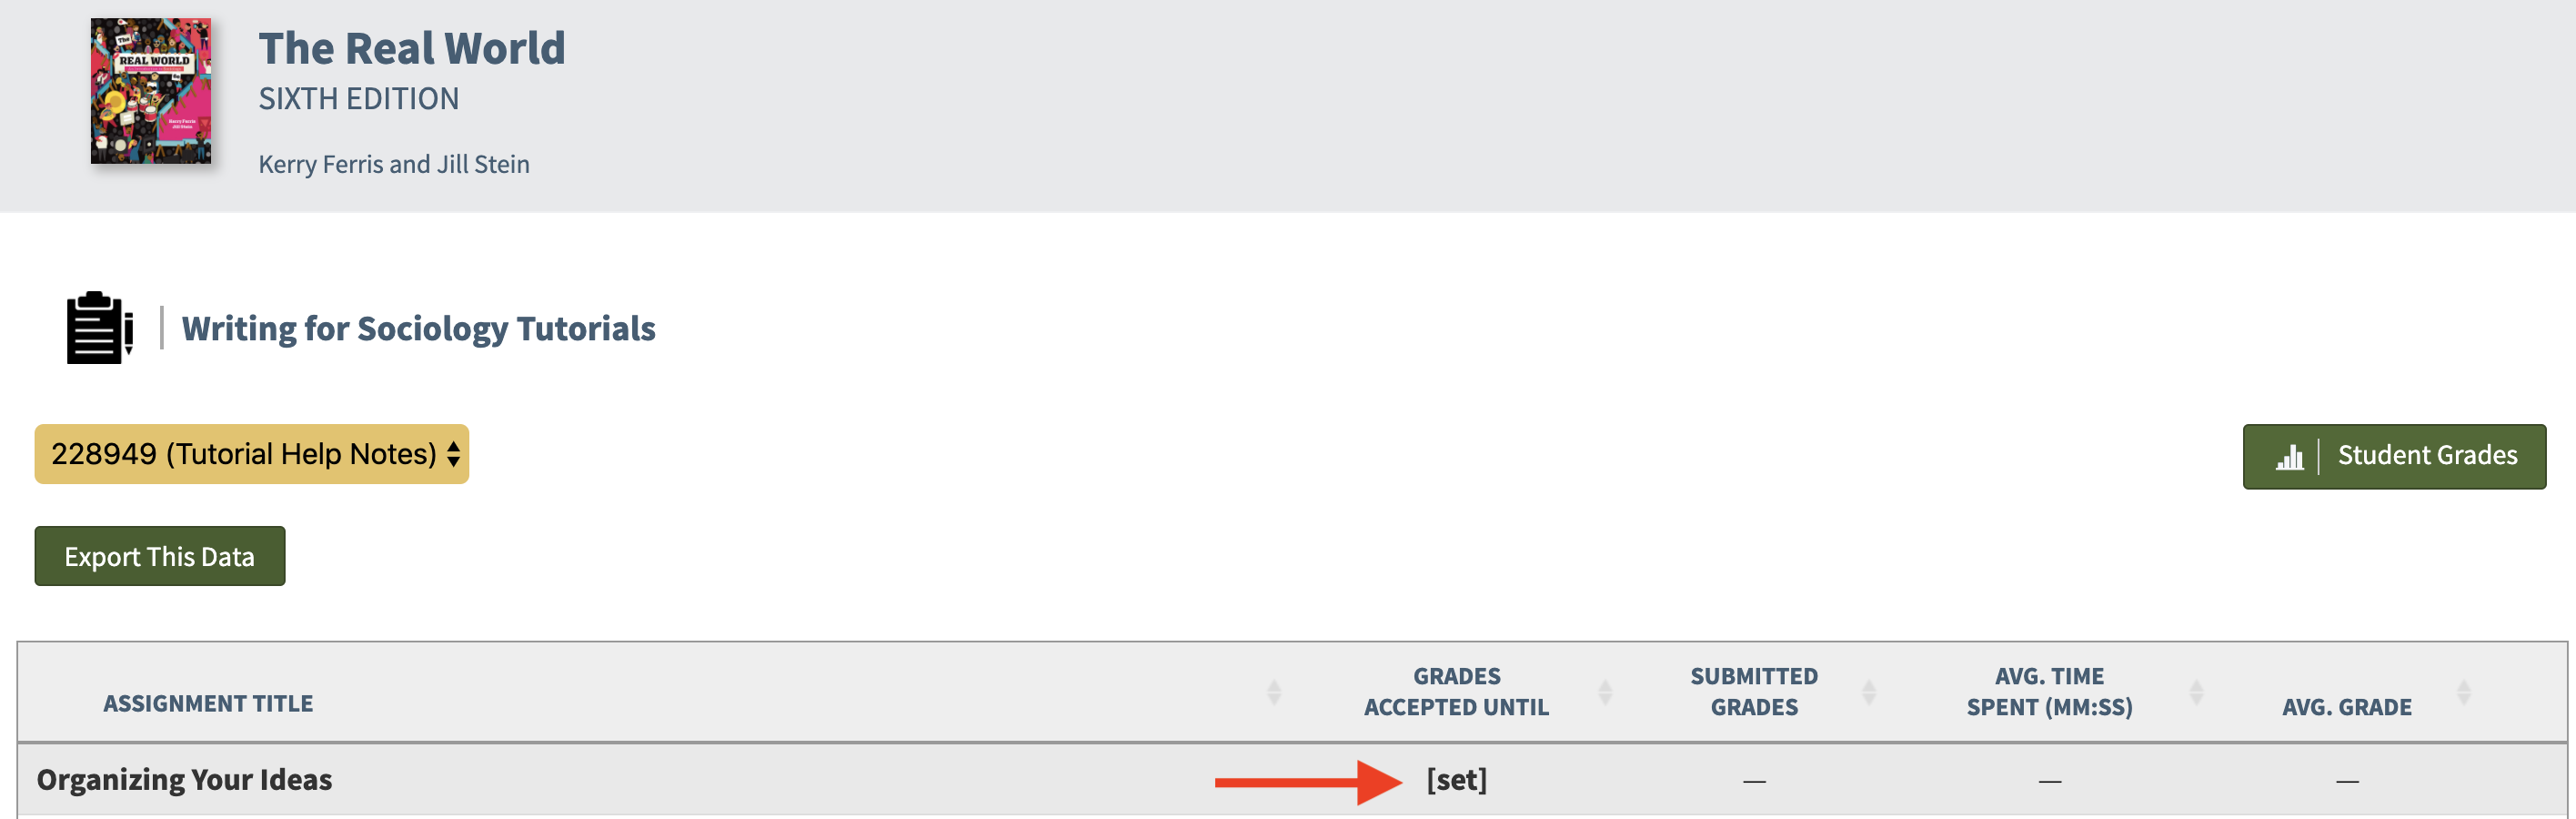
Select a Student Set in the Select a Student Set drop-down menu.

Click [set] across from the assignment.
Select a Grades Accepted Until date and click the Set Grades Accepted Until button. The first time you set a GAU, you'll be asked to choose your time zone. The next time you create a GAU, your time zone will be automatically selected.
Can I require students to enter a school ID?
Require students to enter a school ID in a new Student Set
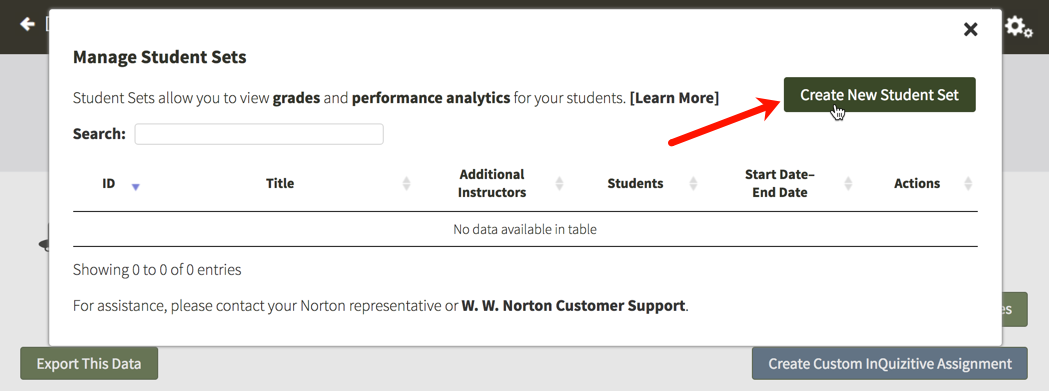
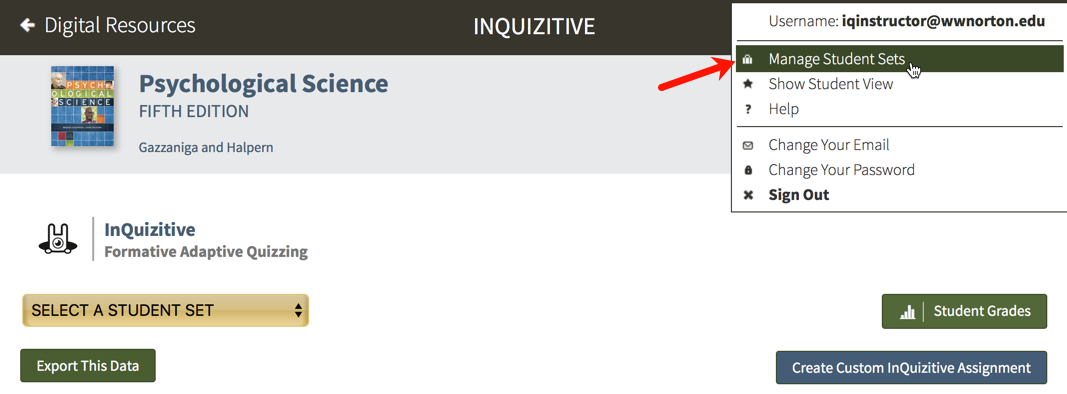
Click on the gear icon in the upper-right corner and select Manage Student Sets from the menu.

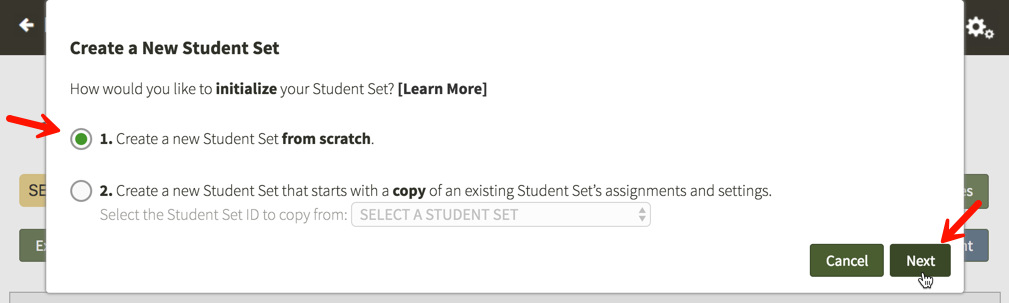
Click on the Create New Student Set button.
Option 1. Create a new Student Set from scratch will be selected by default. Click on the Next button.

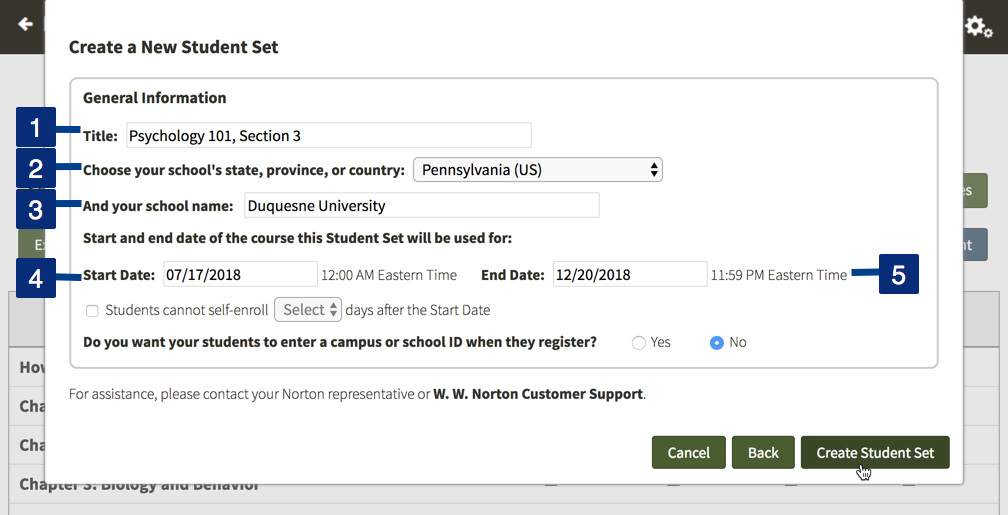
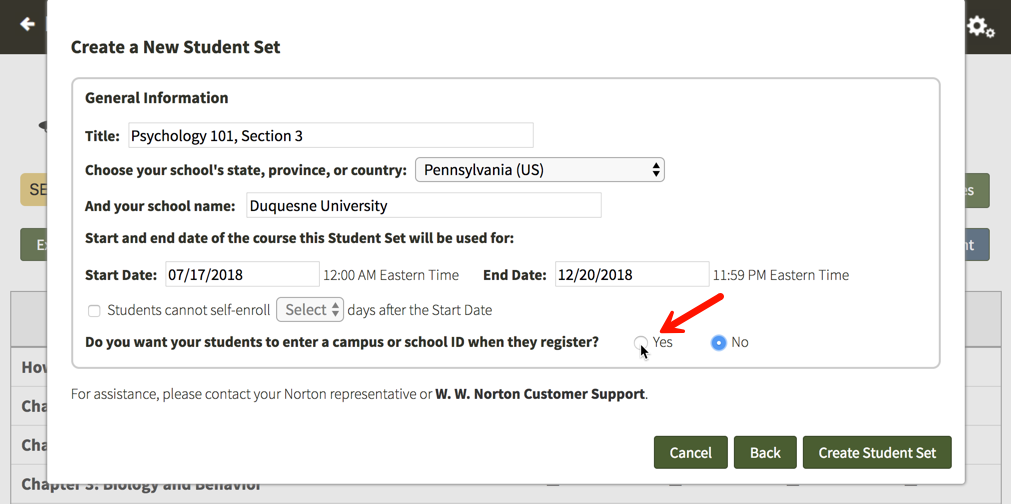
Enter a title for your new Student Set, choose your school's state from the drop-down menu, begin typing your school's name into the text box that appears and select the proper school from the list, and select start and end dates for your Student Set.
Select Yes to the right of Do you want your students to enter a campus or school ID when they register?
You will then be given the opportunity to change the label of the ID for your Student Set. The default School ID will be automatically populated into the text field but please feel free to change this to anything you'd like. This label will be displayed when your students are asked to enter their ID and when you review student results. IDs can contain letters and numbers and they do not have a minimum or maximum length.
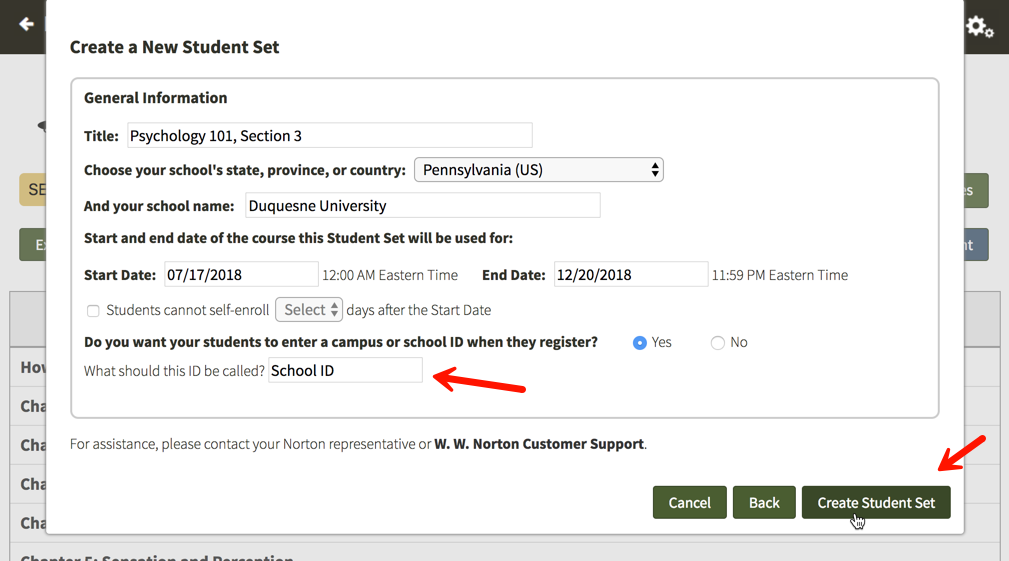
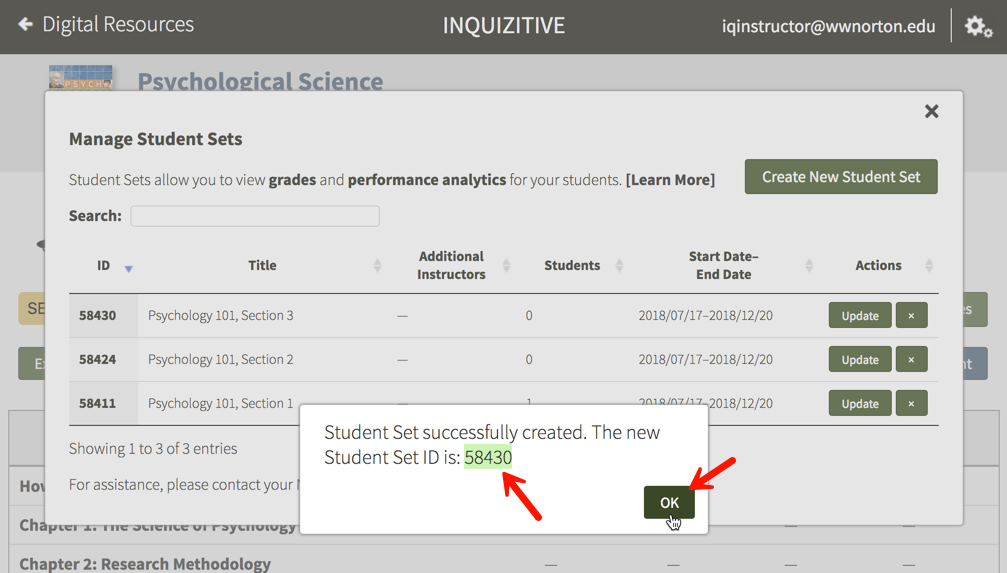
Finally, click the Create Student Set button and you will be given your new Student Set ID. Make a note of the Student Set ID and distribute it to your students so that they can join this Student Set.
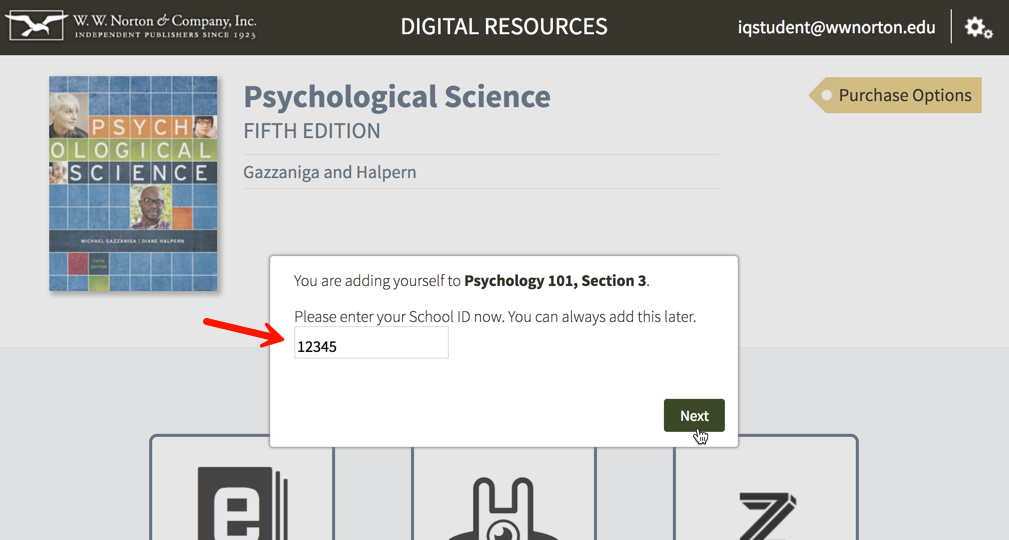
When your students initially attempt to join this Student Set, they will be asked to enter their ID. If students are unsure of their ID or do not yet have one, they can simply click the Next button to add themselves to the Student Set and continue on to the digital resources. The next time they login to access the digital resources, they will be asked to enter their ID again. Students will be asked to enter their ID each time they access the digital resources until they finally enter one.

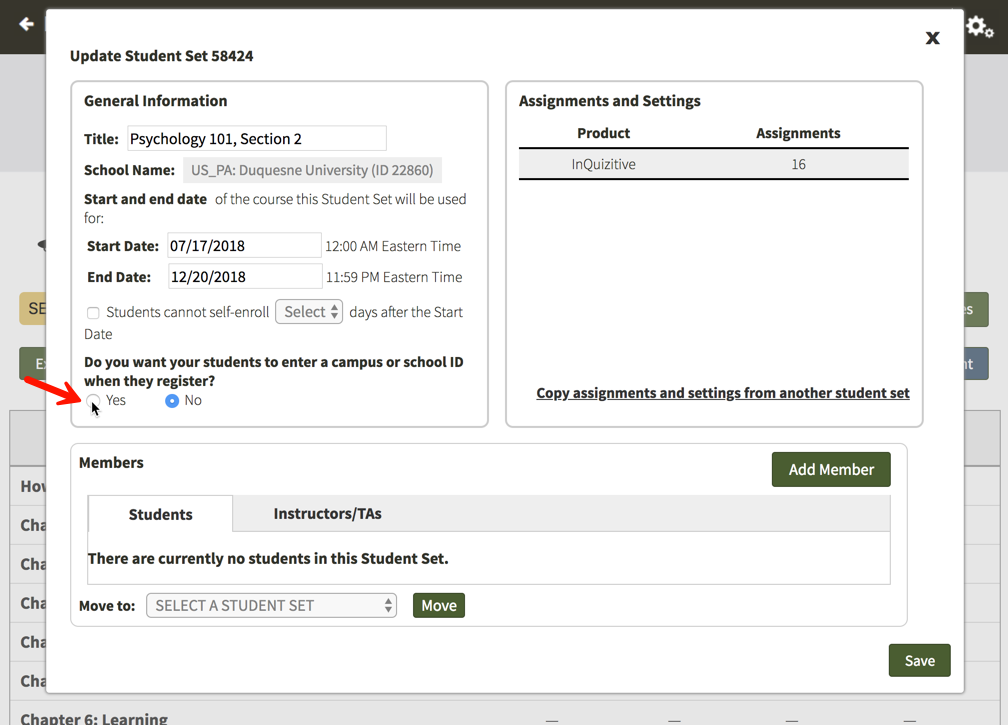
Require students to enter a school ID in an existing Student Set
Click on the gear icon in the upper-right corner and select Manage Student Sets from the menu.

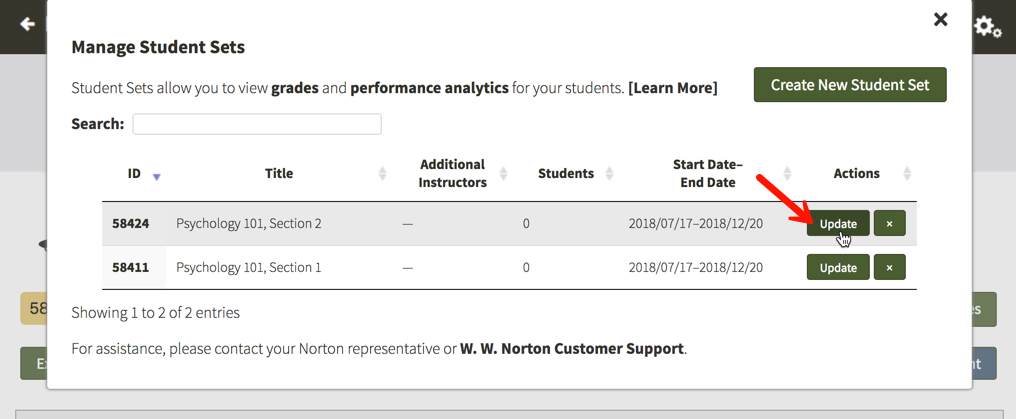
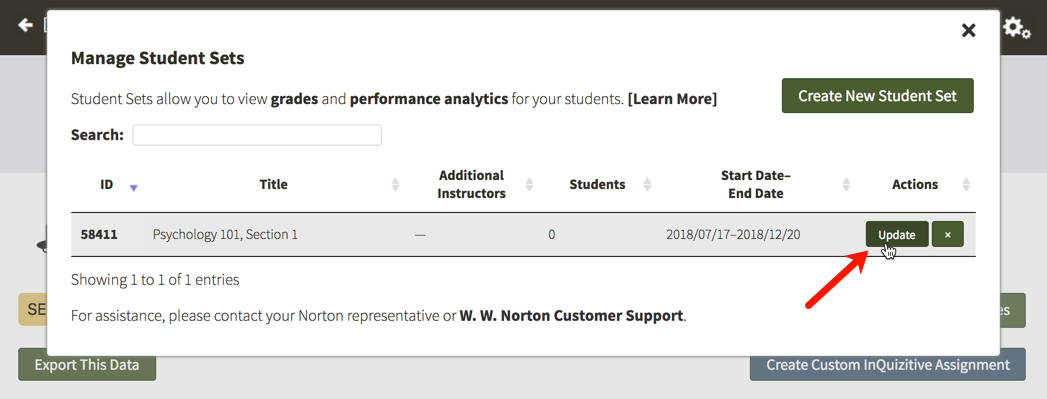
Click on the Update button to the right of the Student Set for which you would like to require an ID.
Select Yes under Do you want your students to enter a campus or school ID when they register?
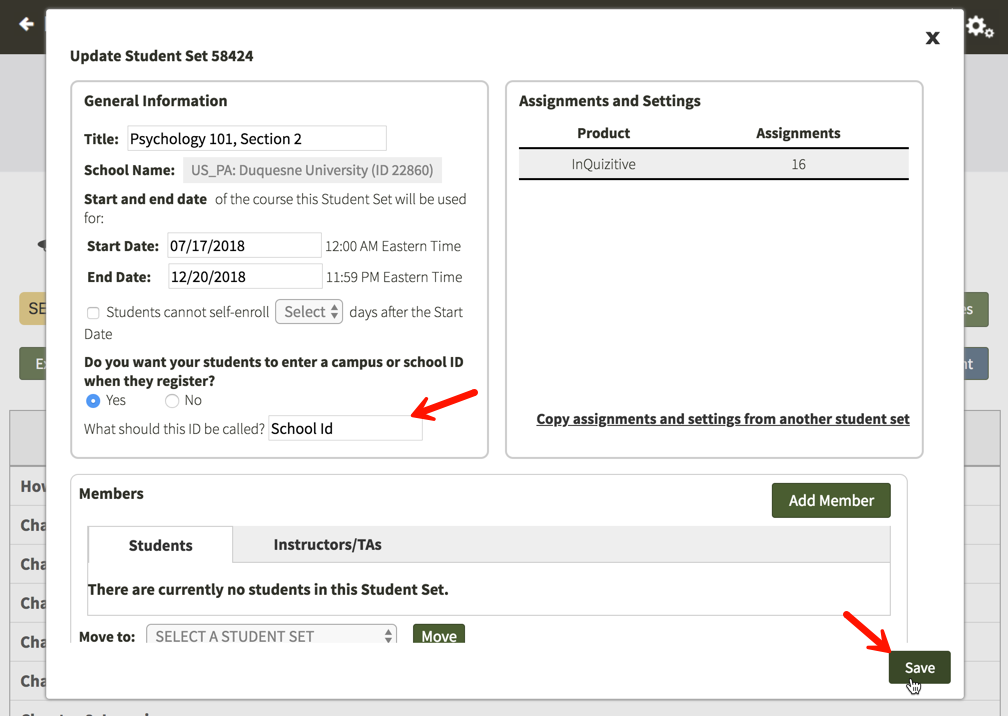
You will then be given the opportunity to change the label of the ID for your Student Set. The default School Id will be automatically populated into the text field but please feel free to change this to anything you'd like. This label will be displayed when your students are asked to enter their ID and when you review student results. IDs can contain letters and numbers and they do not have a minimum or maximum length. Click on the Save button when you are finished.
The next time your students login and access the digital resources, they will be asked to enter their ID. If students are unsure of their ID or do not yet have one, they can simply click the Next button to continue on to the digital resources. The next time they login to access the digital resources, they will be asked to enter their ID again. Students will be asked to enter their ID each time they access the digital resources until they finally enter one.
Can I prevent students from enrolling in a Student Set after a specific number of days?
Prevent students from enrolling after a specific number of days in a new Student Set
Click on the gear icon in the upper-right corner and select Manage Student Sets from the menu.

Click on the Create New Student Set button.

Option 1. will be selected by default. Click on the Next button.
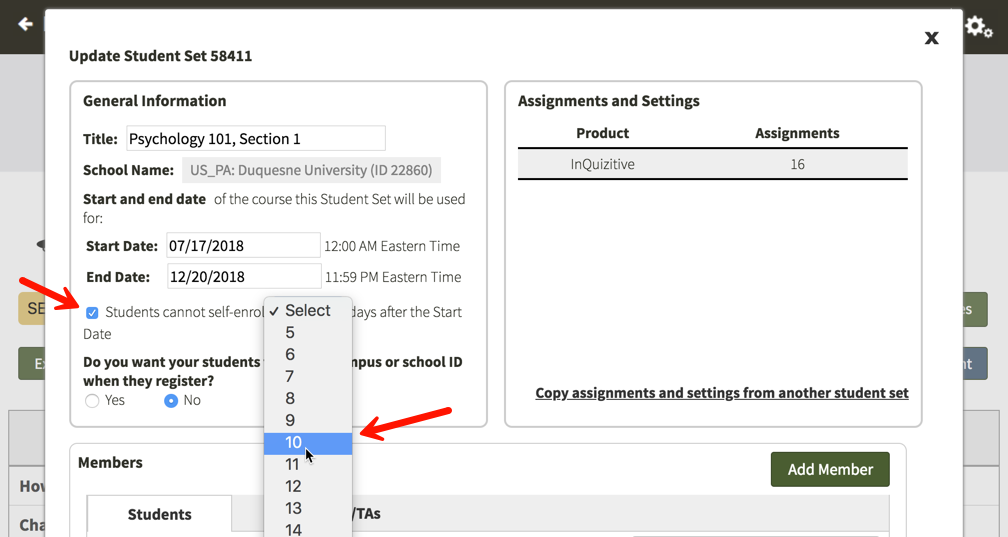
Enter a title for your new Student Set, choose your school's state from the drop-down menu, begin typing your school's name into the text box that appears and select the proper school from the list, and select start and end dates for your Student Set.

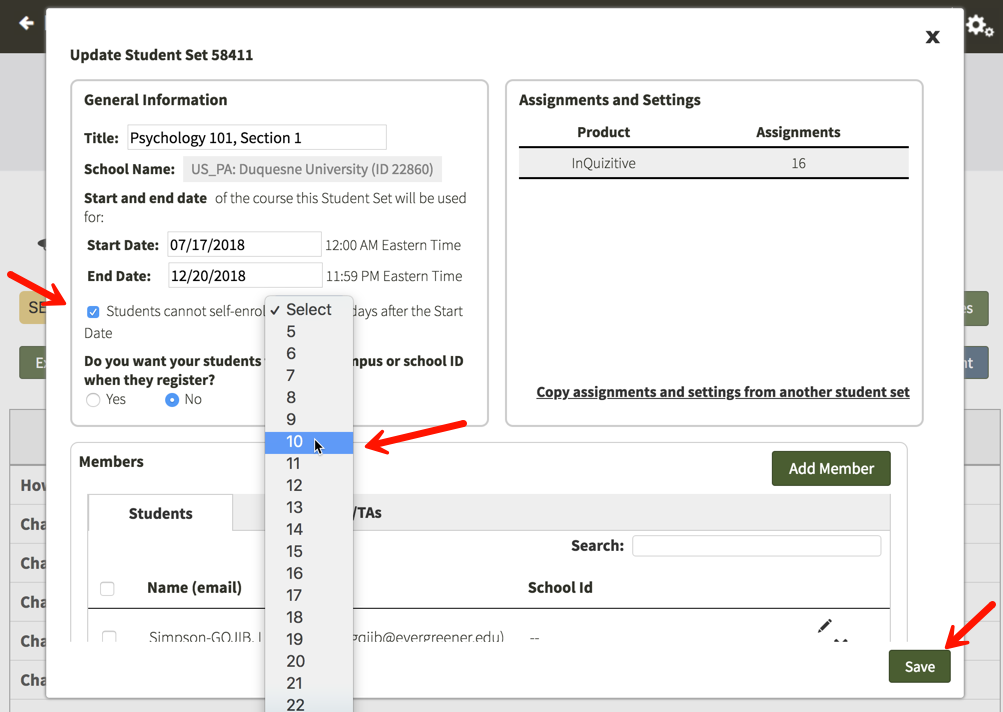
Click the checkbox to the left of Students cannot self-enroll Select days after the Start Date and use the Select drop-down menu to choose how many days after the start date of your Student Set you would like to close the self-enrollment period. You can select any number from 5 to 100 days after the start date.
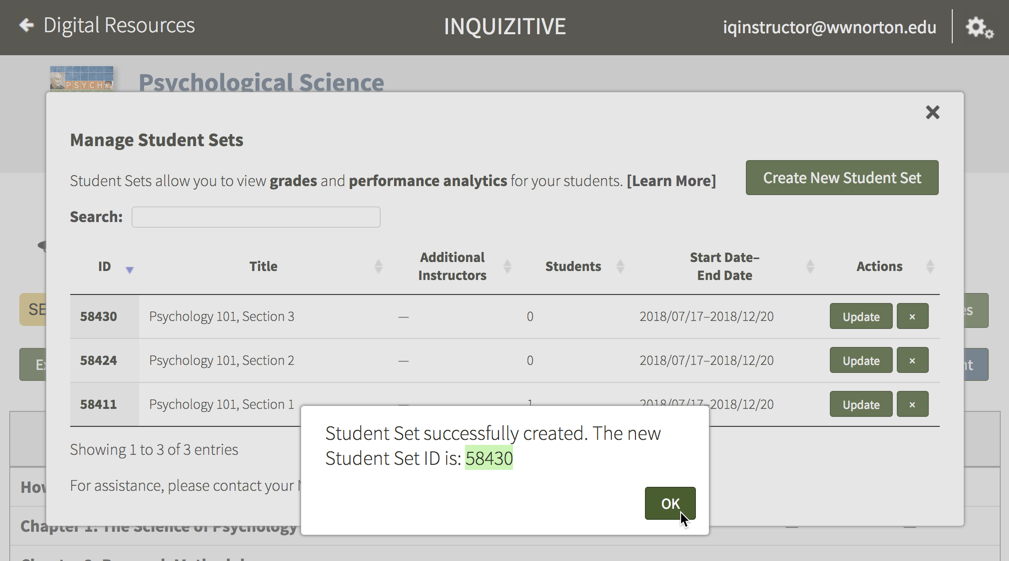
Finally, click the Create Student Set button and you will be given your new Student Set ID. Make a note of the Student Set ID and distribute it to your students so that they can join this Student Set.
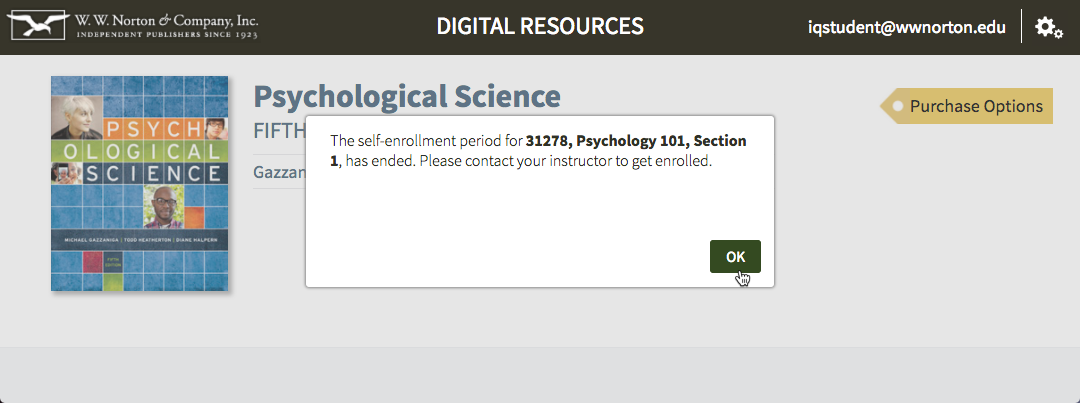
Any students who try to join this Student Set after the self-enrollment period has ended will receive the message below. Since the self-enrollment period has ended, you will need to manually add students to the Student Set from that point on.
Prevent students from enrolling after a specific number of days in an existing Student Set
Click on the gear icon in the upper-right corner and select Manage Student Sets from the menu.

Click on the Update button to the right of the Student Set for which you would like to end the self-enrollment period after a specific number of days.
Click the checkbox to the left of Students cannot self-enroll Select days after the Start Date and use the Select drop-down menu to choose how many days after the start date of your Student Set you would like to close the self-enrollment period. You can select any number from 5 to 100 days after the start date. Click the Save button when you're finished.
Any students who try to join this Student Set after the self-enrollment period has ended will receive the message below. Since the self-enrollment period has ended, you will need to manually add students to the Student Set from that point on.
How do I move students from one Student Set to another?
Click on the gear icon in the upper-right corner and select Manage Student Sets from the menu.

Click on the Update button to the right of the Student Set in which the student is currently enrolled.

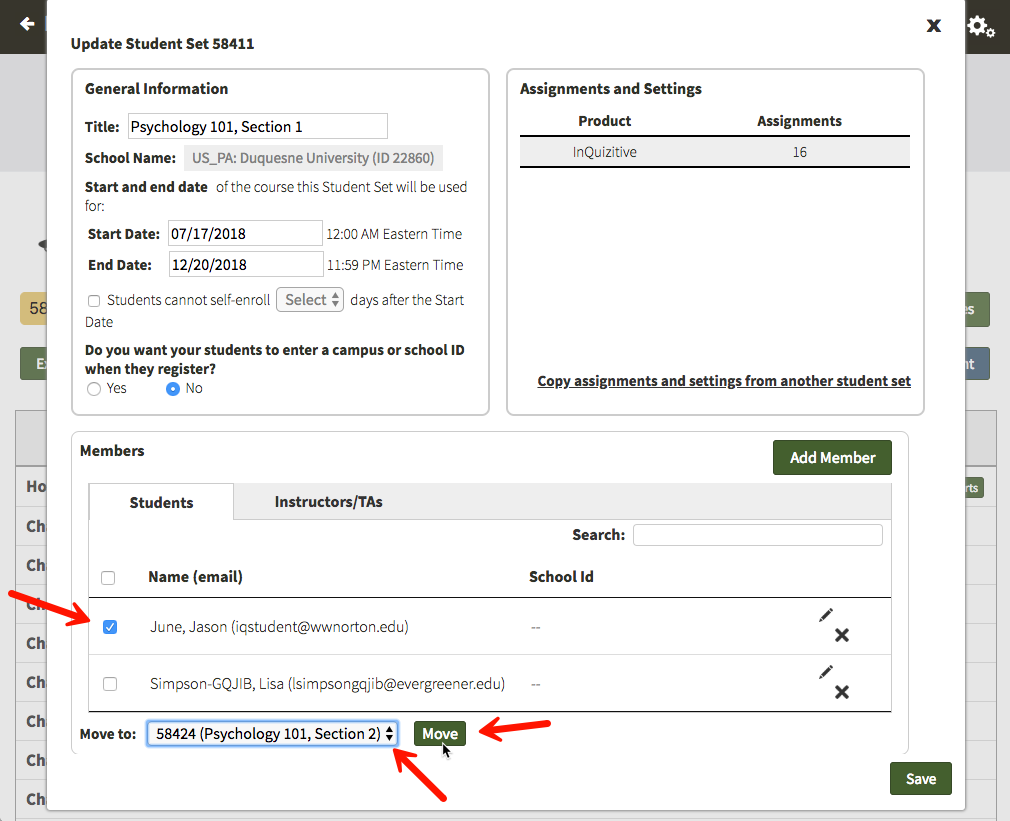
In the Members section, locate the student you would like to transfer to another student set and click the checkbox to the left of his or her name. Using the drop-down menu to the right of Move to: select the new Student Set and click the Move button.
If you would like to completely remove a student from your Student Set, click on the X icon to the right of the student's name you would like to remove.
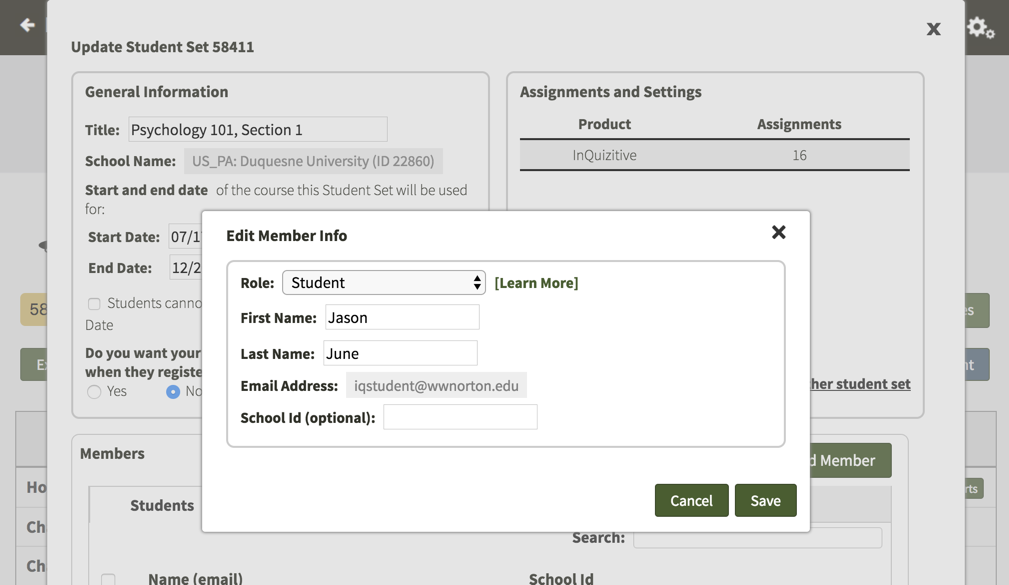
How do I edit student information within a Student Set?
Click on the gear icon in the upper-right corner and select Manage Student Sets from the menu.
Click on the Update button to the right of the Student Set in which the student is currently enrolled.

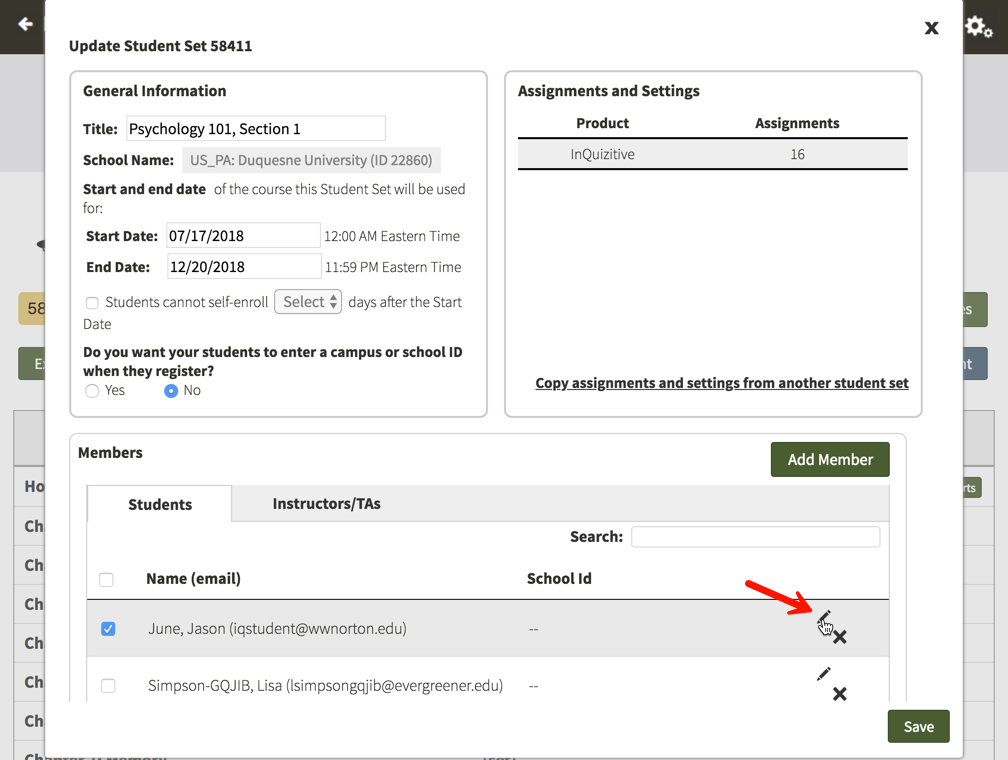
Click on the pencil icon to the right of the student whose information you would like to modify.
Using this window, you can adjust the role of the student, change the first or last name, and add or edit an ID. There is no way to change a student's email address. If you have a student who needs to make a change to their email address, please ask them to contact the W.W. Norton Service Desk for assistance.
Submit a Support Request
Still need help? Submit a support ticket and a customer support specialist will be happy to assist you.
Opened a request already? Click here for an update.