
A guide to getting started using the Online Workbook powered by Noteflight.
How do I get started using the Online Workbook?
There is a great "Getting Started" resource available on the Digital Resources page for your textbook.
- Go to the Digital Resources page for your textbook. Here is a list of the textbooks that feature the Online Workbook powered by Noteflight:
- Concise Introduction to Tonal Harmony: https://digital.wwnorton.com/conciseharmony
- The Musician's Guide to Theory and Analysis, Third Edition: https://digital.wwnorton.com/guidetotheory3
- Login to the Digital Resources page using your account. Please note, to access the Getting Started resource specifically designed for instructors, your account needs to be authorized as an instructor. If you need to have your account authorized as an instructor, please contact your Norton representative.
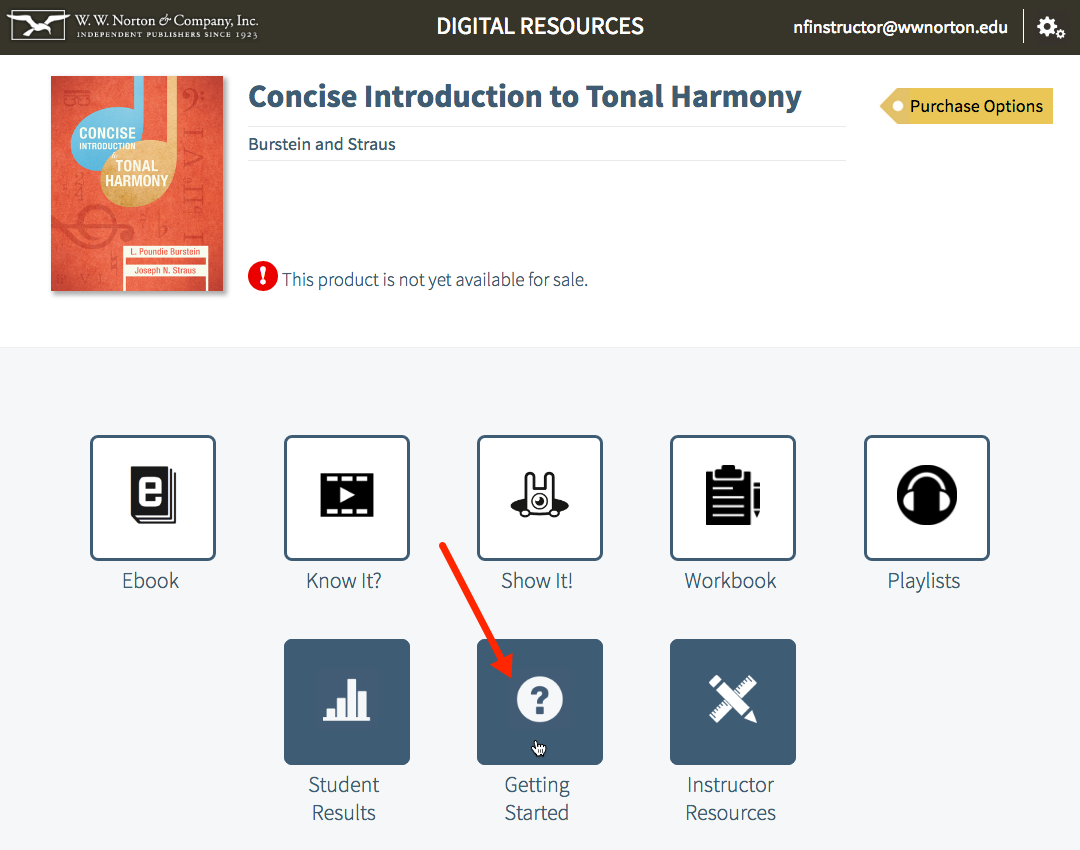
- Click on the Getting Started tile:
How do students register for the Online Workbook?
Access to the workbook is included with every Total Access registration code provided inside new printed textbooks that feature the Online Workbook powered by Noteflight. Total Access can also be purchased online through the Digital Resources page for your textbook.
First, go to the Digital Resources page for your textbook:
- Concise Introduction to Tonal Harmony: https://digital.wwnorton.com/conciseharmony
- The Musician's Guide to Theory and Analysis, Third Edition: https://digital.wwnorton.com/guidetotheory3
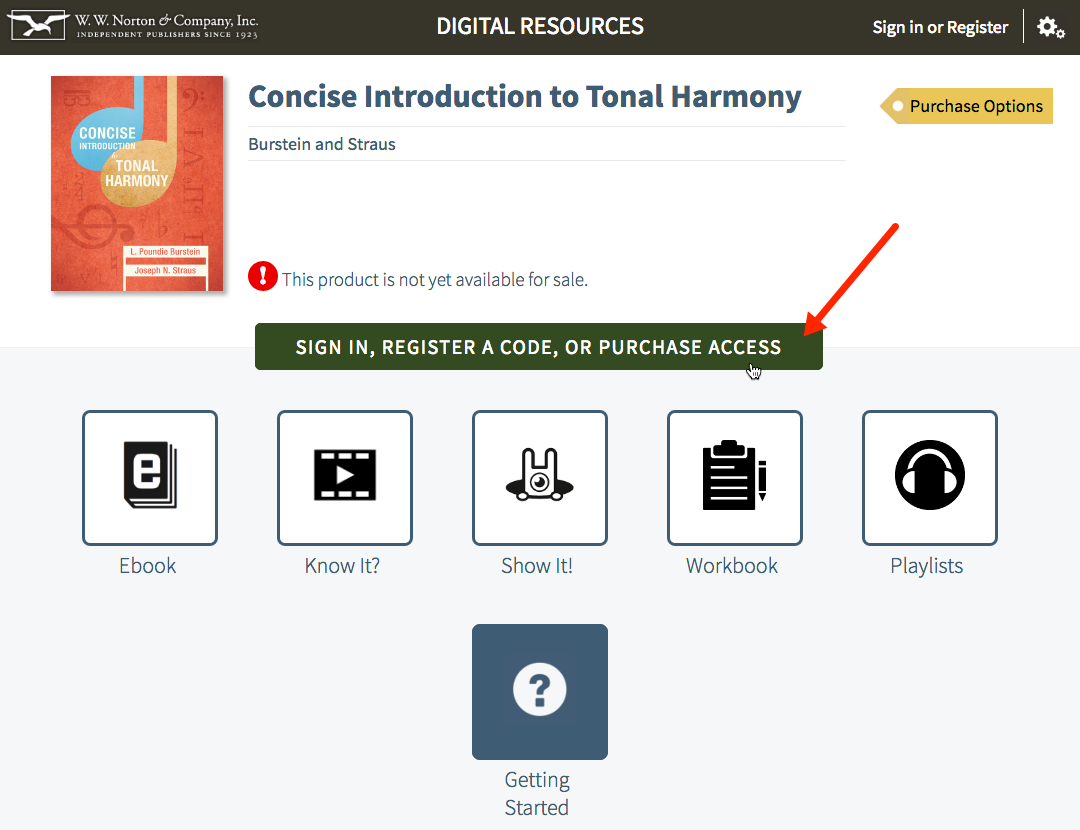
Next, click on the Sign in, Register a Code, or Purchase Access button.
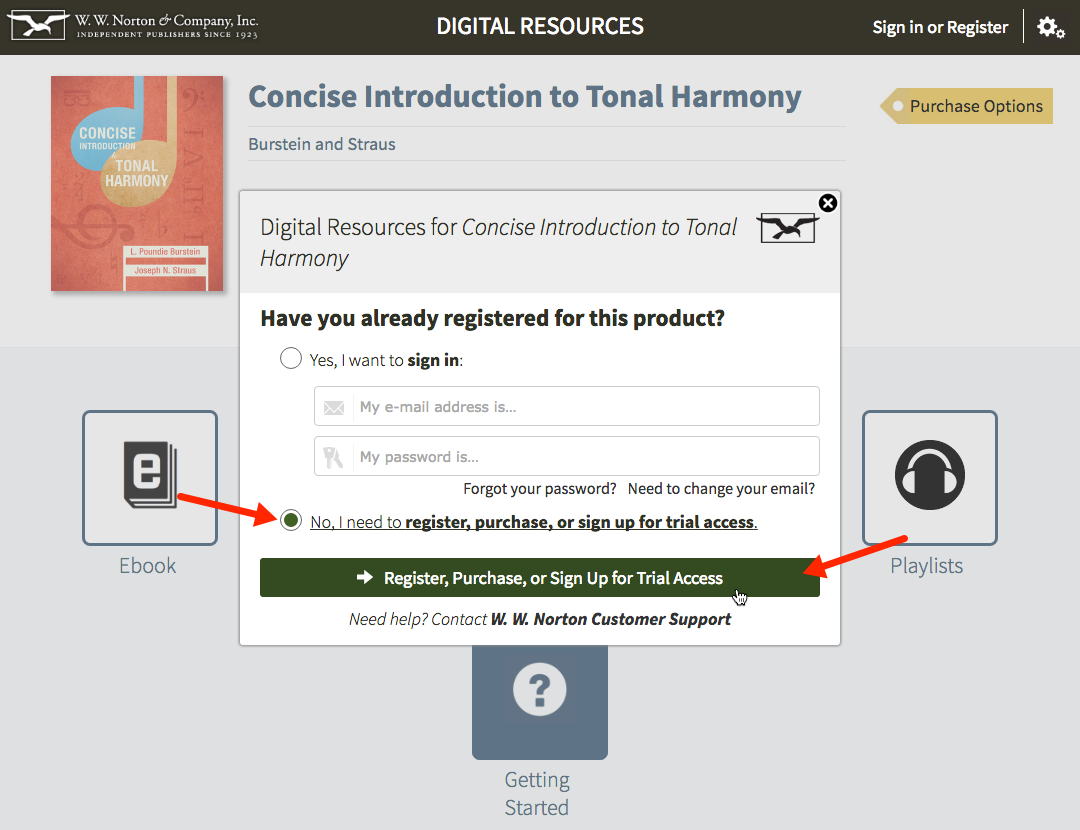
Then, select the circle next to "No, I need to register, purchase, or sign up for trial access." and click the Register, Purchase, or Sign Up for Trial Access button.
Enter your name, email address, and password into the fields at the top of the form.
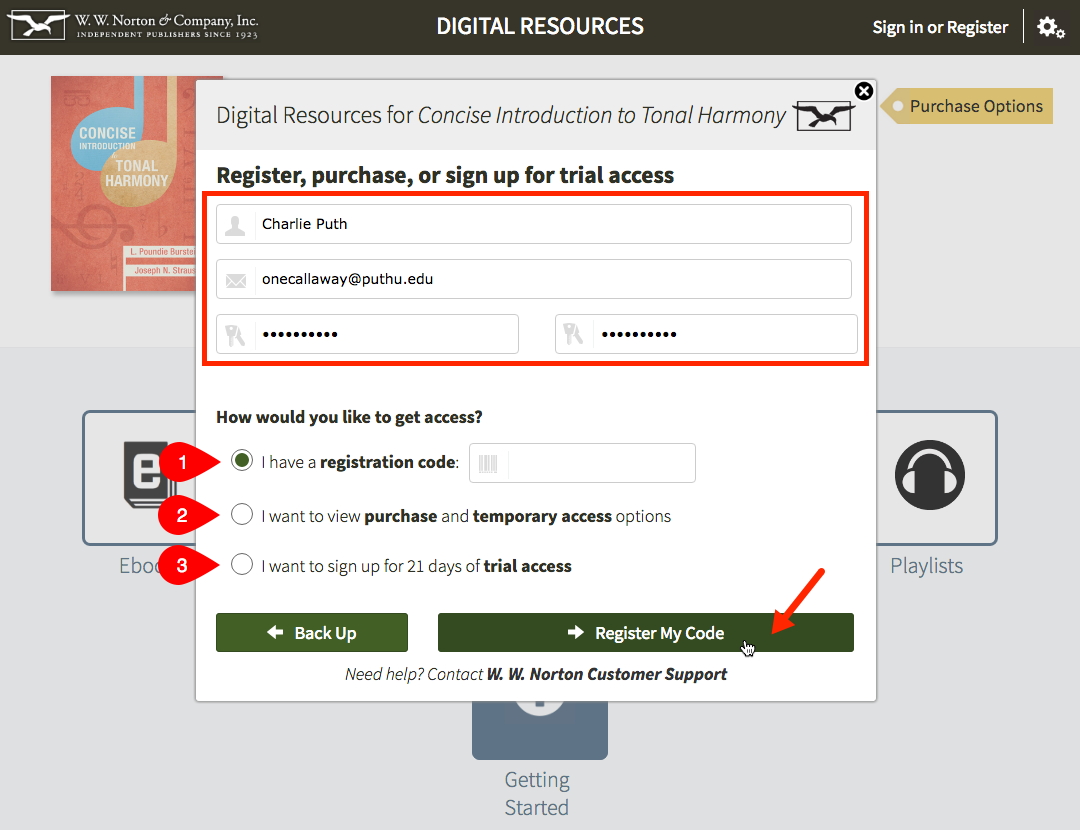
- If you have a Total Access registration code from a new copy of your textbook, select the circle next to "I have a registration code:," enter your code into the field to the right, and click the Register My Code button. Follow the screen prompts to register your code and create your account.
- If you would like to purchase Total Access online or you purchased or rented a used copy of your textbook, click the circle next to "I want to purchase access" and click the Show Purchasing Options button. Follow the screen prompts to complete your purchase and create your account.
- If you would like to register for trial access before purchasing or registering for Total Access, select the circle next to "I want to sign up for 21 days of trial access" and click the Sign Up for Trial Access button. Follow the screen prompts to register for trial access and create your account.
How do students join my Online Workbook section?
Sections in the Online Workbook are called Student Sets.
To assign and grade your students' worksheets, you will need to create a Student Set for your class section, and then have students join this Student Set. If you have already created a Student Set for other products found on the Digital Resources page for your textbook, like InQuizitive quizzes or the Norton Ebook Reader, you can use the same Student Set for multiple products at the same time, including the Online Workbook.
Here's how to create a Student Set:
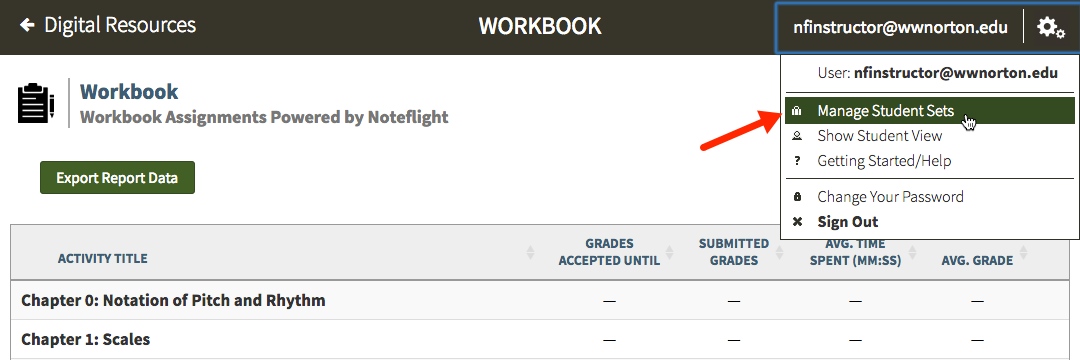
After logging in to the Digital Resources page for your textbook, click the gear menu at the top right of the page and select "Manage Student Sets."
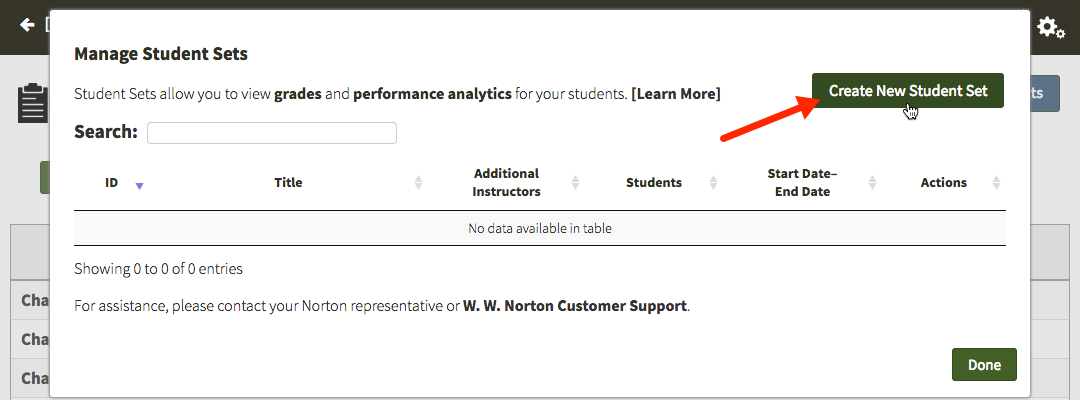
Click "Create New Student Set."
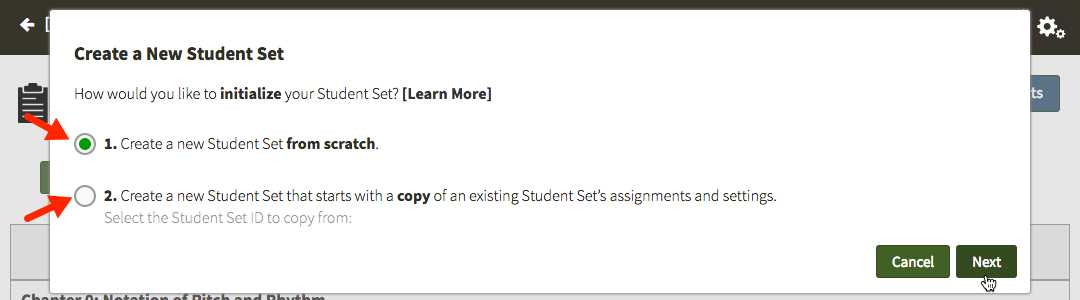
Select the type of Student Set you would like to create.
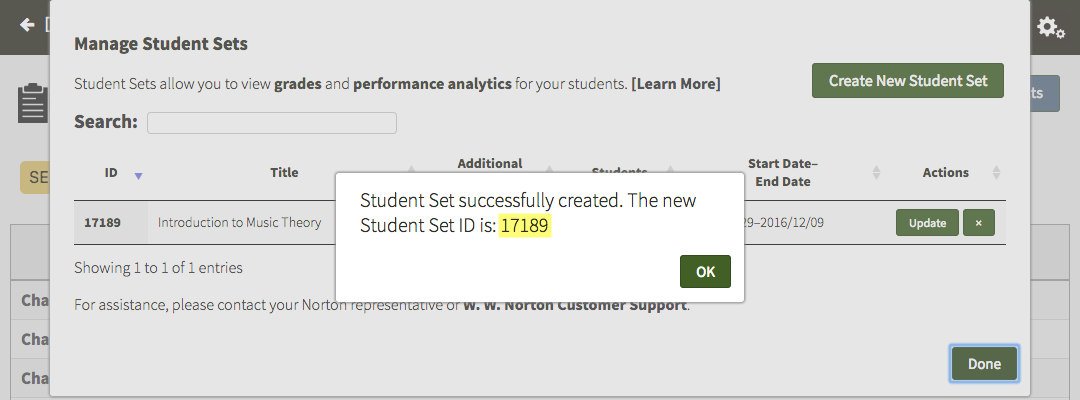
Follow the instructions from there to create a Student Set. Make a note of the Student Set ID and distribute it to your students.
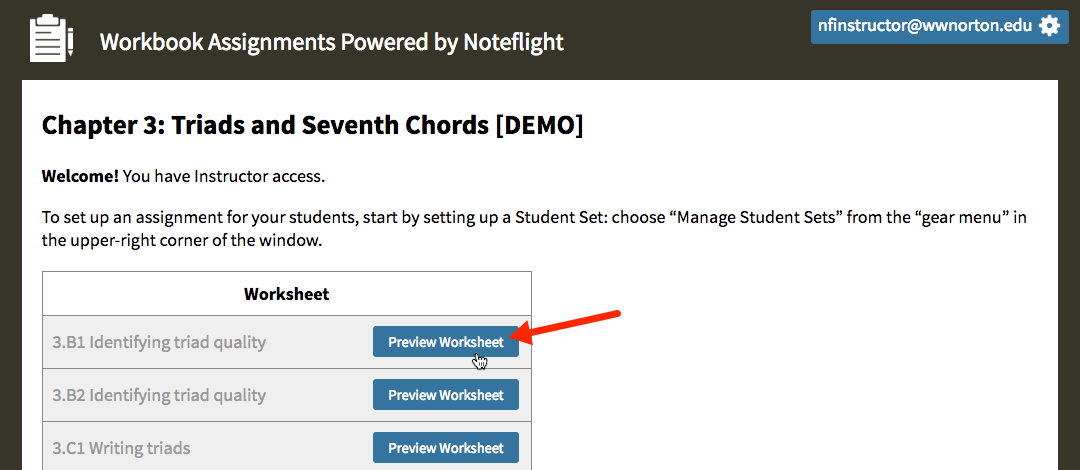
How do I preview the worksheets found in the Online Workbook?
From the Digital Resources page for your textbook:
- Click on the Workbook tile.
- Select a chapter from the list.
- Click on the Preview Worksheet button to the right of the worksheet you'd like to preview.
Note: When previewing worksheets while logged in as an instructor, you will not have the ability to edit the worksheets. If you would like the ability to edit the worksheets like a student, please follow these steps:
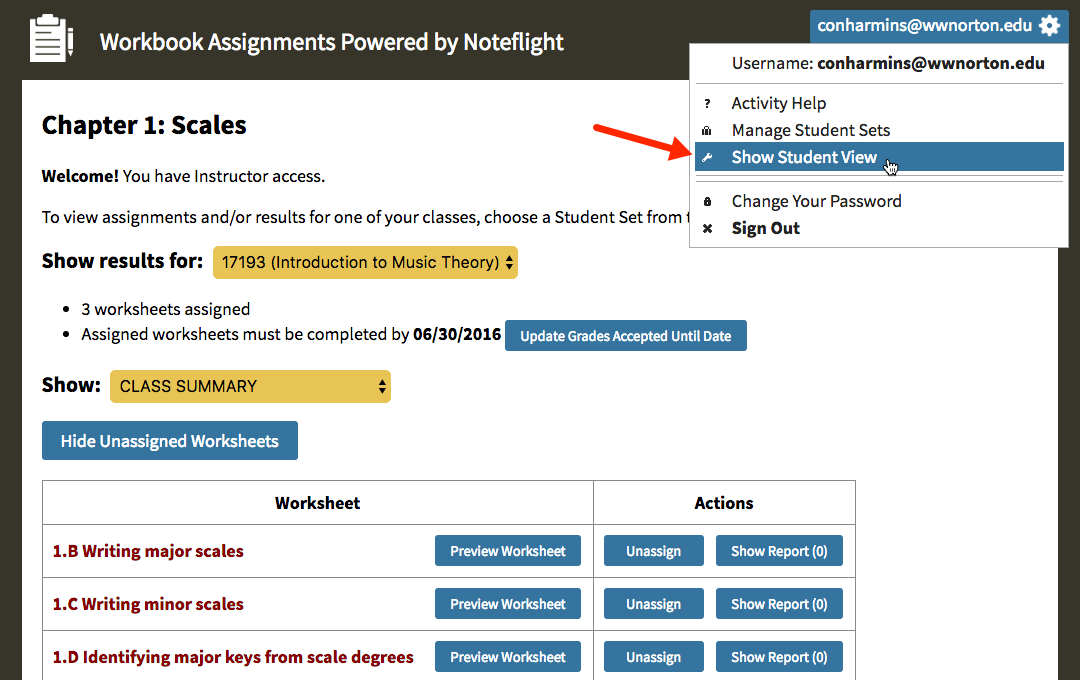
Student View
Please note, you must open a chapter of the workbook and turn on Student View prior to opening a worksheet or the editing tools will not load properly.
After opening a chapter of the workbook, click on the gear menu in the upper right corner and select Show Student View.
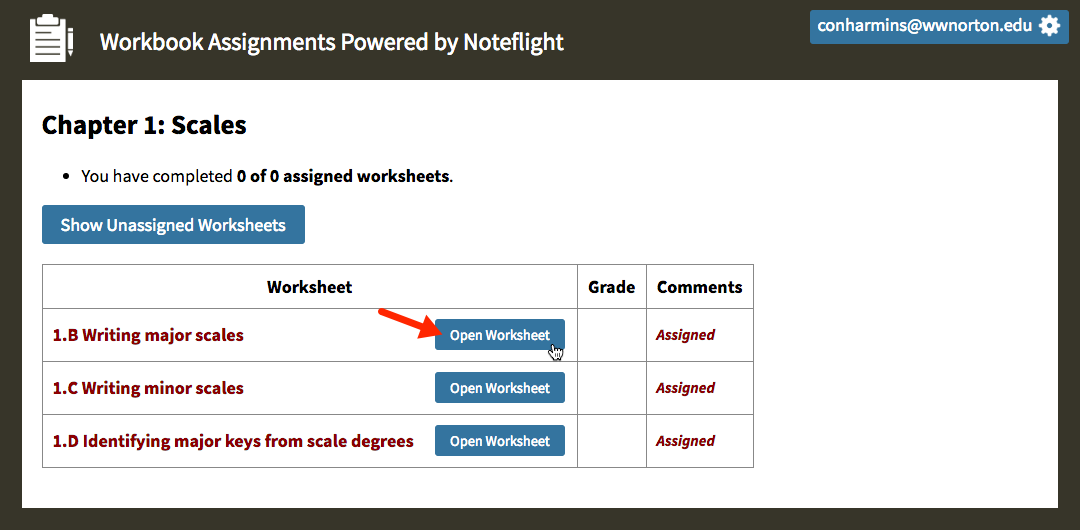
On the next screen, click on the Open Worksheet button to the right of the worksheet you'd like to view.
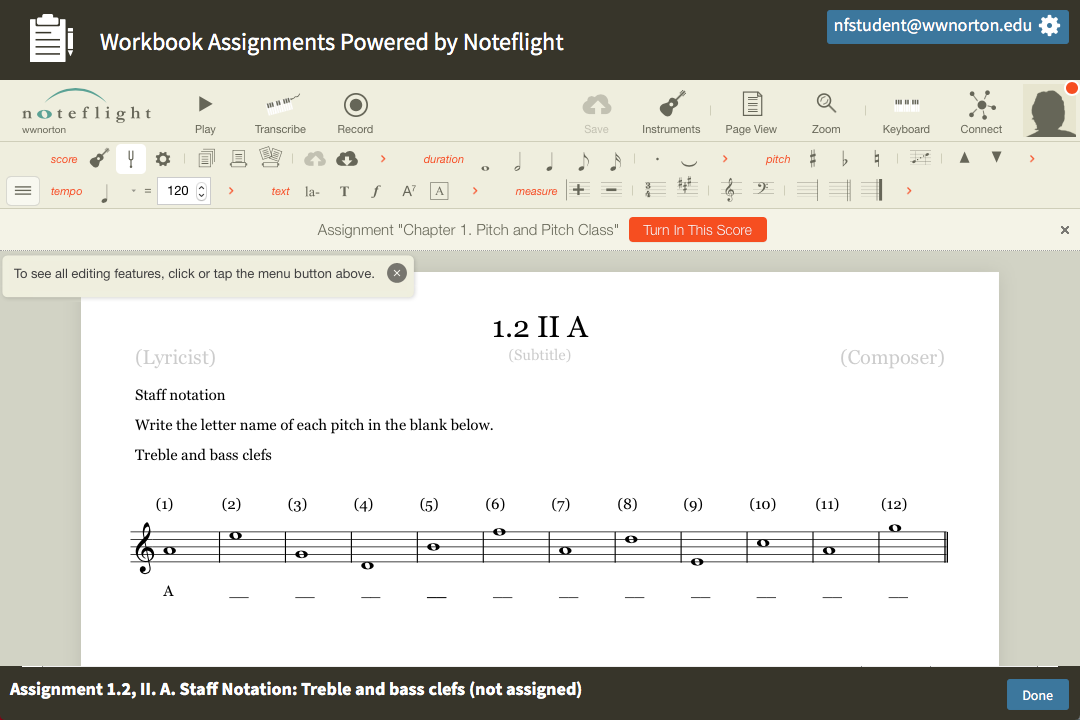
The worksheet will then open using the student version of the Noteflight editor, which will allow you to edit the worksheets like a student. The only difference you will see is that the Turn In This Score button is not at the top of the editor since, as the instructor, you will not be submitting these worksheets for grades. Click on the Done button in the bottom right corner to close the worksheet and return to the workbook.
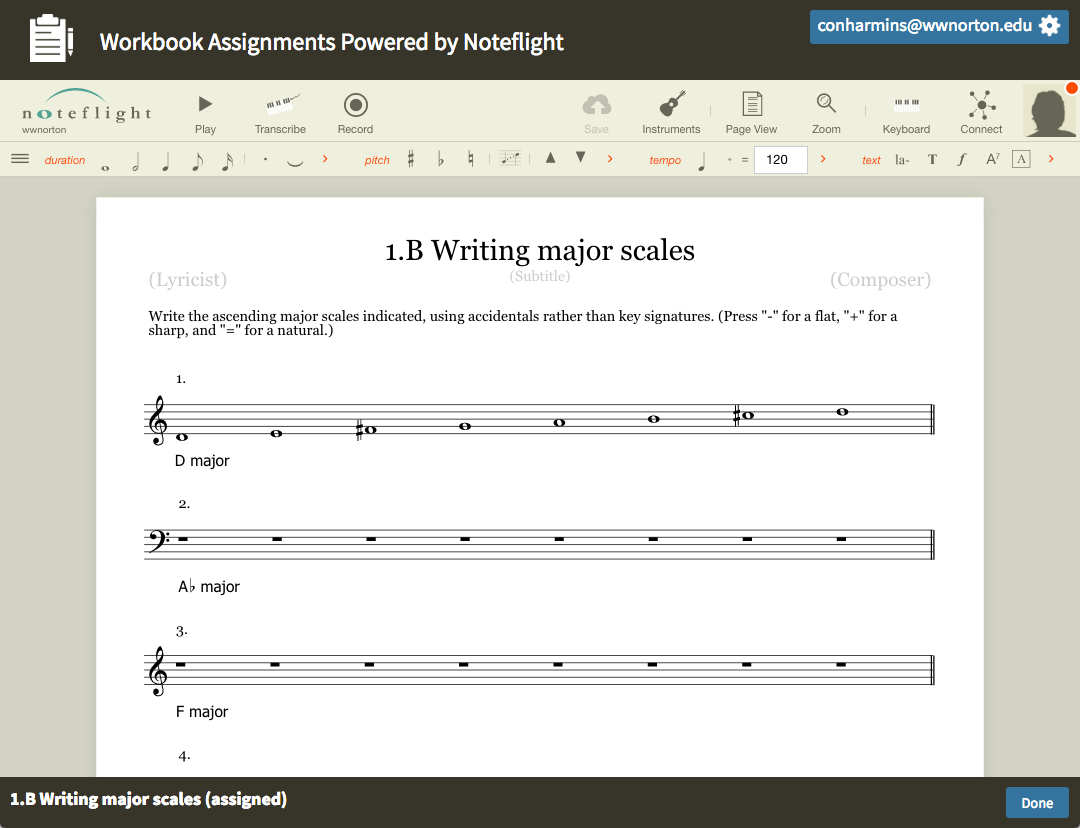
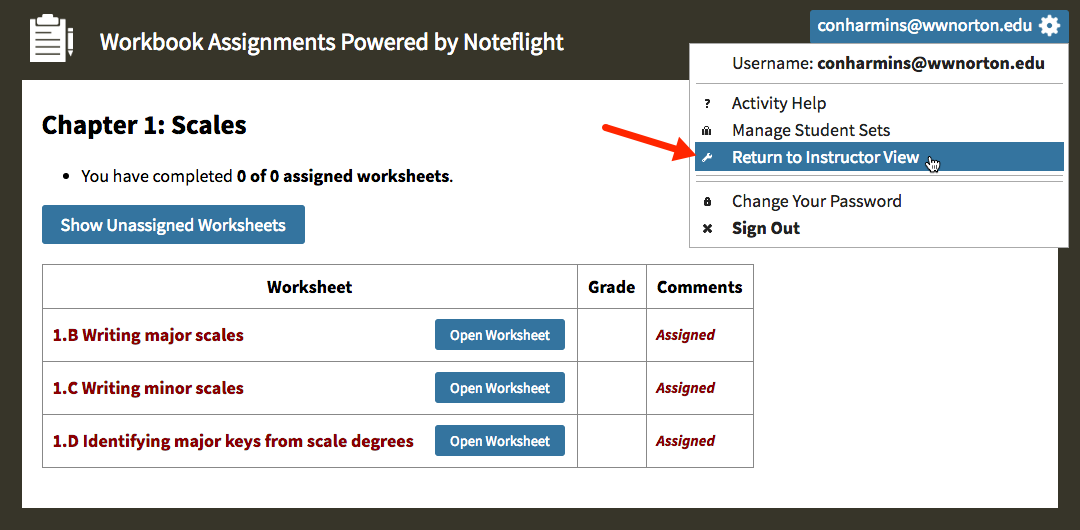
To return to the instructor view of the workbook, click on the gear menu and select Return to Instructor View from the menu. When you return to Instructor View, the Assign/Unassign and Show Report buttons will appear to the right of each worksheet.
How do my students and I use the Noteflight editor?
Here are direct links to some techniques that are featured in the worksheets found in the Online Workbook:
Which devices and browsers are best when using the Online Workbook?
The Online Workbook powered by Noteflight works on desktop and laptop computers, tablets, and smartphones, however desktops, laptops, and tablets are recommended.
Please refer to Minimum Systems Requirements
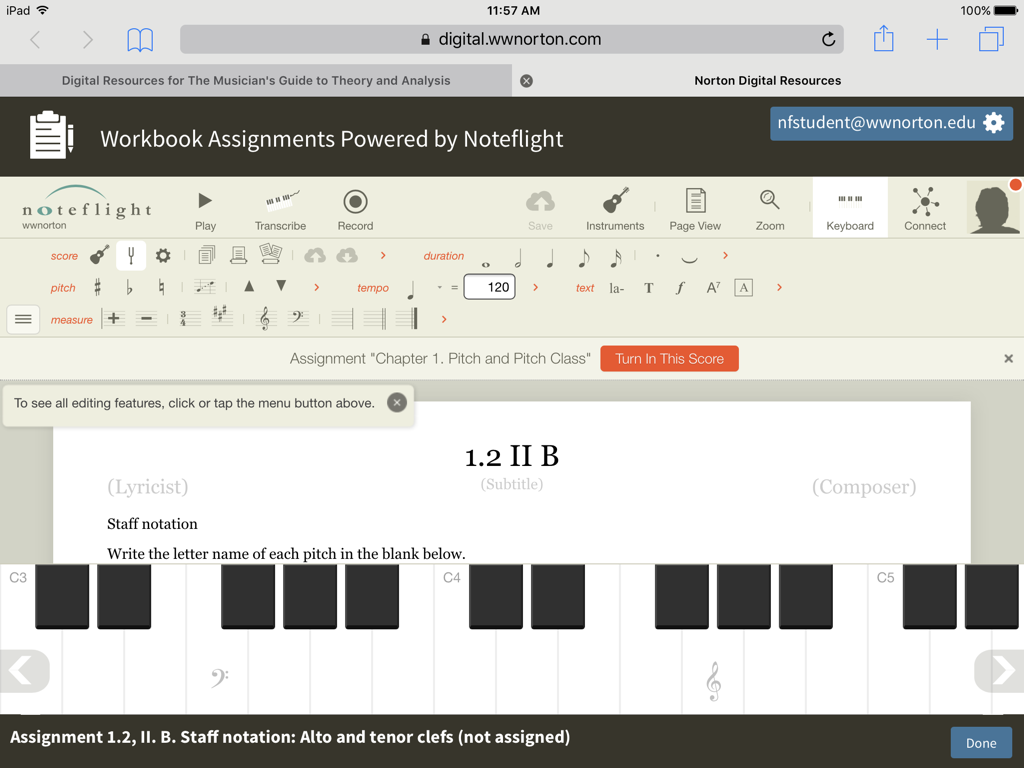
Why won't the worksheets load in Safari?
Due to a default cookie setting within Safari, the worksheets may fail to completely load and your screen will look like this:
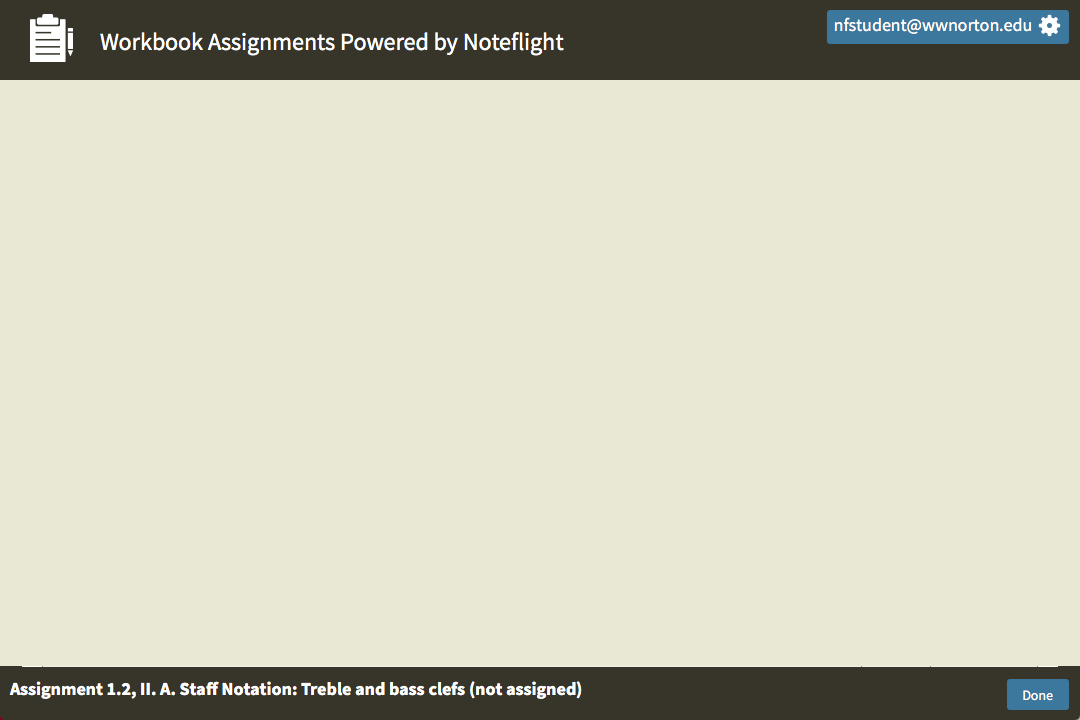
There are two solutions to this issue:
The quick and easy solution...
Before opening a worksheet in the online workbook, open a new tab in your Safari browser and go to noteflight.com. After the page loads completely, you can simply close the tab and return to the online workbook; you do not need to sign in or interact on Noteflight's site.
After you close the Noteflight tab and return to the online workbook, you should now be able to successfully open and interact with all of the worksheets using Safari on your computer or iOS device.
The permanent solution for macOS...
For Safari versions 11.0 or less
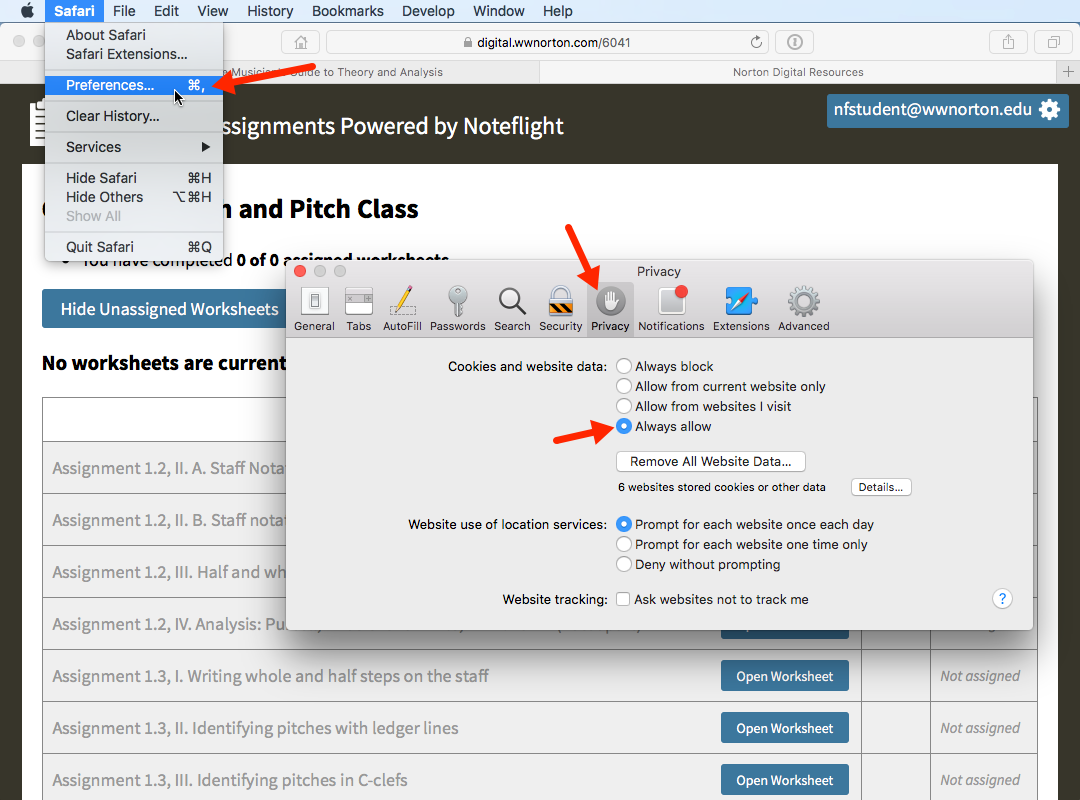
To fix this issue permanently within Safari on your computer, open the Safari menu, click on Preferences..., select the Privacy tab, and change the Cookies and website data setting to Always allow cookies.
For Safari versions 11.0 or later
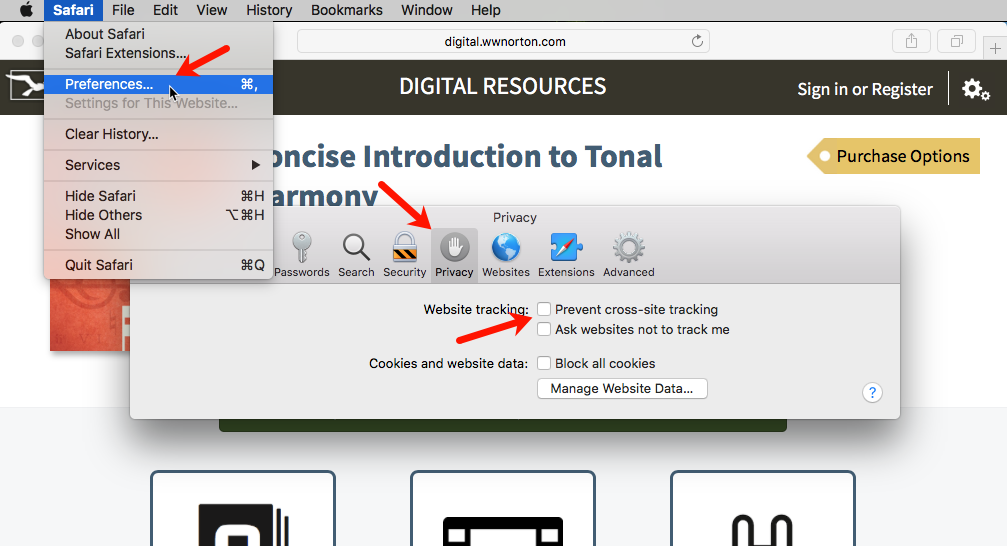
To fix this issue permanently within Safari on your computer, open the Safari menu, click on Preferences..., select the Privacy tab, and uncheck the Website Tracking: Prevent cross-site tracking box.
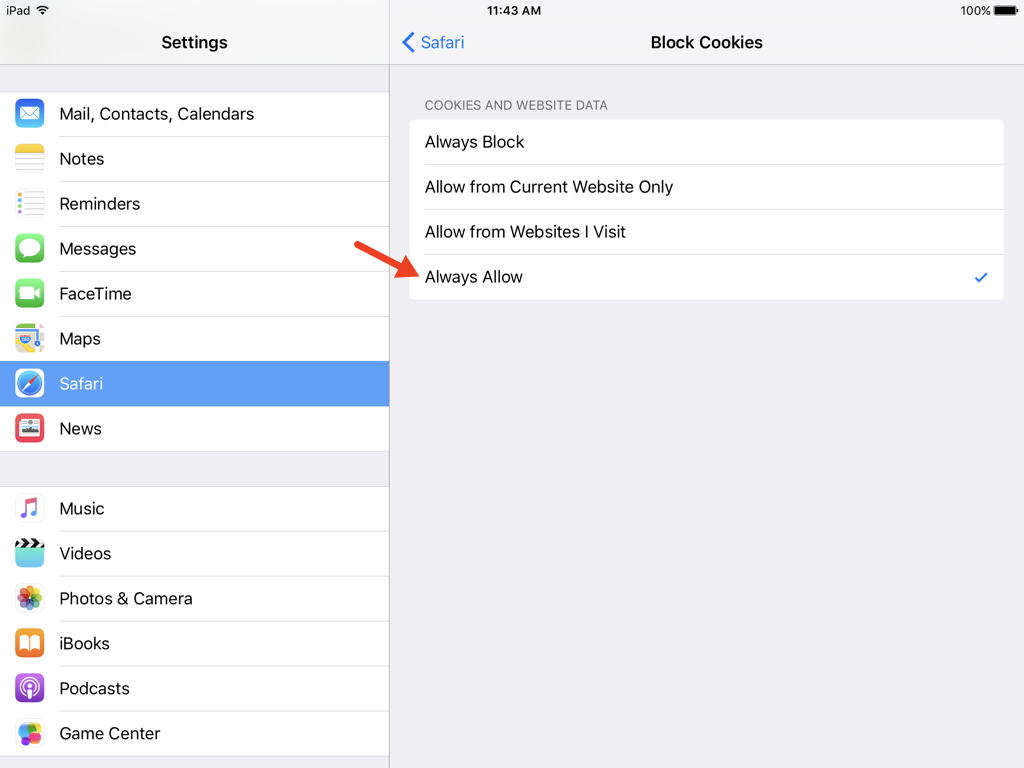
The permanent solution for iOS...
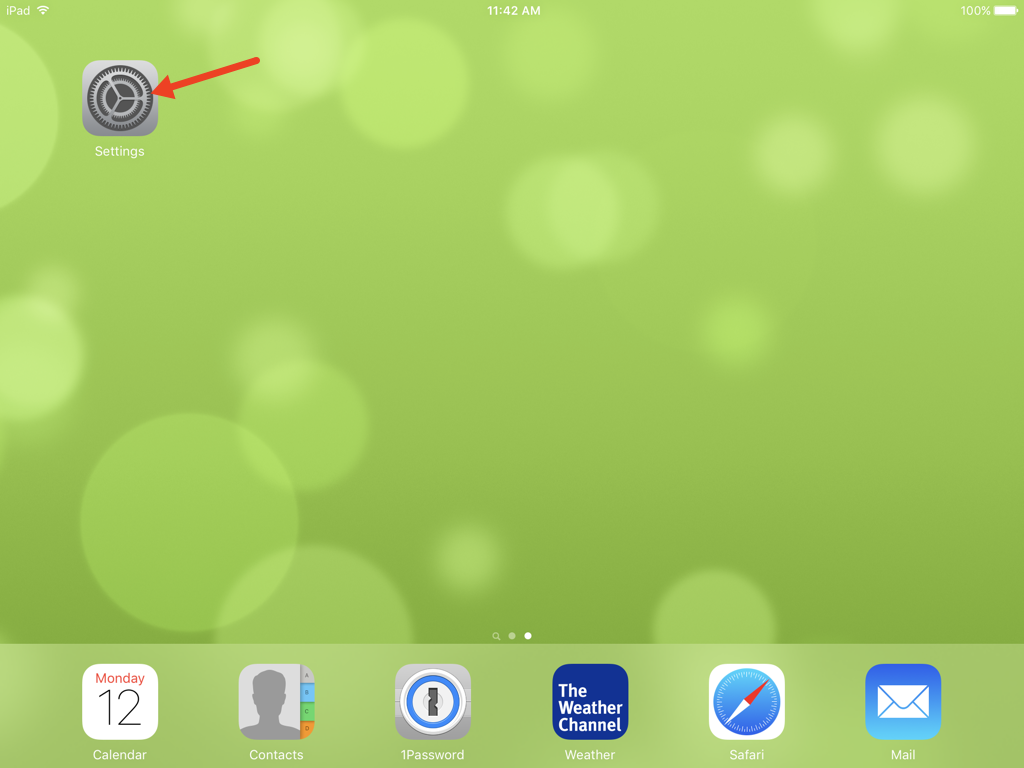
If you're using Safari on an iOS device, open the Settings app.
For iOS versions 10.0 or earlier
Scroll down the list on the left side of the screen and select Safari. Then, scroll down the options that appear on the right side of the screen and tap on Block Cookies.
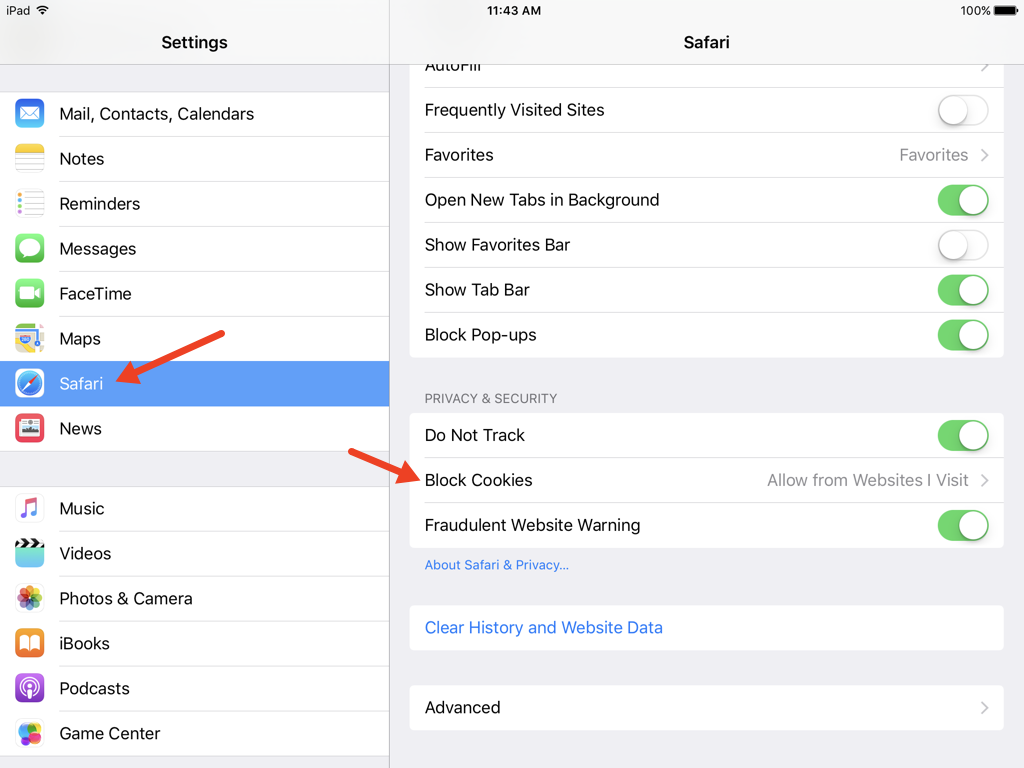
In the Block Cookies settings, select Always Allow. Once this change is made, you can close the Settings app and return to the online workbook in Safari.
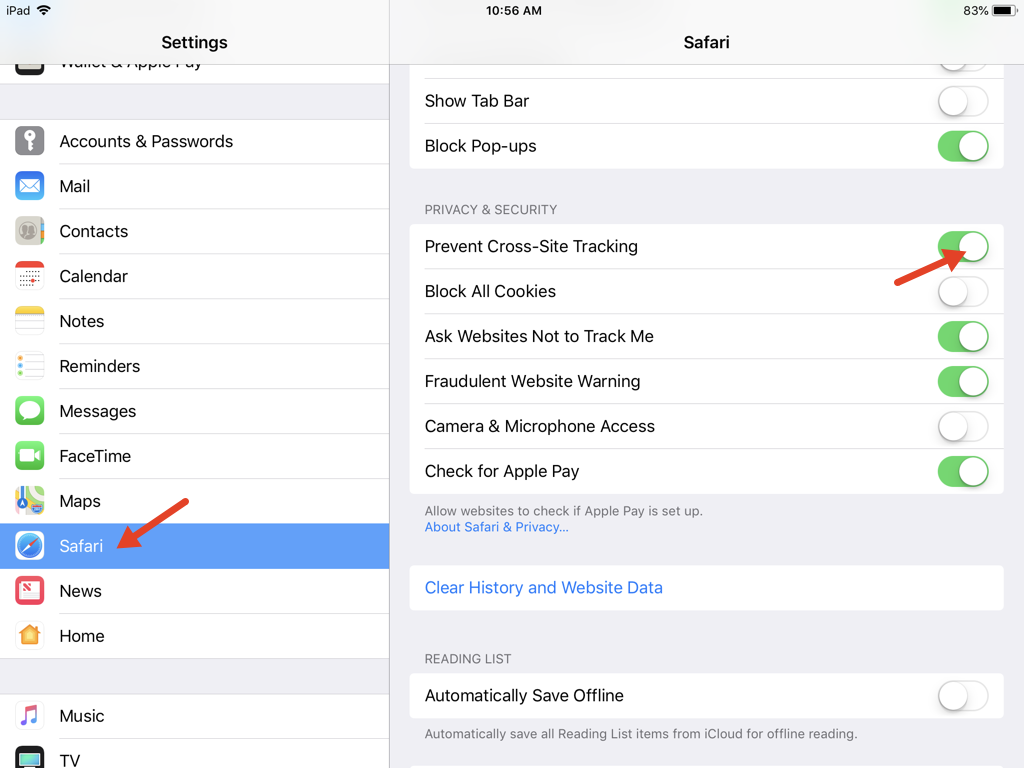
For iOS versions 11.0 or later
Scroll down the list on the left side of the screen and select Safari. Then, scroll down the options that appear on the right side of the screen and tap on the toggle for the Prevent Cross-Site Tracking option (the bar will turn white).
After making this adjustment on your computer or iOS device, you should be able to successfully open and interact with all of the worksheets found in the online workbook using Safari.
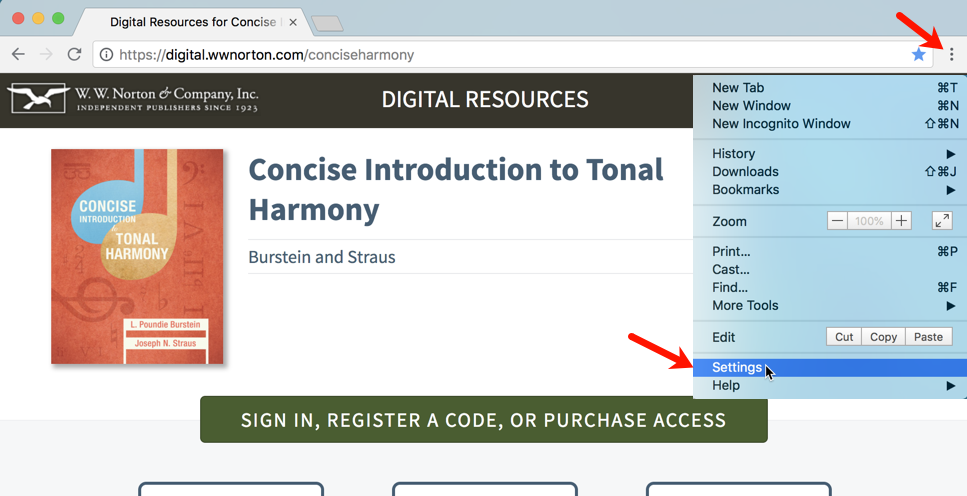
Why won't the worksheets load in Chrome?
Due to a default cookie setting within Chrome, the worksheets may fail to completely load and your screen will look like this:

The solution to this issue:
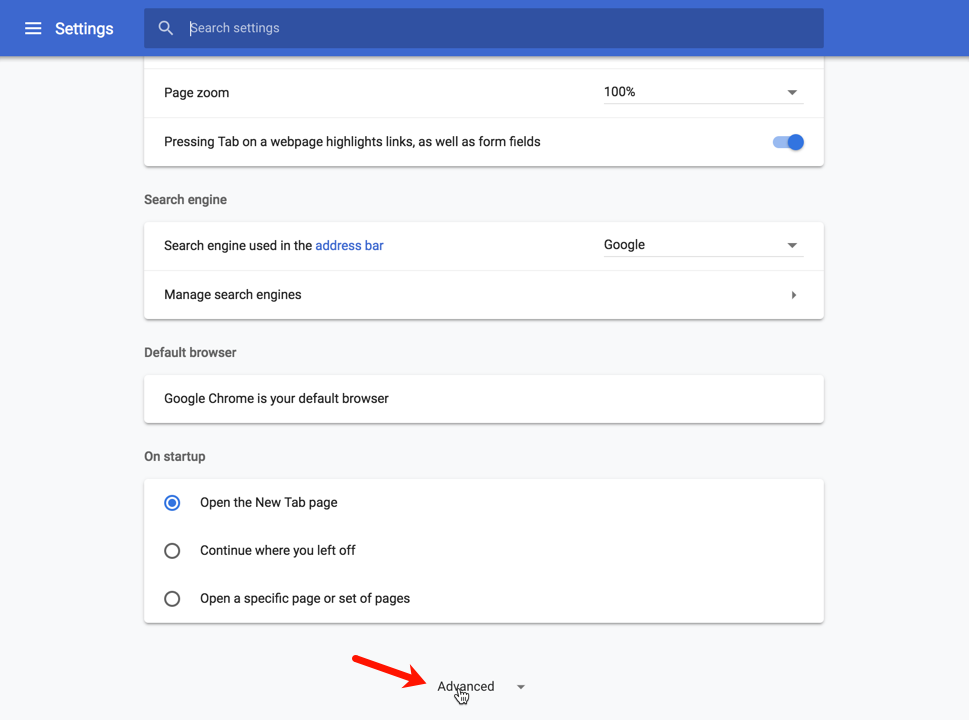
Go to the Settings menu in Chrome and scroll down to open the Advanced settings menu.
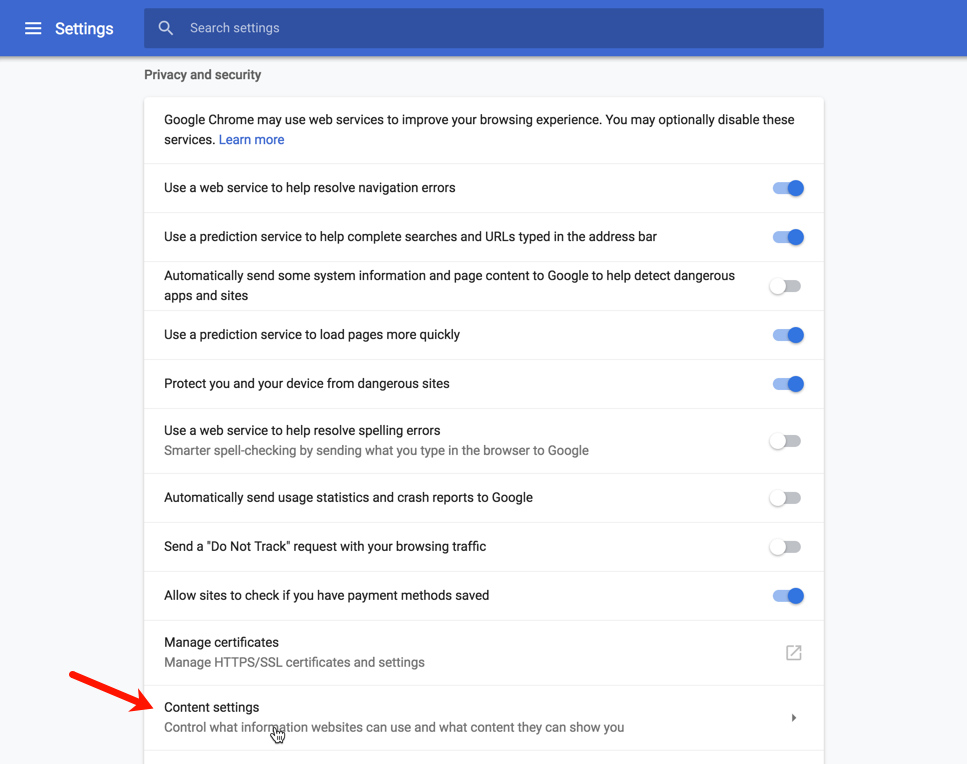
Within the Privacy and security settings menu, select Content settings.
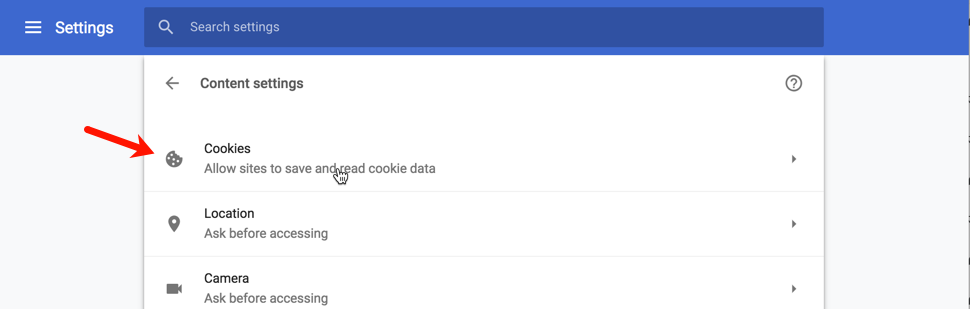
Then select the Cookies menu.
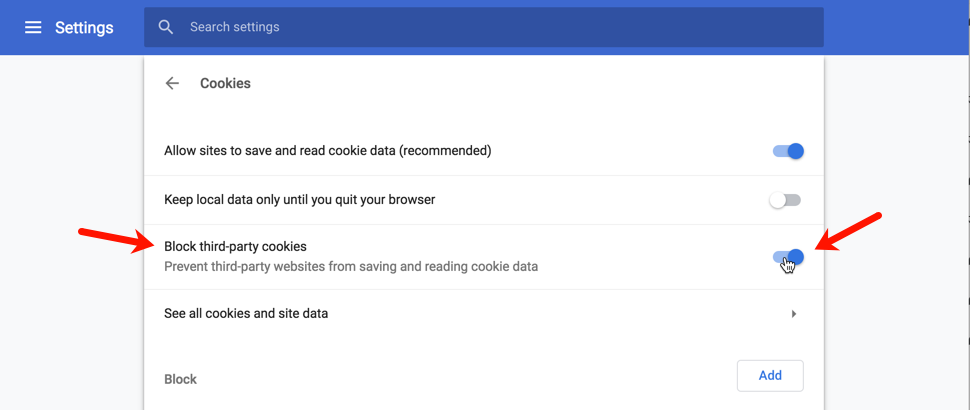
Chrome automatically has Block third-party cookies set to on. Click on the blue toggle to the right of the menu to turn this off (the toggle will turn gray).
After making this adjustment on your computer, you should be able to successfully open and interact with all of the worksheets found in the online workbook using Chrome.
Submit a Support Request
Still need help? Submit a support ticket and a customer support specialist will be happy to assist you.
Opened a request already? Click here for an update.