
InQuizitive provides instructors with the ability to assign due dates, choose which learning objectives appear in assignments, modify the number of questions that appear in assignments, adjust Target Scores, and copy assignments and settings between Student Sets.
How do I set due dates?
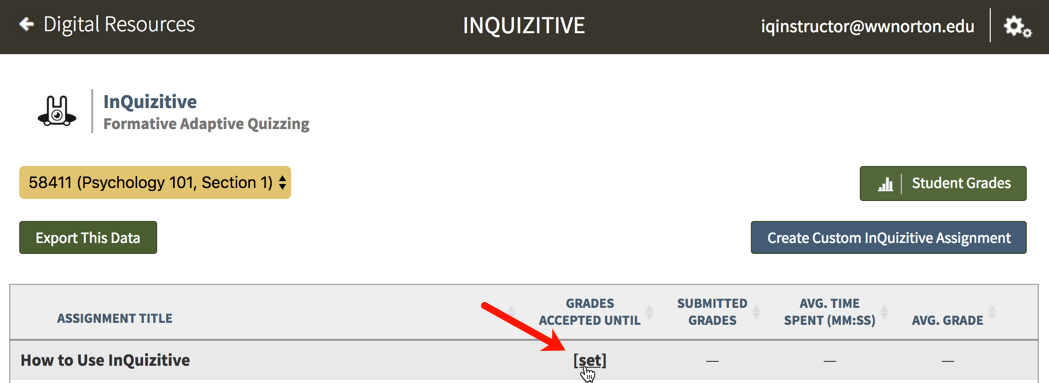
You can set Grades Accepted Until dates for InQuizitive assignments. After a Grades Accepted Until date for an assignment passes, students can continue to answer questions, but will no longer be able to improve their grade on that assignment.
Here’s how to set up Grades Accepted Until dates:
Select a Student Set in the Select a Student Set drop-down menu.

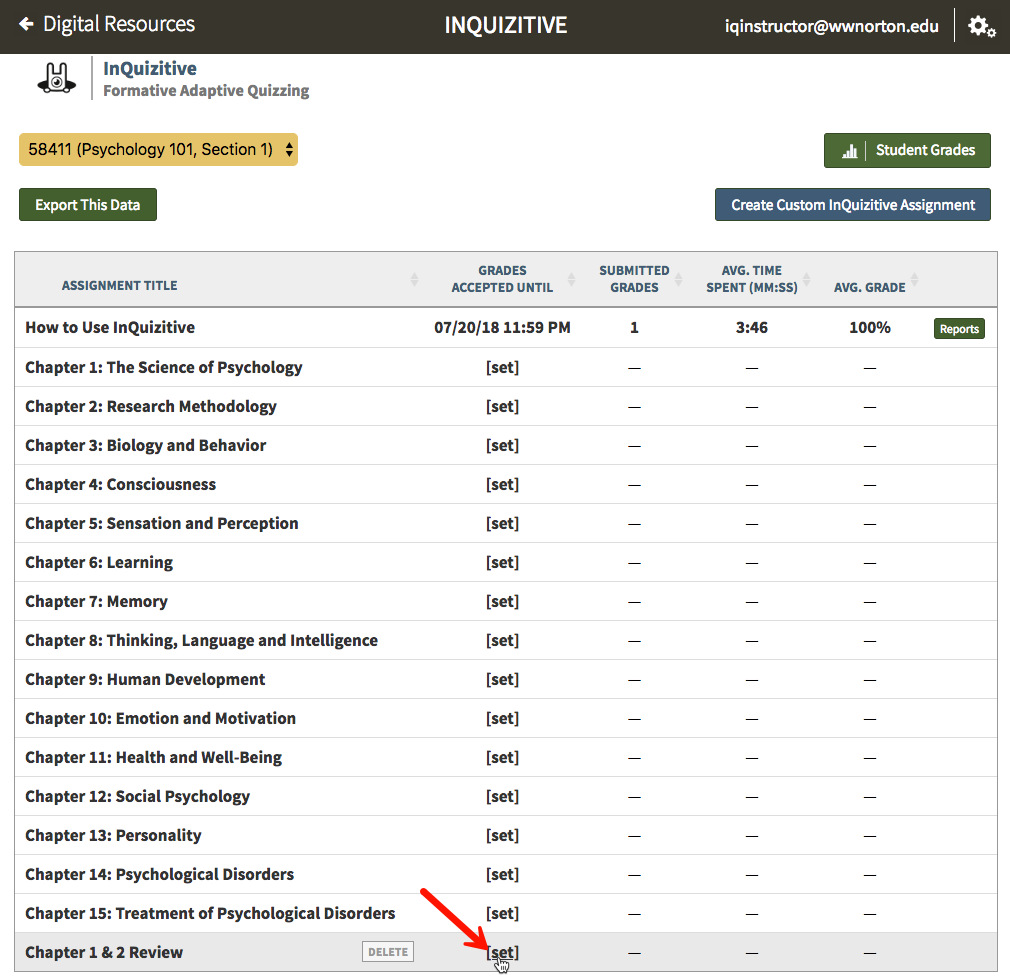
Click [set] across from the assignment.
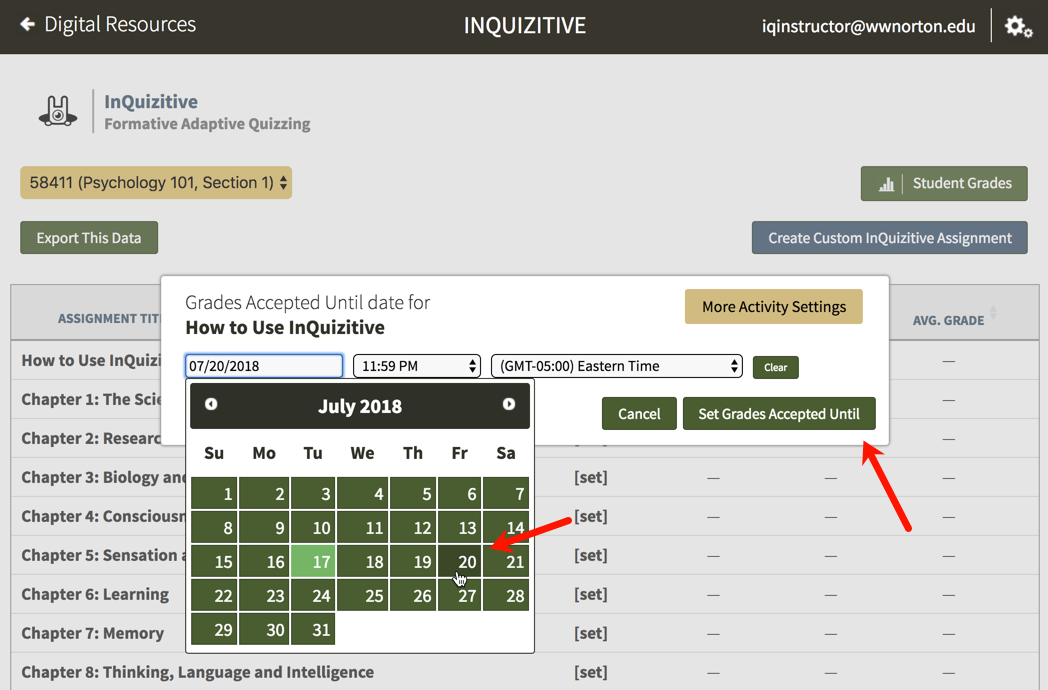
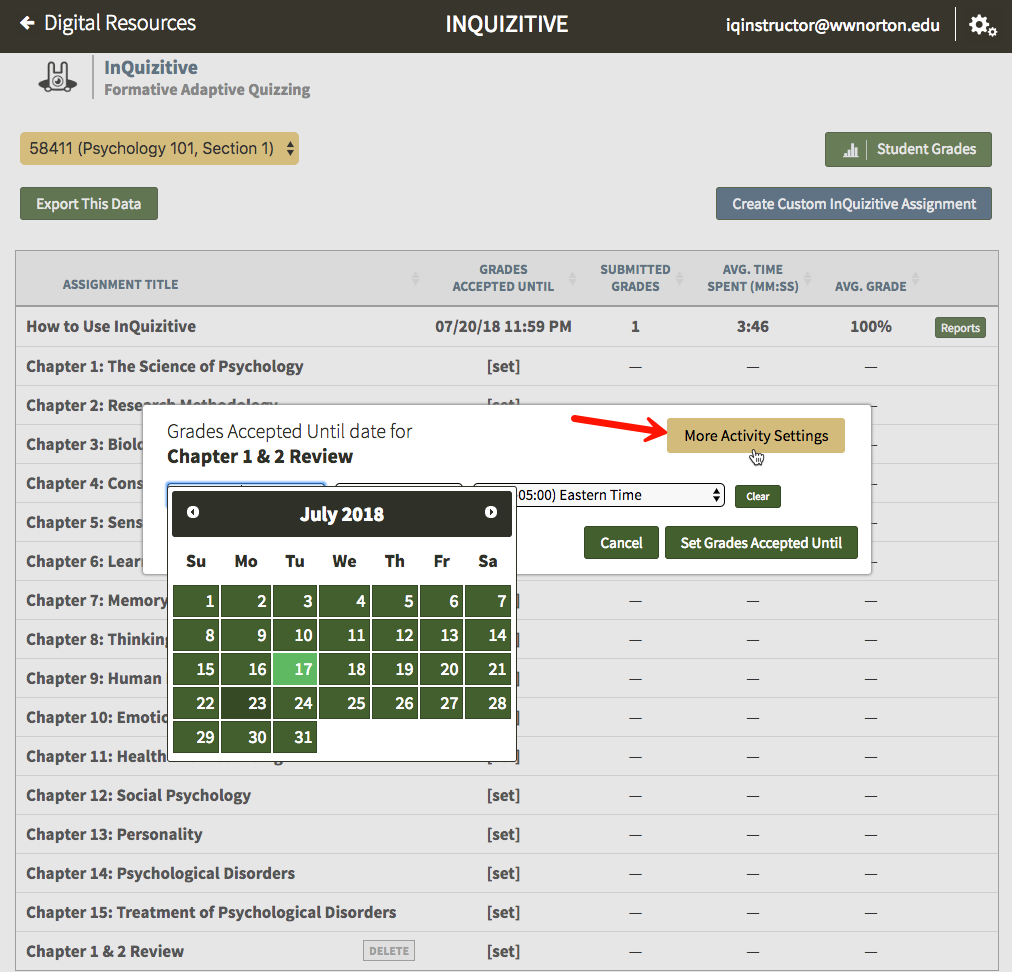
Select a Grades Accepted Until date and click the Set Grades Accepted Until button. The first time you set a GAU, you'll be asked to choose your time zone. The next time you create a GAU, your time zone will be automatically selected.
Note: If you’re using the Student Grades grid to track average InQuizitive grades, only assignments with Grades Accepted Until dates will count toward InQuizitive averages. In other words, if you're using InQuizitive for a grade, set Grades Accepted Until dates for all assignments you're asking students to complete!
How do I modify the number of questions and Target Score in an activity so that student receive a grade and reach 100%?
Here's how to modify both the number of questions and Target Score accordingly:
Select a Student Set in the Select a Student Set drop-down menu.

Click [set] or the GAU date across from the assignment.

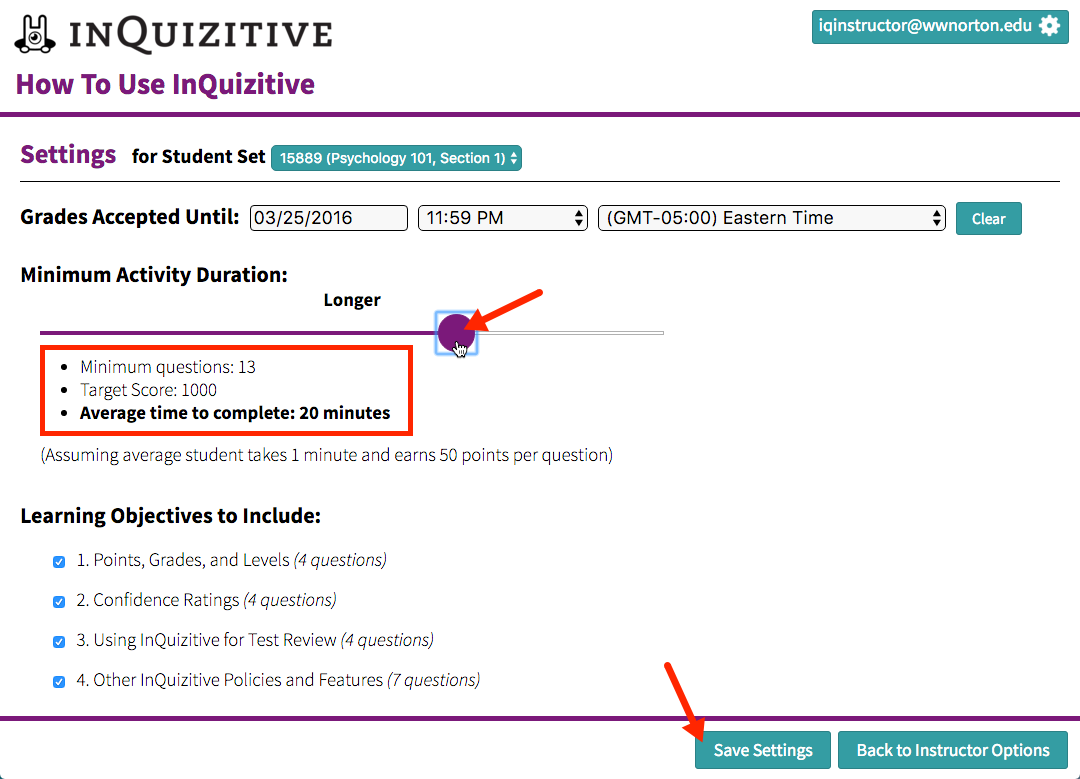
In the next window, click the More Activity Settings button.

Use the Minimum Activity Duration slider to modify how long or short you’d like the activity to be and click the Save Settings button.
Still need help? Watch these videos:
How do I choose which questions students answer in an InQuizitive assignment?
You can’t choose which questions students answer. However, you can omit Learning Objectives that won’t be covered in an InQuizitive assignment via the activity settings page, and thus, students won’t receive questions for those Learning Objectives.
Here’s how to omit Learning Objectives:
Select a Student Set in the Select a Student Set drop-down menu.

Click [set] or the GAU date across from the assignment.

In the next window, click the More Activity Settings button.

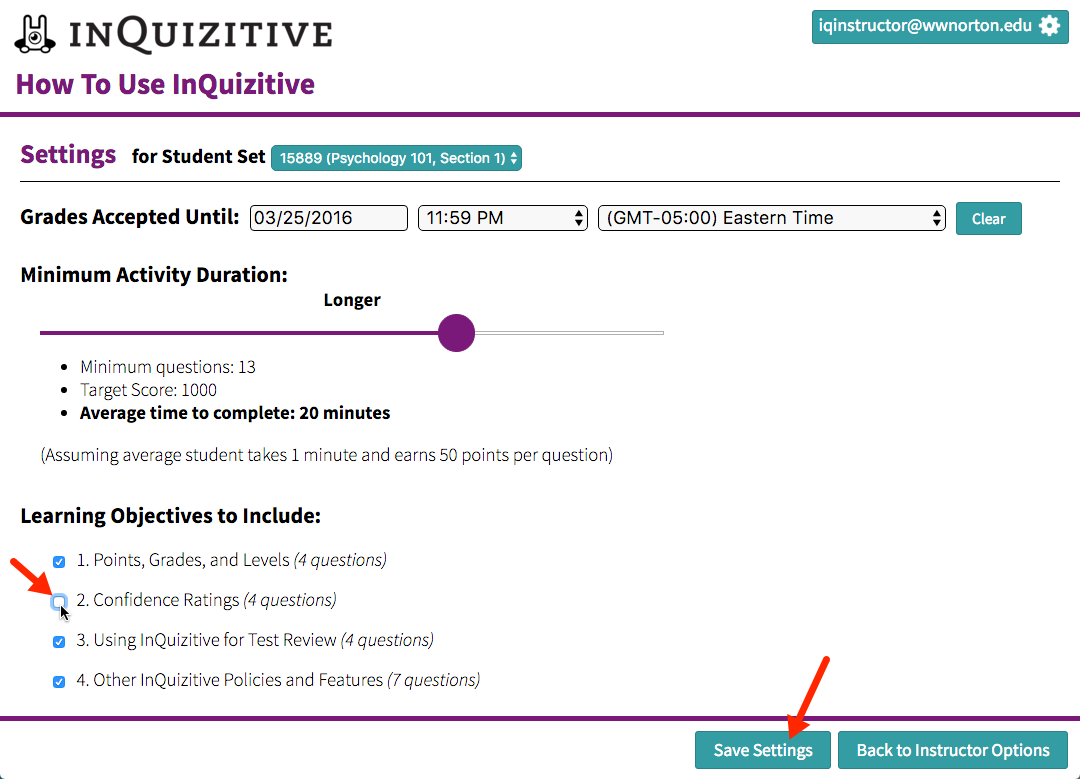
Near the bottom of the page, uncheck any Learning Objectives you don’t want students to be quizzed on and click the Save Settings button.
Still need help? Watch this video.
How do I modify questions in an InQuizitive assignment?
Questions cannot be modified in InQuizitive assignments. However, you can omit questions associated with Learning Objectives that won’t be covered in an assignment.
If you or your students should come across any problematic questions, please report them via the Question Help/Challenge button, and the Norton media editorial team will address them immediately.
What types of questions will students see in InQuizitive activities?
Our goal in developing InQuizitive has been to provide the technology for our question authors to ask about each individual concept in a way that’s engaging, thought-provoking, and fun for students. We’ve developed many different question types in InQuizitive—12 at last count (and many types have a number of different “variants”)—to allow us to ask creative questions about the variety concepts and disciplines our books cover.
Every question in InQuizitive is essentially a mini-game in itself and all share the following characteristics:
- All questions are interactive in one way or another: students have to drag-and-drop elements from one place to another; find and click a choice, a part of an image, or a part of a sentence; or type something to answer the question.
- In every question, students get immediate feedback after every click, drag/drop, or keystroke. InQuizitive corrects students as soon as they start down the wrong path to answering a question—before they’ve gone down that path long enough to develop a misunderstanding.
- There is no “I give up” or “Show me the answer” button in InQuizitive. Every question is designed to guide students to generate the correct answer themselves, even if they don’t know the answer when they start.
What if a student doesn't know the answer to a question, or finds a problem with a question?
Students can’t give up or skip questions when they don’t initially know the answer. Instead, students must make an initial guess (after setting their confidence level appropriately), and then InQuizitive guides them to generate the correct answer themselves if their initial guess is wrong.
If a student feels a question is incorrect or unfair, he or she can click the Question Help/Challenge button and briefly explain the issue with the question.
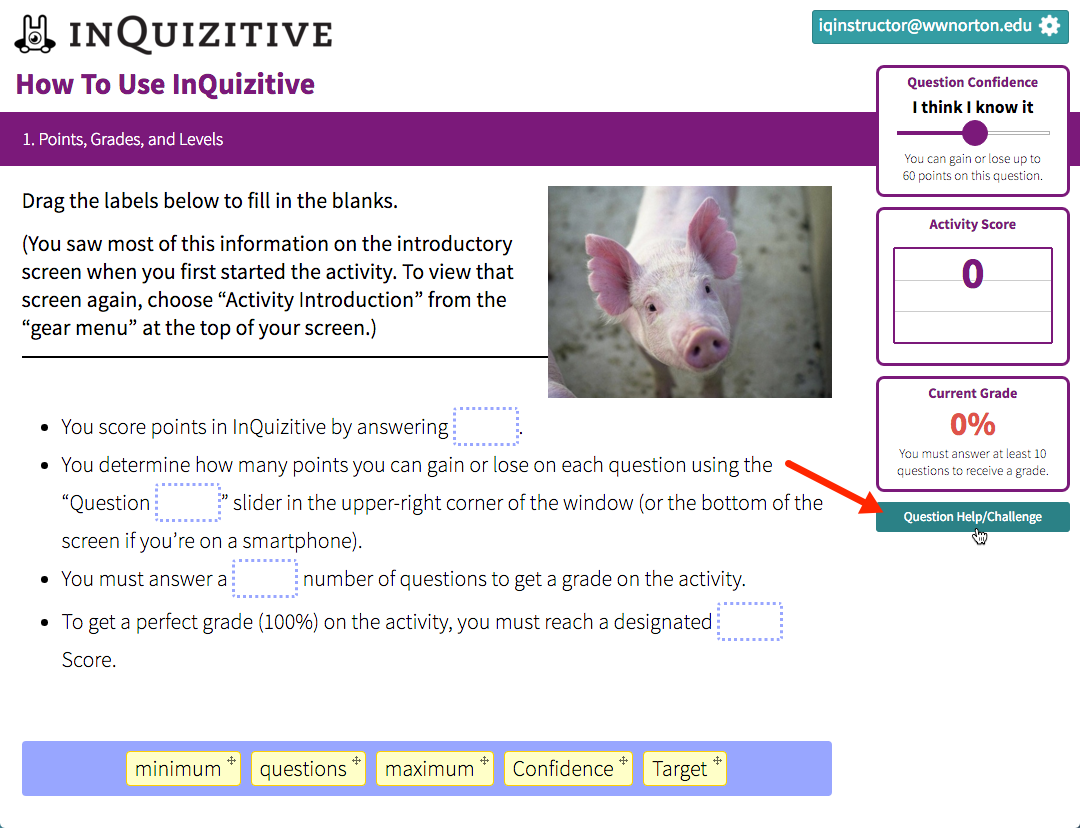
If the question is indeed faulty, any points lost on the question will be returned, and a new question will be shown. Moreover, question challenges are reported back to Norton media editors, who will quickly correct the question, if need be.
Note: Such corrections immediately go into effect for all users in the system. Students can challenge three questions per assignment, and instructors can also report problematic questions from Question Review mode.
How do I copy assignments and settings from one Student Set to another?
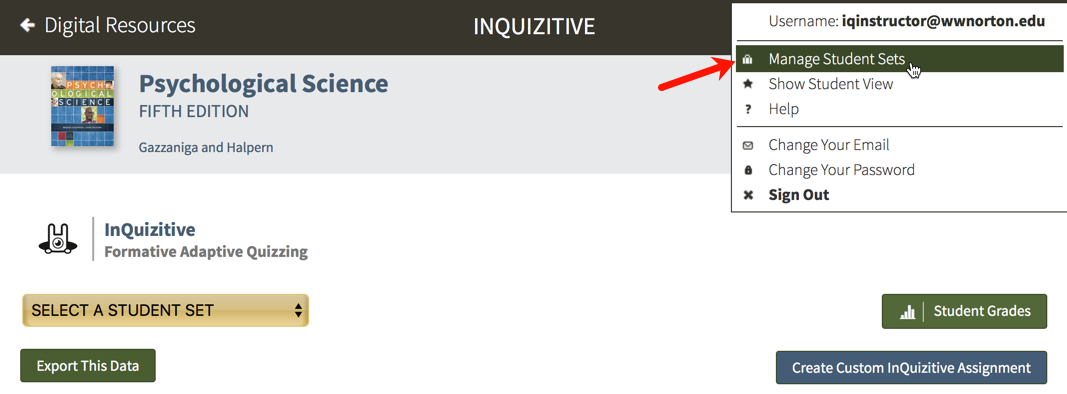
Click on the gear icon in the upper-right corner and select Manage Student Sets from the menu.

There are two ways in which you can copy assignments and settings from one Student Set to another:
1. Copy Assignments and Settings to a New Student Set
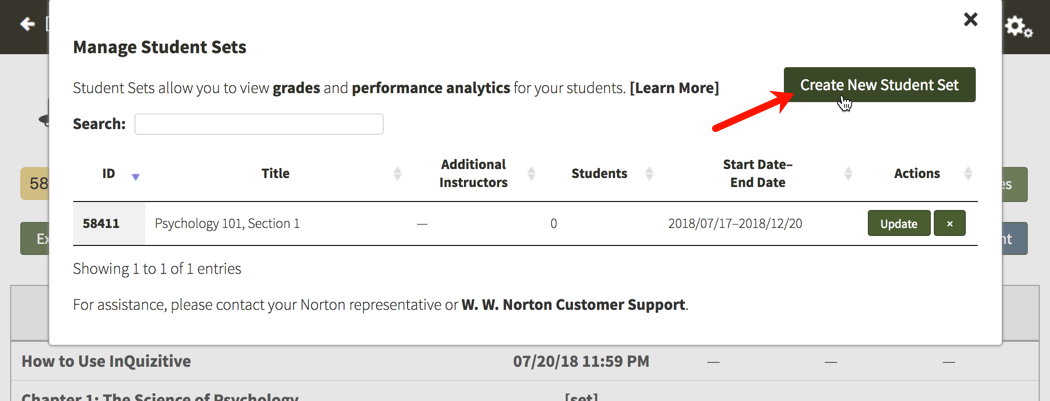
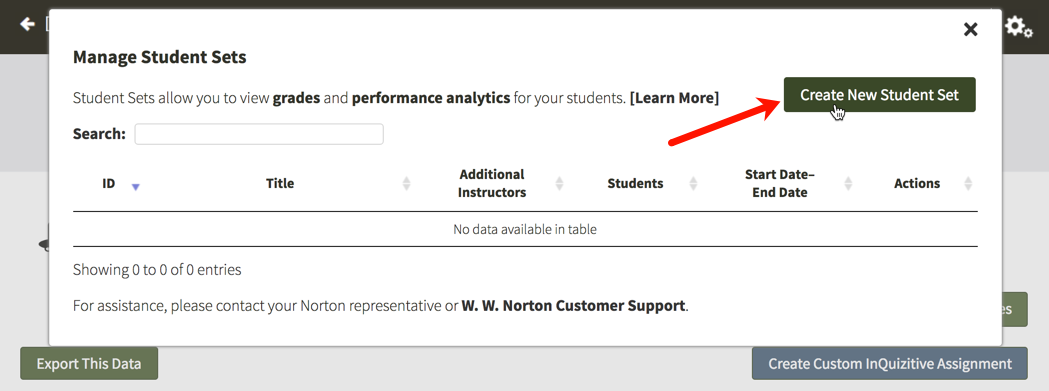
Click on the Create New Student Set button in the upper-right corner.
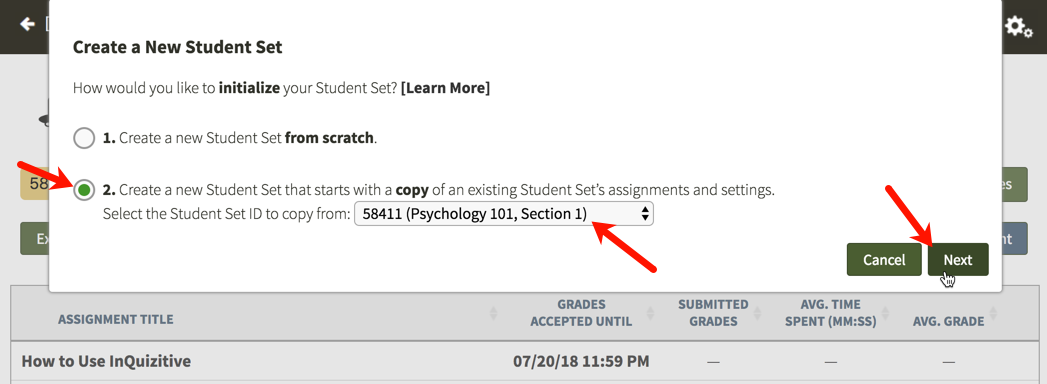
Select option 2, choose a Student Set from the drop-down menu, and click the Next button.
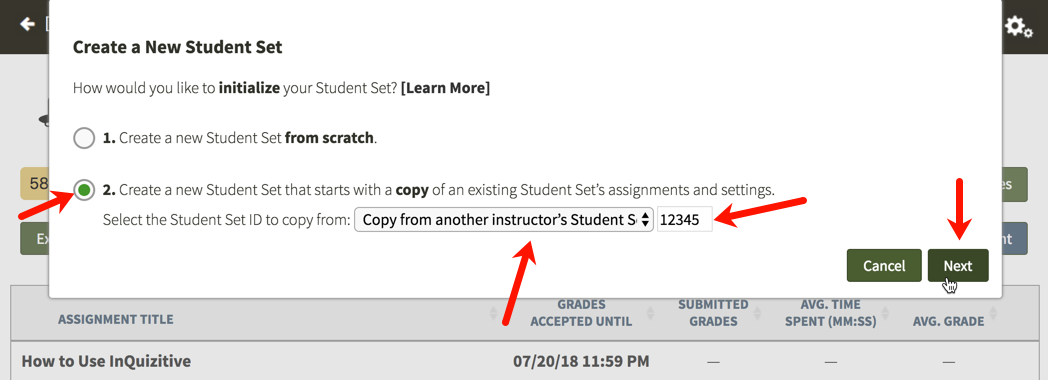
If you would like to copy the assignments and settings from another instructor's Student Set, select option 2, choose Copy from another instructor's Student Set from the drop-down menu, enter the Student Set ID number, and click the Next button.
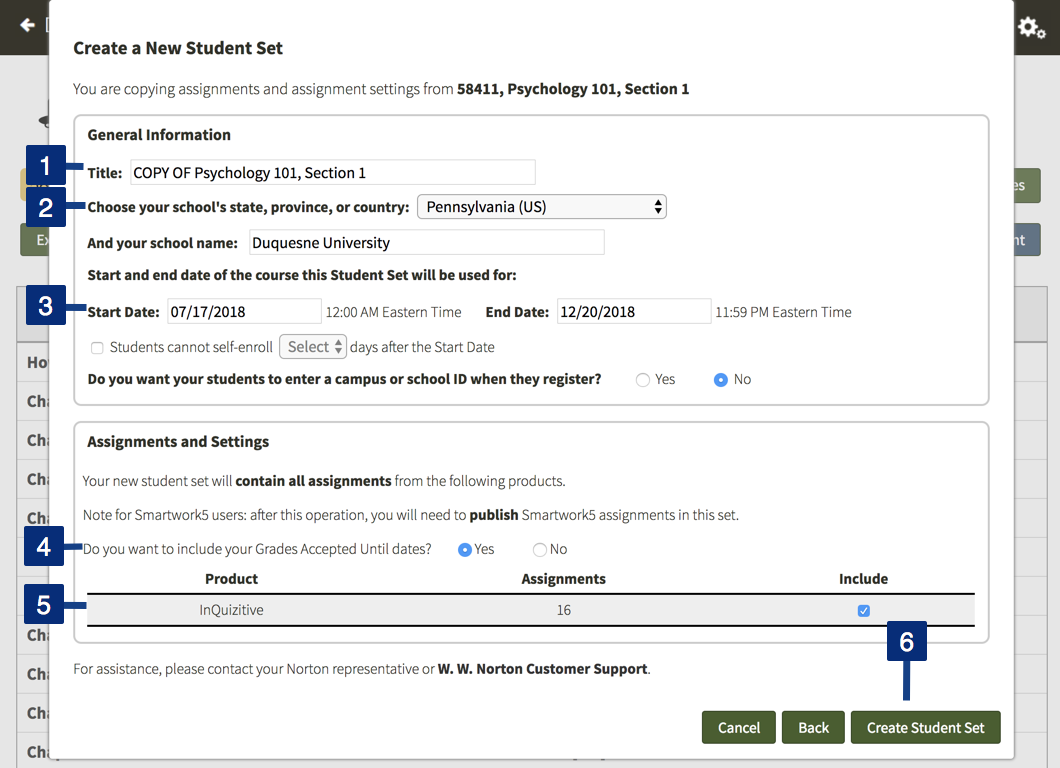
- COPY OF will be added to the beginning of the original Student Set's title. Please feel free to modify the title to fit your needs for this new Student Set.
- Select your state, province, or country from the drop-down menu and begin typing your school's name into the text field that appears. A list of schools will appear as you type. Select your school from the list or continue typing.
- Select a Start and End date for this Student Set.
- If you would like the Grades Accepted Until dates to be copied from the original Student Set, select Yes. All GAUs set in the original Student Set will be copied to this Student Set.
- You'll be given a brief summary of how many InQuizitive assignments will be copied from the original Student Set. The settings that will be copied include: minimum number of questions to complete each activity, selected learning objectives, and any custom assignments that you created; previous student results will NOT be copied to the new Student Set.
- Finally, click the Create Student Set button.
You will then receive a confirmation message. Please review the information and if everything is correct, click the Confirm button to create the new Student Set with the copied assignments and settings. If you need to make any adjustments, click the Back button to return to the previous screen.
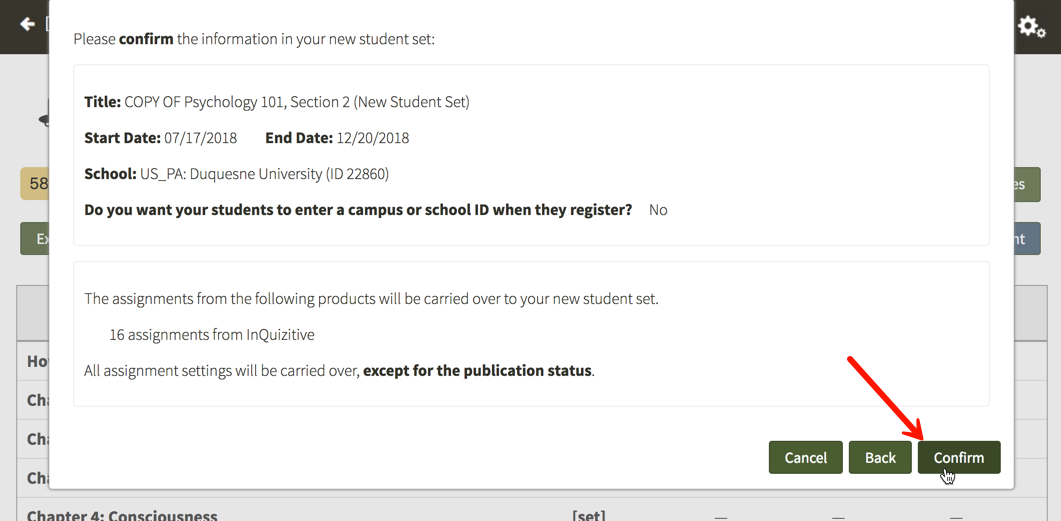
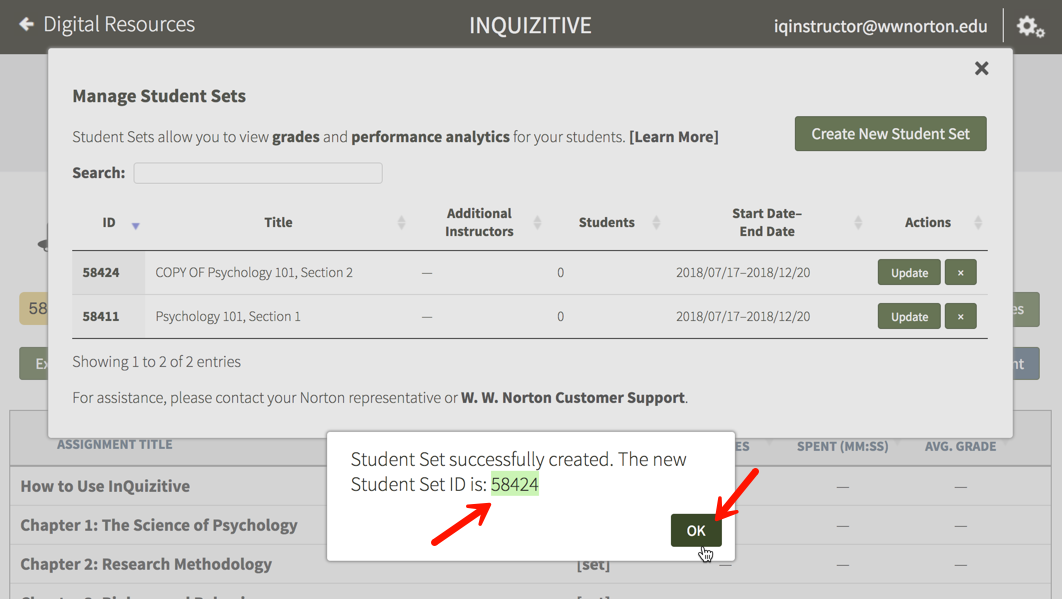
Even though the assignments and settings were copied from another Student Set, your new Student Set will be assigned a new, unique Student Set ID number. Be sure to give your students the new Student Set ID number so that they can join this specific Student Set.
2. Copy Assignments and Settings to an Existing Student Set
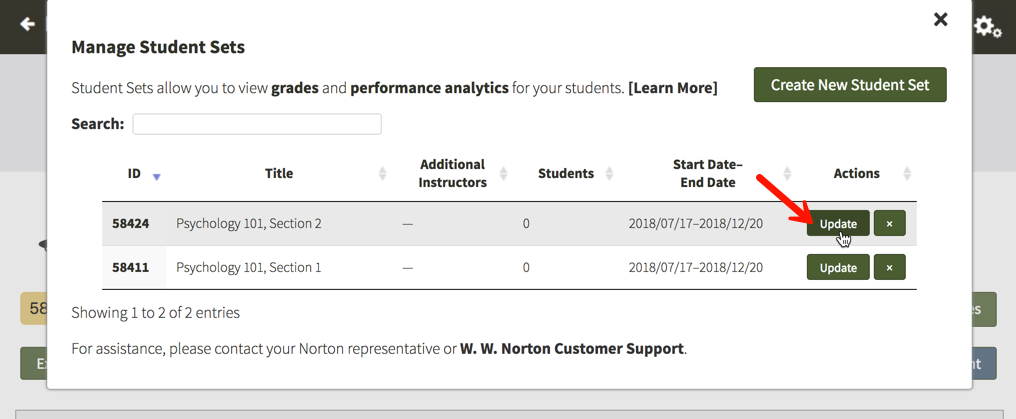
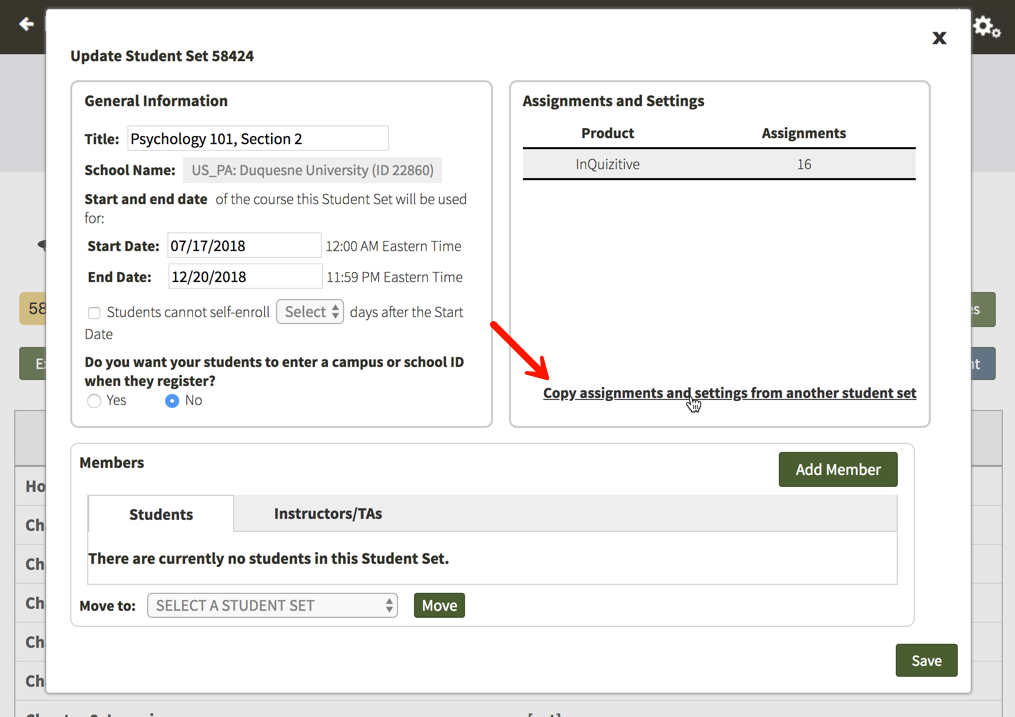
On the Manage Student Sets window, click on the Update button to the right of the Student Set to which you would like to copy the assignments and settings.
In the Assignments and Settings section, click on the Copy assignments and settings from another student set link.
Select the Student Set from which you would like to copy the assignments and settings from the drop-down menu.
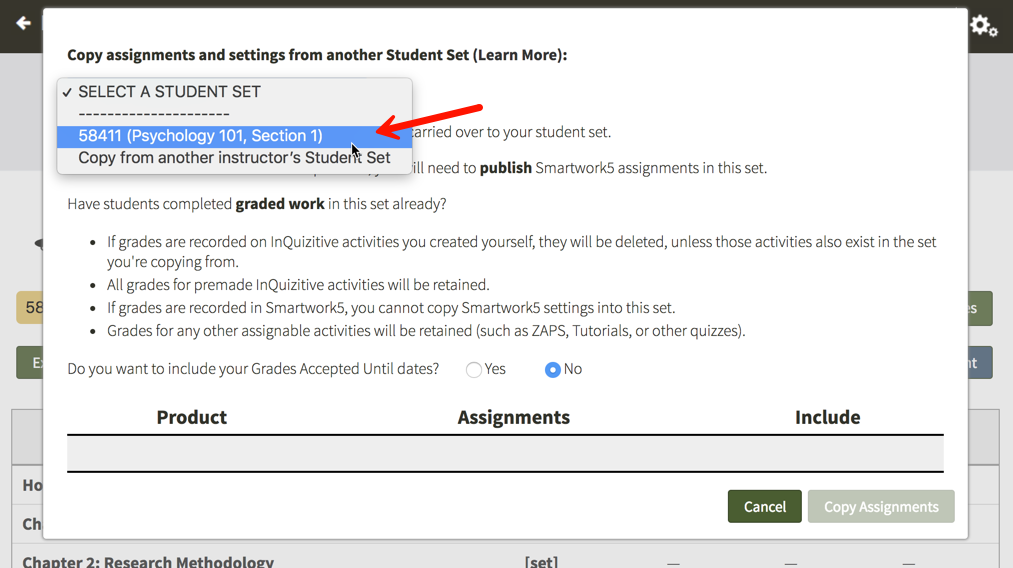
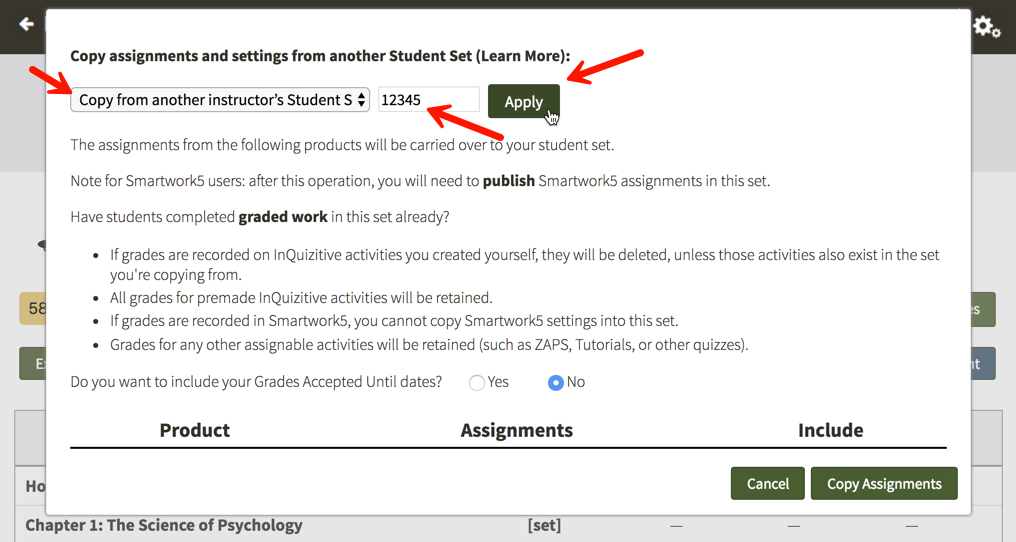
If you would like to copy the assignments and settings from another instructor's Student Set, select Copy from another instructor's Student Set from the drop-down menu, enter the Student Set ID number, and click the Apply button.
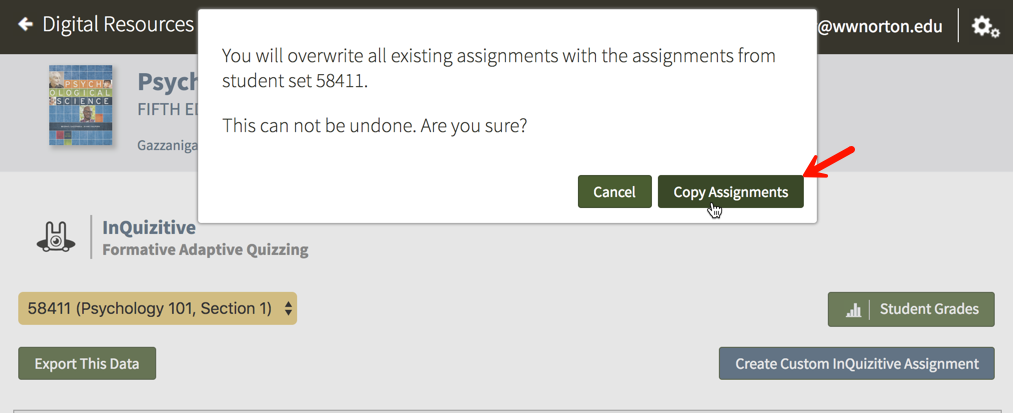
If you would like to copy the Grades Accepted Until dates from the original Student Set, click Yes to the right of Do you want to include your Grades Accepted Until dates? A brief summary of how many InQuizitive assignments which will be copied into this Student Set will be displayed. Finally, click the Copy Assignments button.
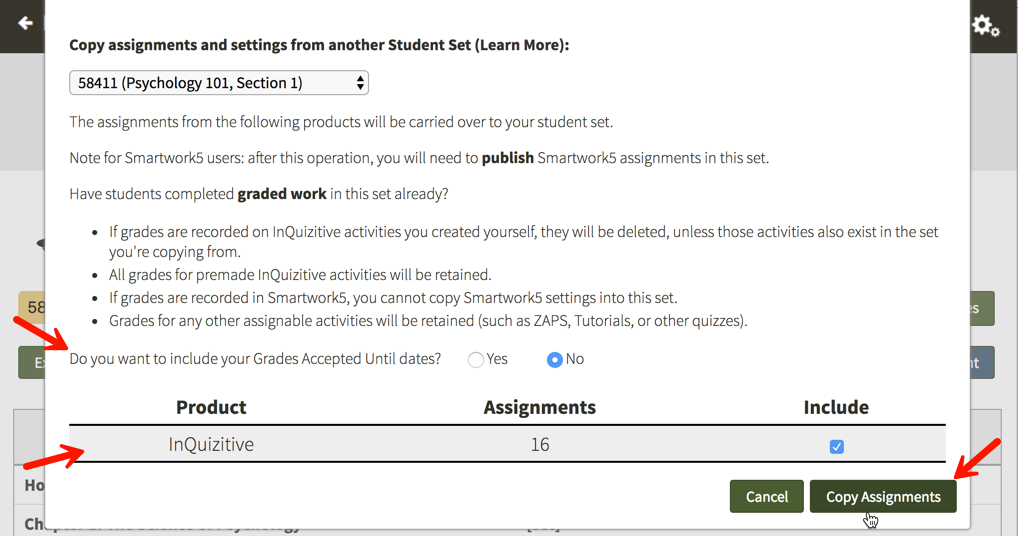
You will then be asked if you're sure you want to copy the assignments and settings into this Student Set. To proceed, click on the Copy Assignments button.
Note: All assignments and settings in the new Student Set will be overwritten by the assignments and settings from the original Student Set.
The settings that will be copied include: the minimum number of questions to complete each assignment, selected learning objectives, and any custom assignments that you created; previous student results will NOT be copied to the new Student Set.
Can I create a custom InQuizitive assignment?
Yes! While it is not possible to create your own customized InQuizitive questions, you can create a custom assignment that combines the questions from several different chapters into one larger assignment, or splits a single chapter into multiple assignments. This could be useful if you cover a single chapter over multiple weeks or cover topics from multiple chapters in a single week; or you could create a custom assignment with questions from many chapters to use when helping your students prepare for mid-term or final exams.
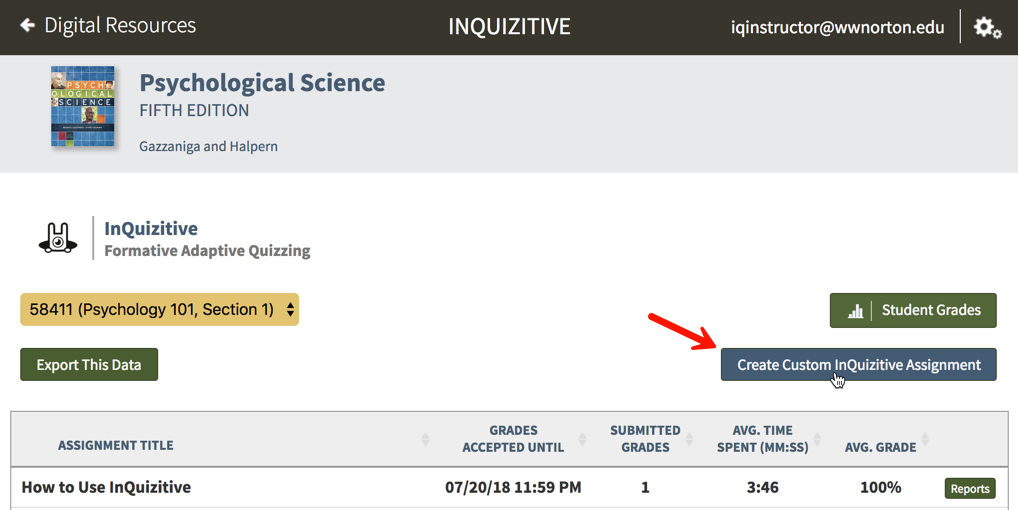
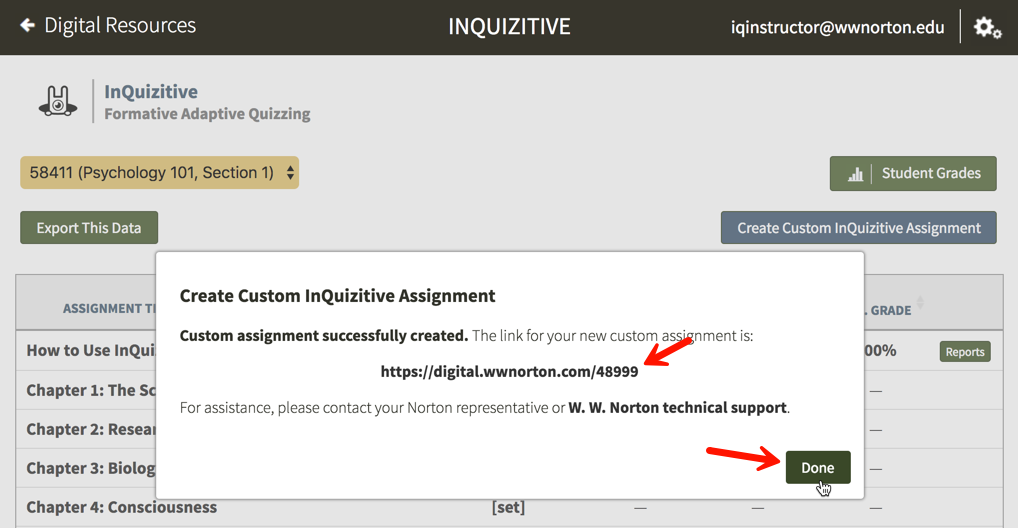
In InQuizitive, click on the Create Custom InQuizitive Assignment button.
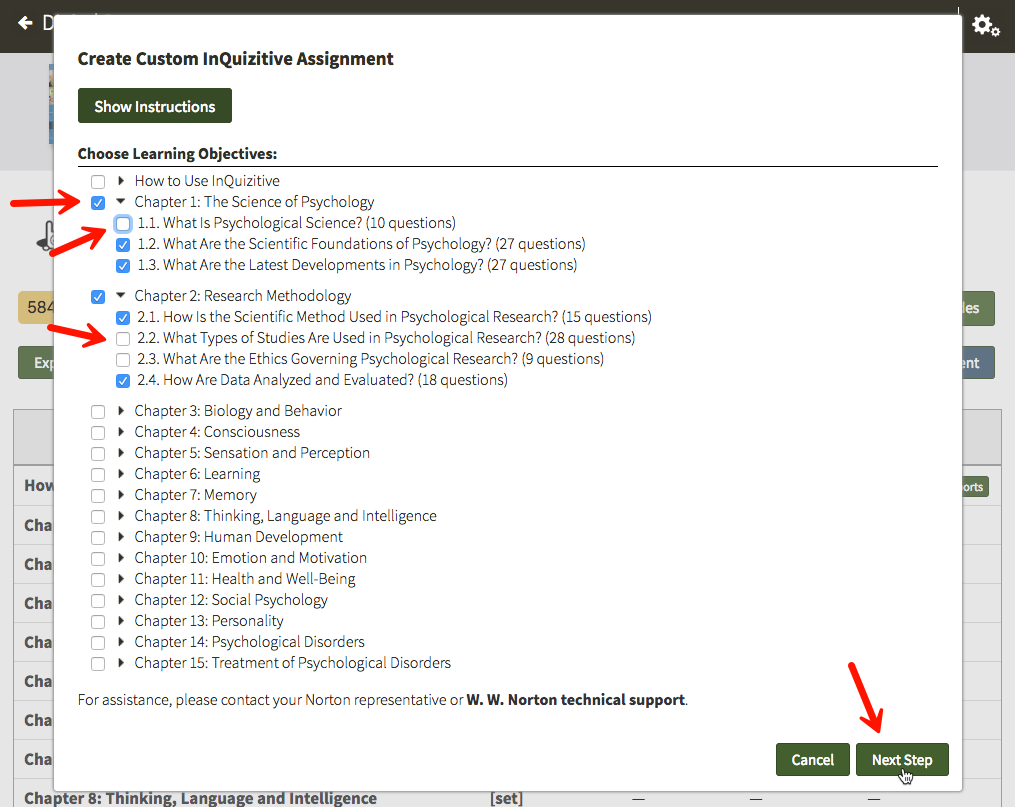
Select the chapters you would like to be included in your custom assignment. After you select a chapter, it will expand and you will be able to view all of the learning objectives found within that chapter. Deselect any learning objectives that you do not want to be included in your custom assignment. Once you are finished, click the Next Step button in the bottom right corner.
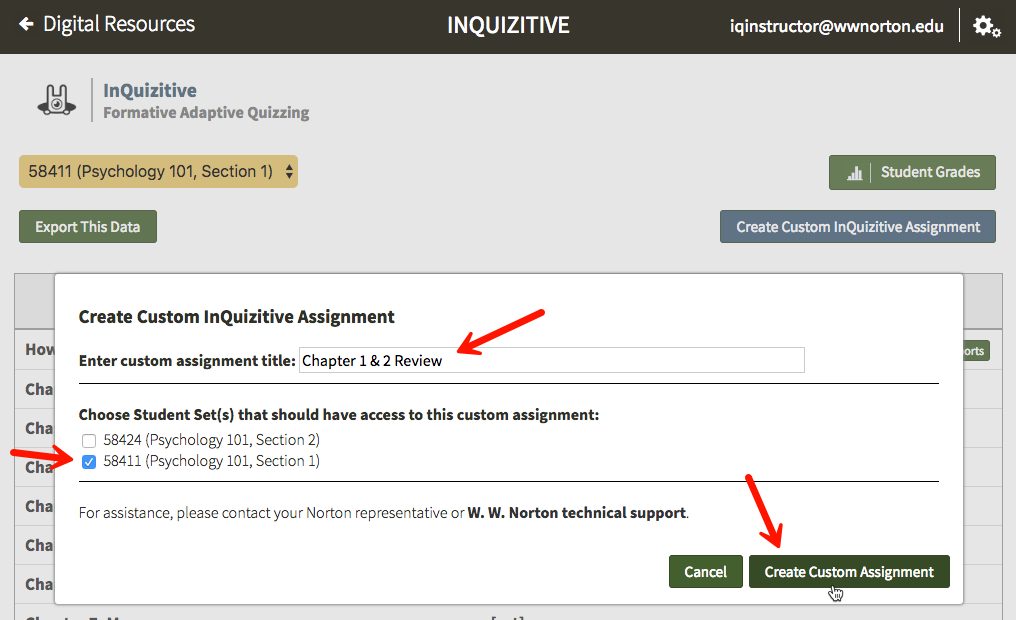
Name your custom InQuizitive assignment, select the Student Sets you would like to be able to access the assignment, and click the Create Custom Assignment button.
Your custom assignment will be added to the activity lists of all of the students who are members of the Student Sets you selected in the previous step. Additionally, your custom assignment will be given a direct access link/URL. You cannot change the name of a Custom Activity once it has been created.
Note: If you have set up InQuizitive/LMS integration using individual activity links (rather than one link to the InQuizitive activity list home page), you will want to use this direct access link to set up a new integrated link in your LMS (in the link, you'll need to change "digital" to "ncia" and follow the steps you've used for other InQuizitive/LMS integrated activity links). For more information on LMS integration, please review the Instructor Help Notes.
After you create your custom InQuizitive assignment, be sure to click on the [set] link on the assignment list to set a Grades Accepted Until date.
You may also choose to edit additional activity settings (minimum number of questions required and target score) by clicking on the More Activity Settings button. Go to Assignment Setup and Controls for additional help or watch this video.
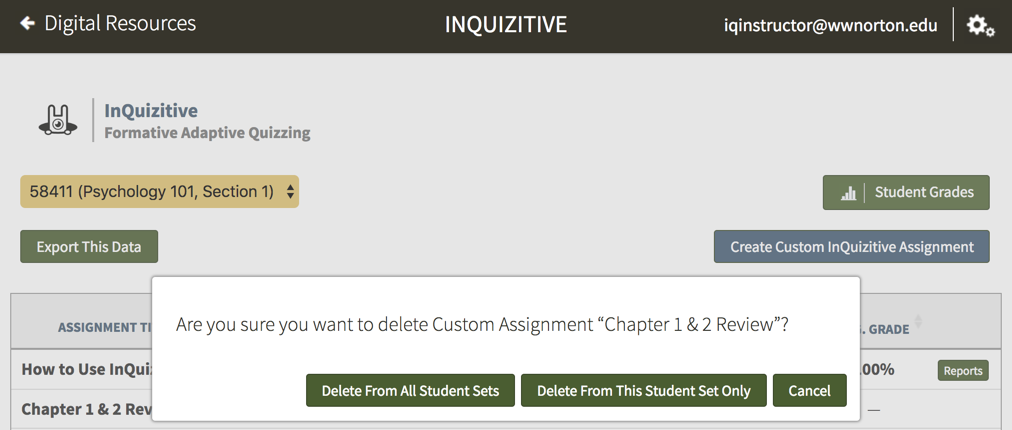
To delete a custom InQuizitive assignment that you have created, click on the DELETE button to the right of the custom assignment you'd like to delete.
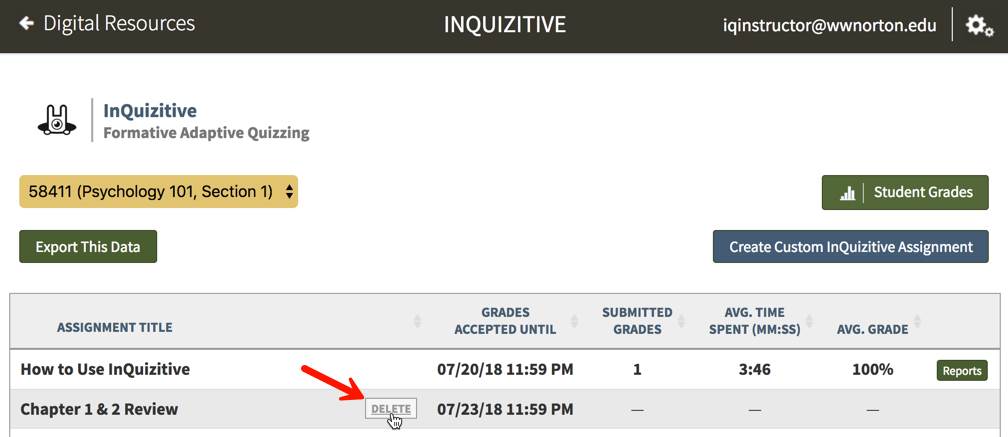
You can then select to delete the custom assignment from all Student Sets or from the Student Set you have selected. Please be careful since deleting a custom assignment is permanent!
Can I require students to enter a school ID?
Require students to enter a school ID in a new Student Set
Click on the gear icon in the upper-right corner and select Manage Student Sets from the menu.

Click on the Create New Student Set button.
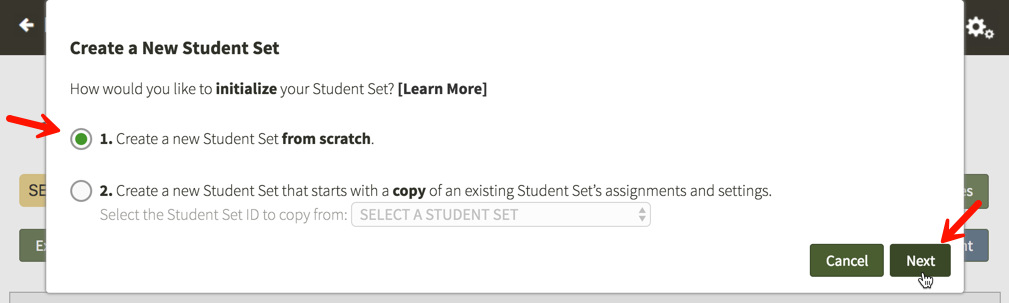
Option 1. Create a new Student Set from scratch will be selected by default. Click on the Next button.

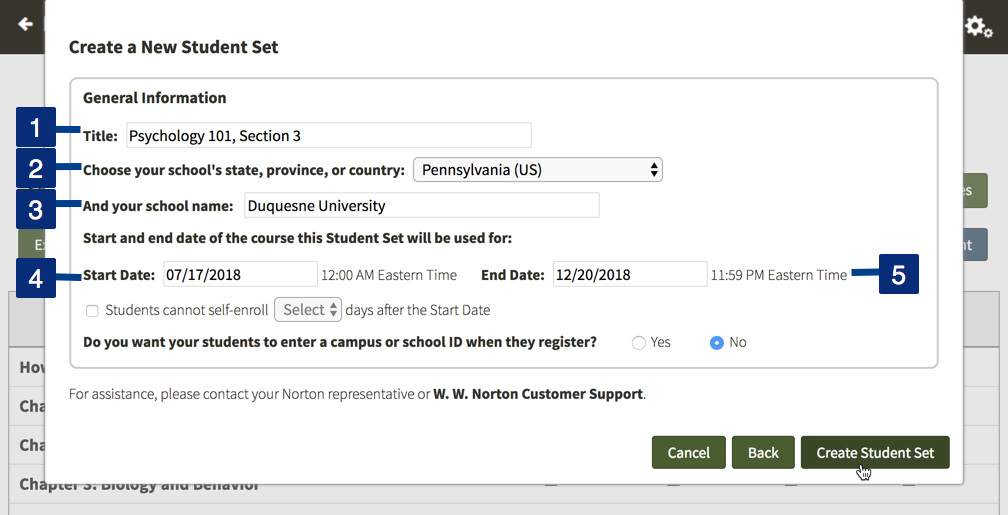
Enter a title for your new Student Set, choose your school's state from the drop-down menu, begin typing your school's name into the text box that appears and select the proper school from the list, and select start and end dates for your Student Set.
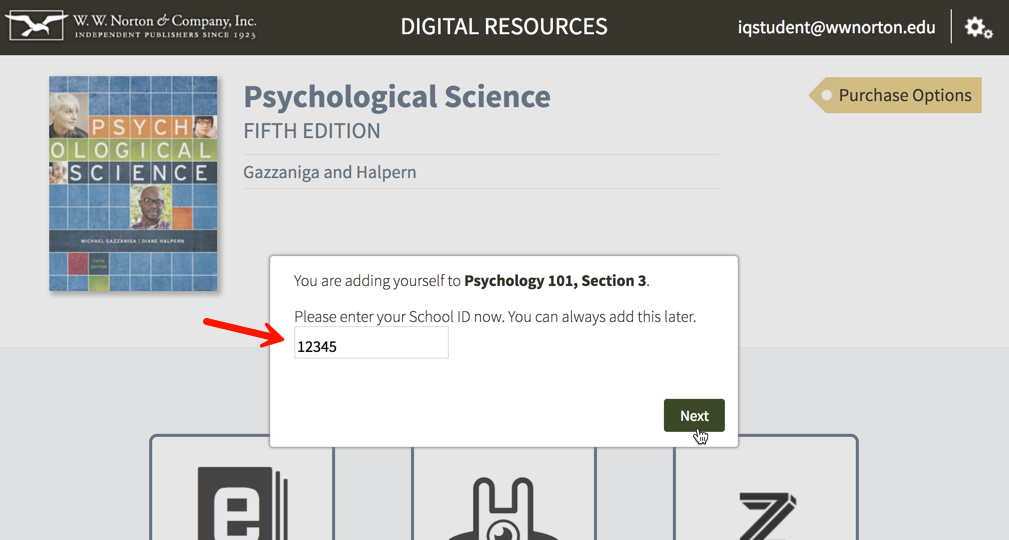
Select Yes to the right of Do you want your students to enter a campus or school ID when they register?
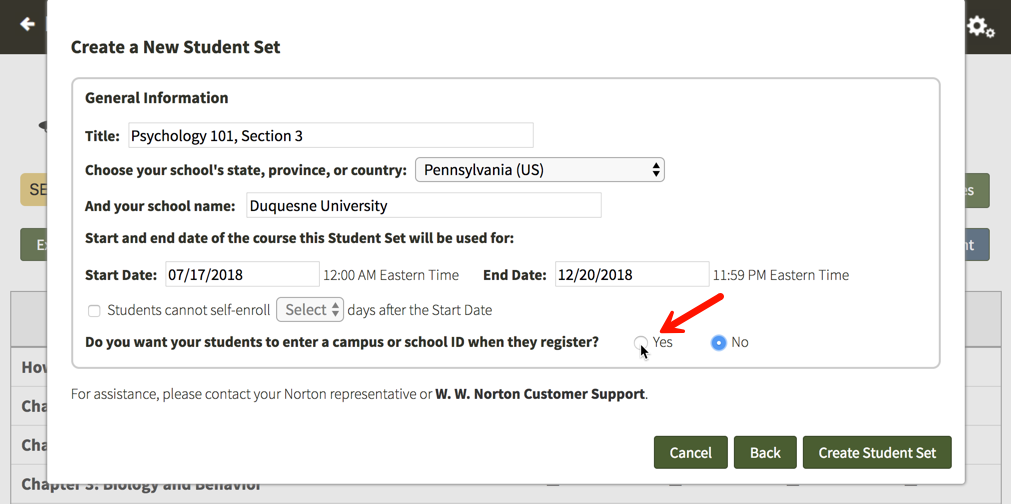
You will then be given the opportunity to change the label of the ID for your Student Set. The default School ID will be automatically populated into the text field but please feel free to change this to anything you'd like. This label will be displayed when your students are asked to enter their ID and when you review student results. IDs can contain letters and numbers and they do not have a minimum or maximum length.
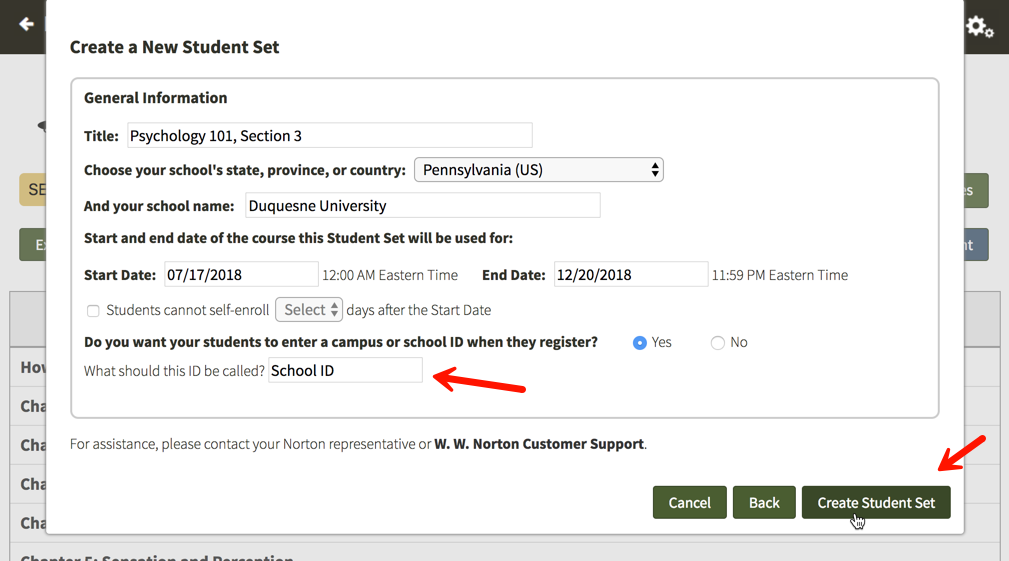
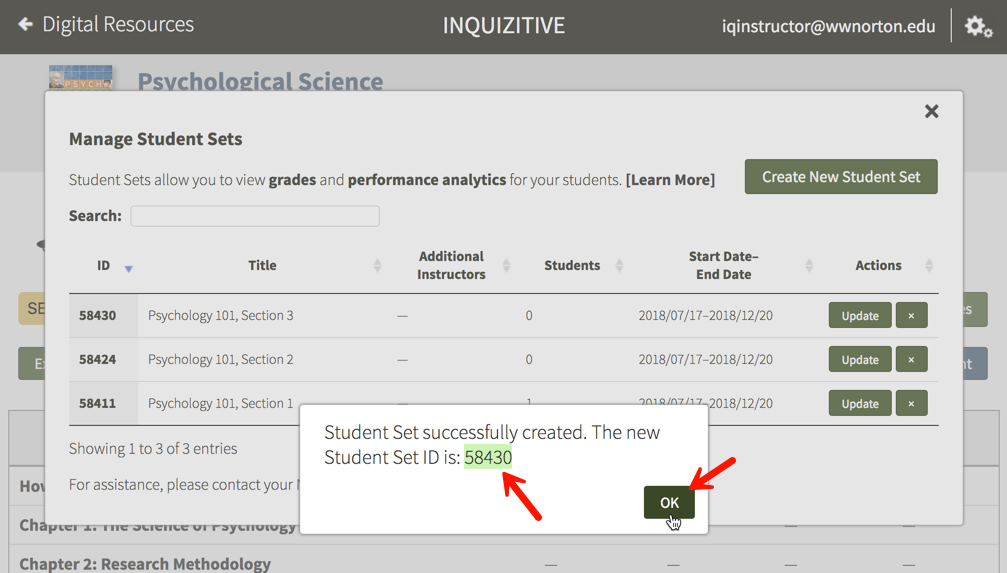
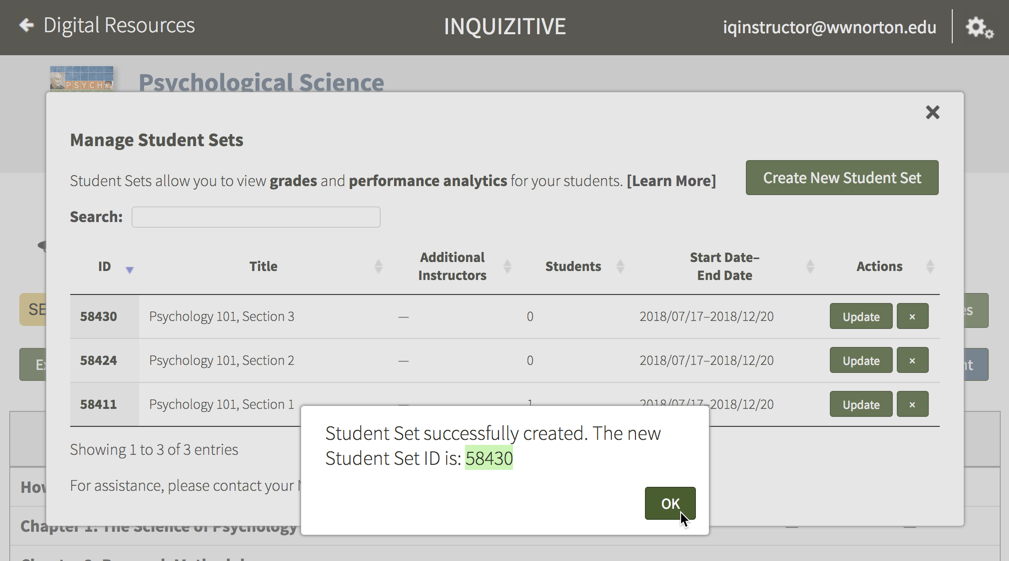
Finally, click the Create Student Set button and you will be given your new Student Set ID. Make a note of the Student Set ID and distribute it to your students so that they can join this Student Set.
When your students initially attempt to join this Student Set, they will be asked to enter their ID. If students are unsure of their ID or do not yet have one, they can simply click the Next button to add themselves to the Student Set and continue on to the digital resources. The next time they login to access the digital resources, they will be asked to enter their ID again. Students will be asked to enter their ID each time they access the digital resources until they finally enter one.

Require students to enter a school ID in an existing Student Set
Click on the gear icon in the upper-right corner and select Manage Student Sets from the menu.

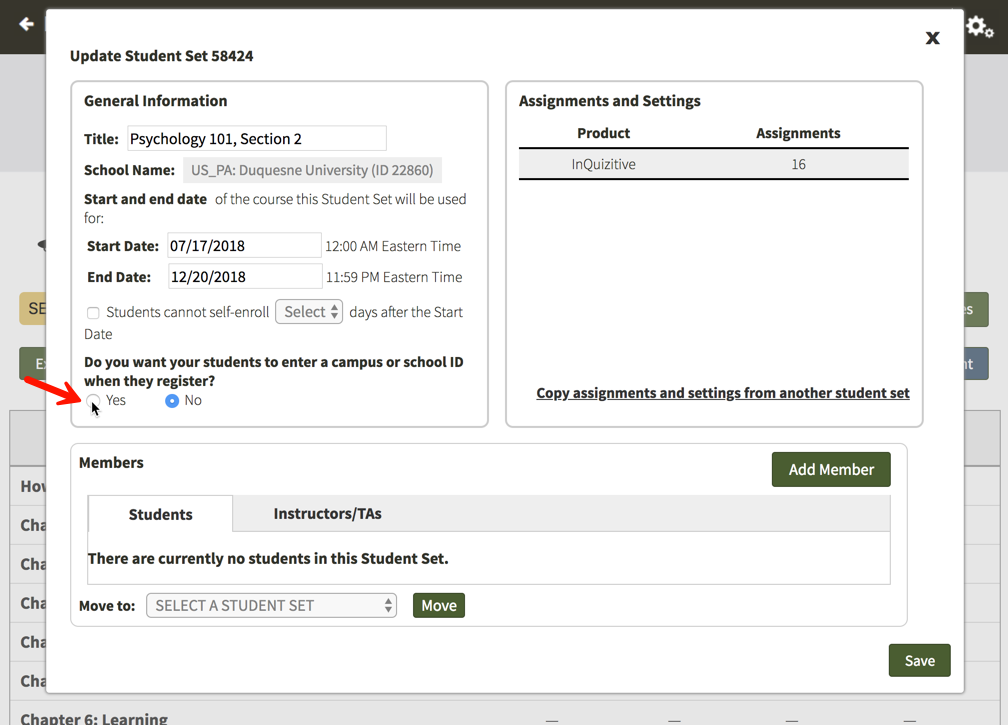
Click on the Update button to the right of the Student Set for which you would like to require an ID.

Select Yes under Do you want your students to enter a campus or school ID when they register?
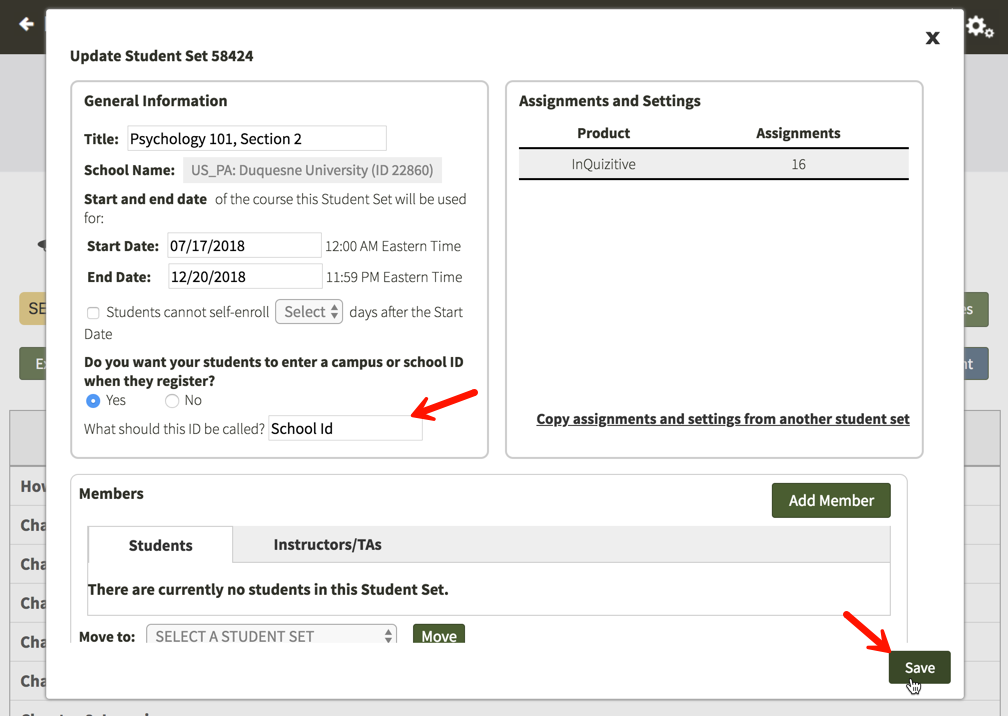
You will then be given the opportunity to change the label of the ID for your Student Set. The default School Id will be automatically populated into the text field but please feel free to change this to anything you'd like. This label will be displayed when your students are asked to enter their ID and when you review student results. IDs can contain letters and numbers and they do not have a minimum or maximum length. Click on the Save button when you are finished.
The next time your students login and access the digital resources, they will be asked to enter their ID. If students are unsure of their ID or do not yet have one, they can simply click the Next button to continue on to the digital resources. The next time they login to access the digital resources, they will be asked to enter their ID again. Students will be asked to enter their ID each time they access the digital resources until they finally enter one.
Can I prevent students from enrolling in a Student Set after a specific number of days?
Prevent students from enrolling after a specific number of days in a new Student Set
Click on the gear icon in the upper-right corner and select Manage Student Sets from the menu.

Click on the Create New Student Set button.

Option 1. will be selected by default. Click on the Next button.
Enter a title for your new Student Set, choose your school's state from the drop-down menu, begin typing your school's name into the text box that appears and select the proper school from the list, and select start and end dates for your Student Set.

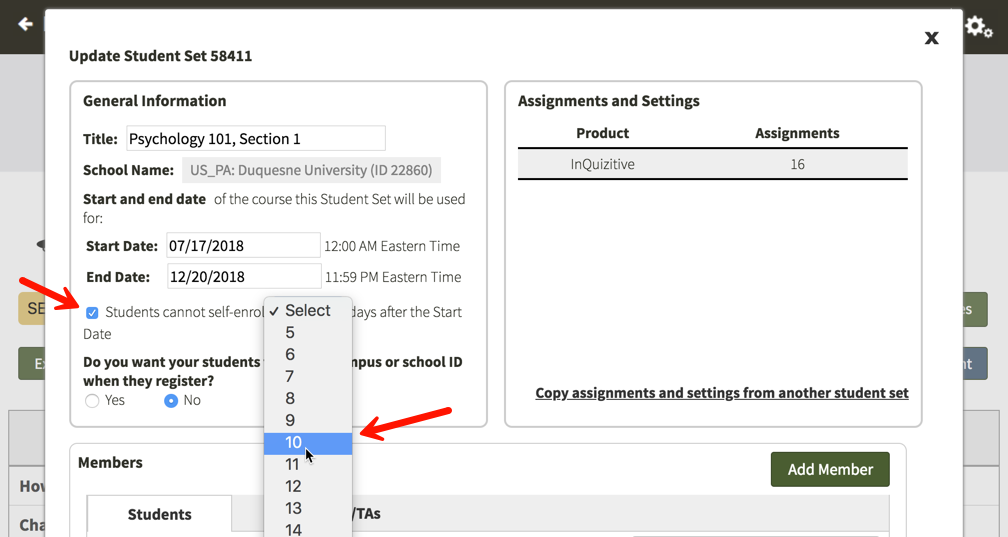
Click the checkbox to the left of Students cannot self-enroll Select days after the Start Date and use the Select drop-down menu to choose how many days after the start date of your Student Set you would like to close the self-enrollment period. You can select any number from 5 to 100 days after the start date.
Finally, click the Create Student Set button and you will be given your new Student Set ID. Make a note of the Student Set ID and distribute it to your students so that they can join this Student Set.
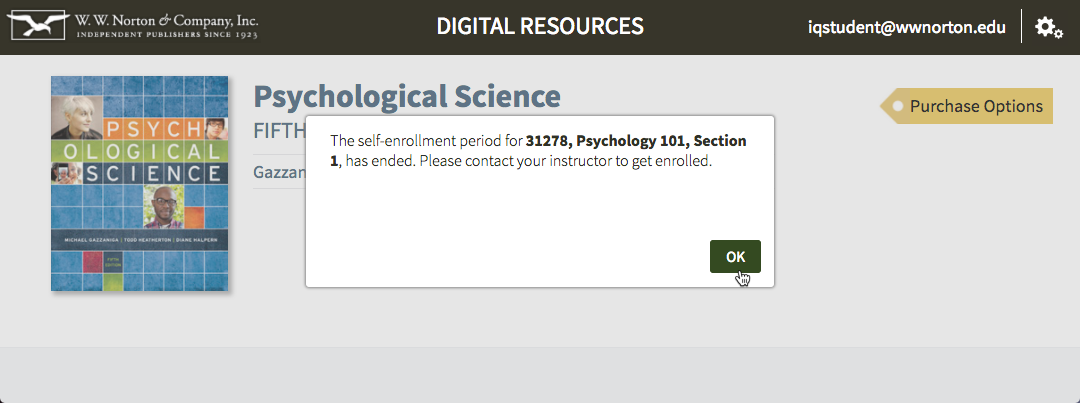
Any students who try to join this Student Set after the self-enrollment period has ended will receive the message below. Since the self-enrollment period has ended, you will need to manually add students to the Student Set from that point on.
Prevent students from enrolling after a specific number of days in an existing Student Set
Click on the gear icon in the upper-right corner and select Manage Student Sets from the menu.

Click on the Update button to the right of the Student Set for which you would like to end the self-enrollment period after a specific number of days.
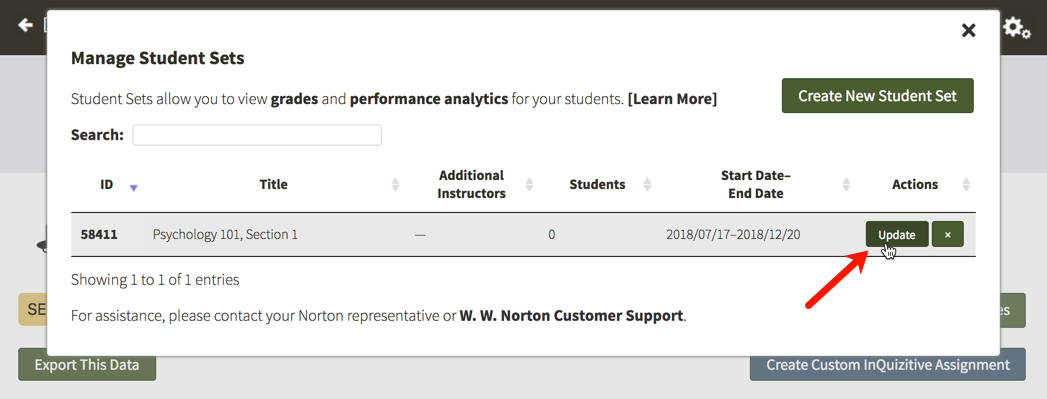
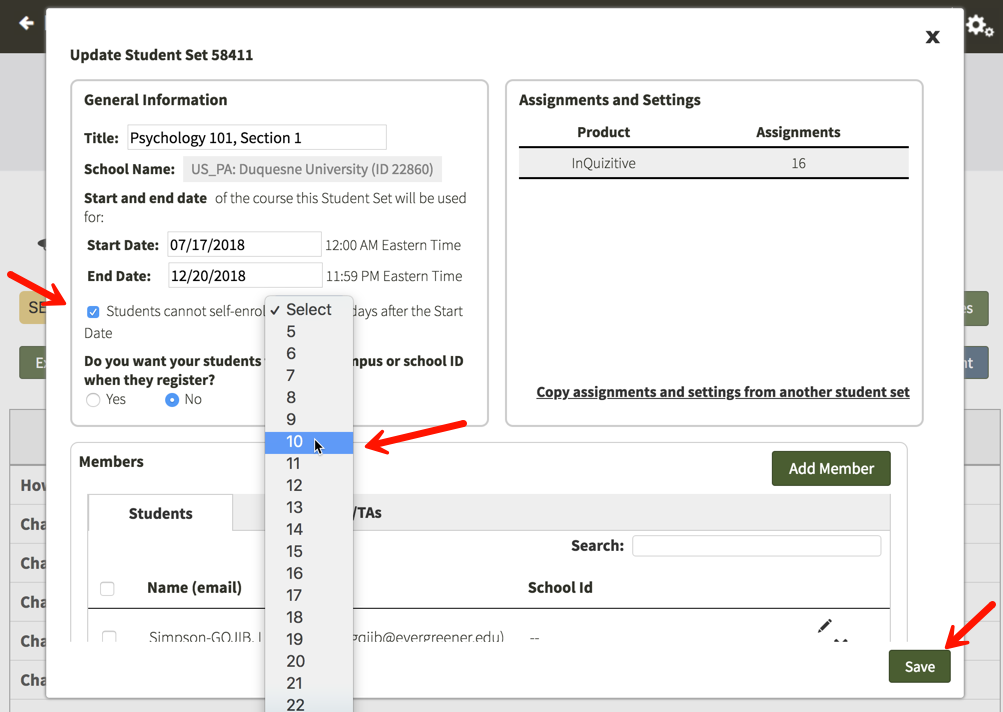
Click the checkbox to the left of Students cannot self-enroll Select days after the Start Date and use the Select drop-down menu to choose how many days after the start date of your Student Set you would like to close the self-enrollment period. You can select any number from 5 to 100 days after the start date. Click the Save button when you're finished.
Any students who try to join this Student Set after the self-enrollment period has ended will receive the message below. Since the self-enrollment period has ended, you will need to manually add students to the Student Set from that point on.
How do I move students from one Student Set to another?
Click on the gear icon in the upper-right corner and select Manage Student Sets from the menu.

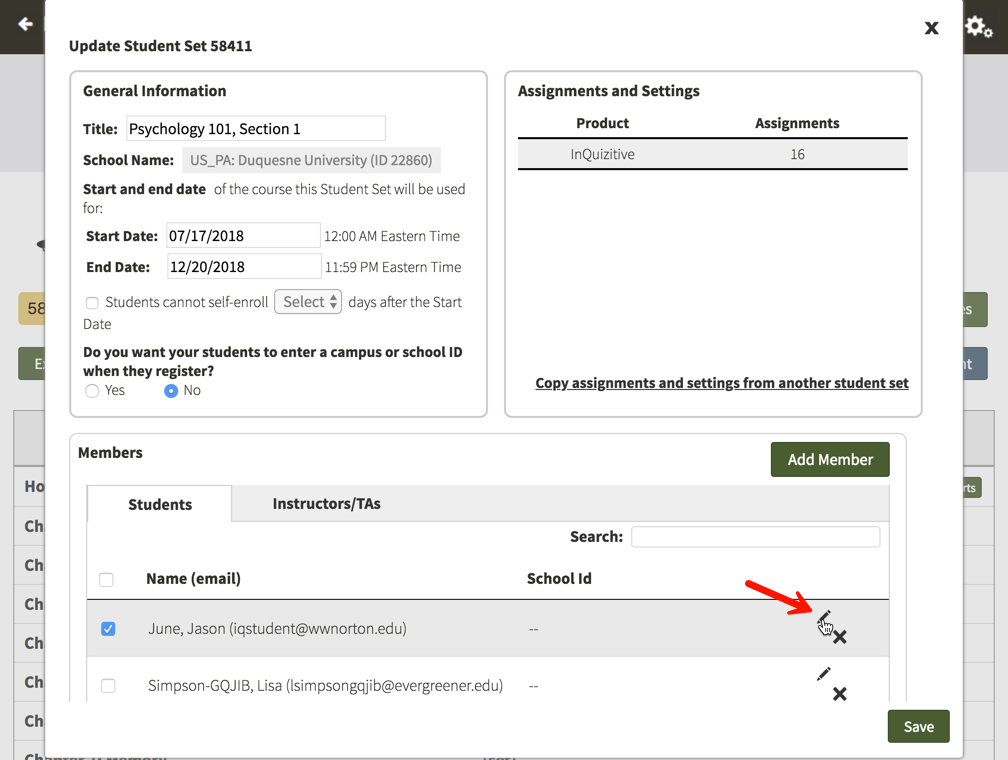
Click on the Update button to the right of the Student Set in which the student is currently enrolled.

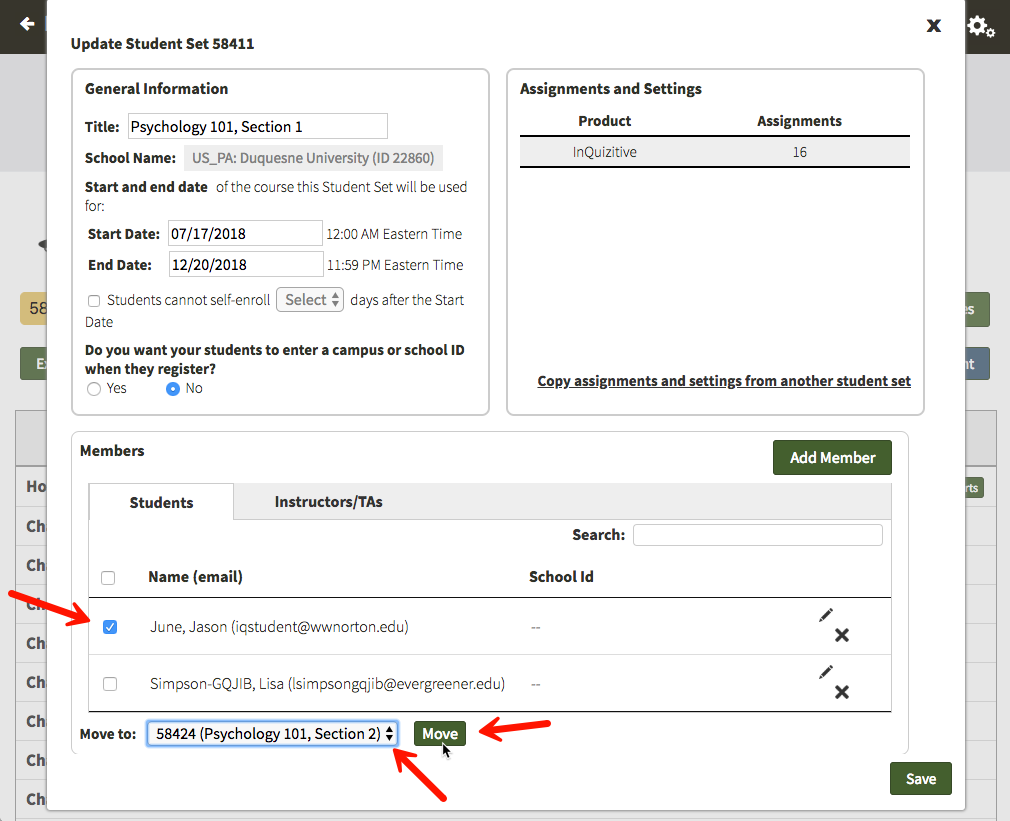
In the Members section, locate the student you would like to transfer to another student set and click the checkbox to the left of his or her name. Using the drop-down menu to the right of Move to: select the new Student Set and click the Move button.
If you would like to completely remove a student from your Student Set, click on the X icon to the right of the student's name you would like to remove.
How do I edit student information within a Student Set?
Click on the gear icon in the upper-right corner and select Manage Student Sets from the menu.
Click on the Update button to the right of the Student Set in which the student is currently enrolled.

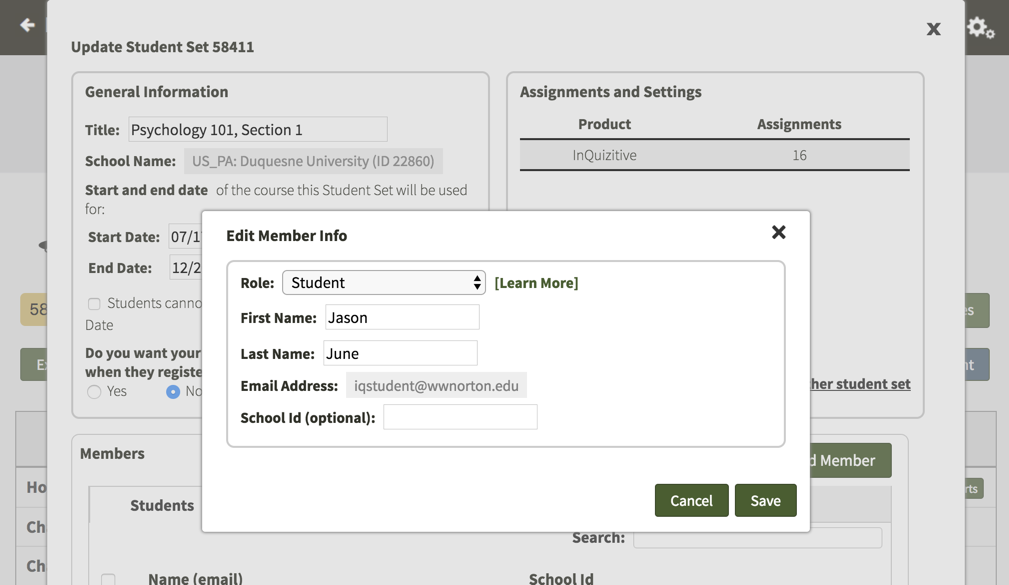
Click on the pencil icon to the right of the student whose information you would like to modify.
Using this window, you can adjust the role of the student, change the first or last name, and add or edit an ID. There is no way to change a student's email address. If you have a student who needs to make a change to their email address, please ask them to contact the W.W. Norton Service Desk for assistance.
Submit a Support Request
Still need help? Submit a support ticket and a customer support specialist will be happy to assist you.
Opened a request already? Click here for an update.