The Sorting Module is used to create questions in which images or words are sorted into different categories.
Getting Started
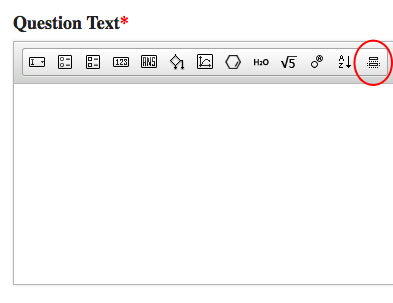
- To insert the Sorting Module in to the Question Text section, click the sorting button in the Question Type Palette. The symbol on this button is two rectangles.
- Once inserted into the Question text section, the module will always appear as a list of items and two categories, as exemplified in the screenshot below:

- To open the Sorting Module editor, double click on the module.
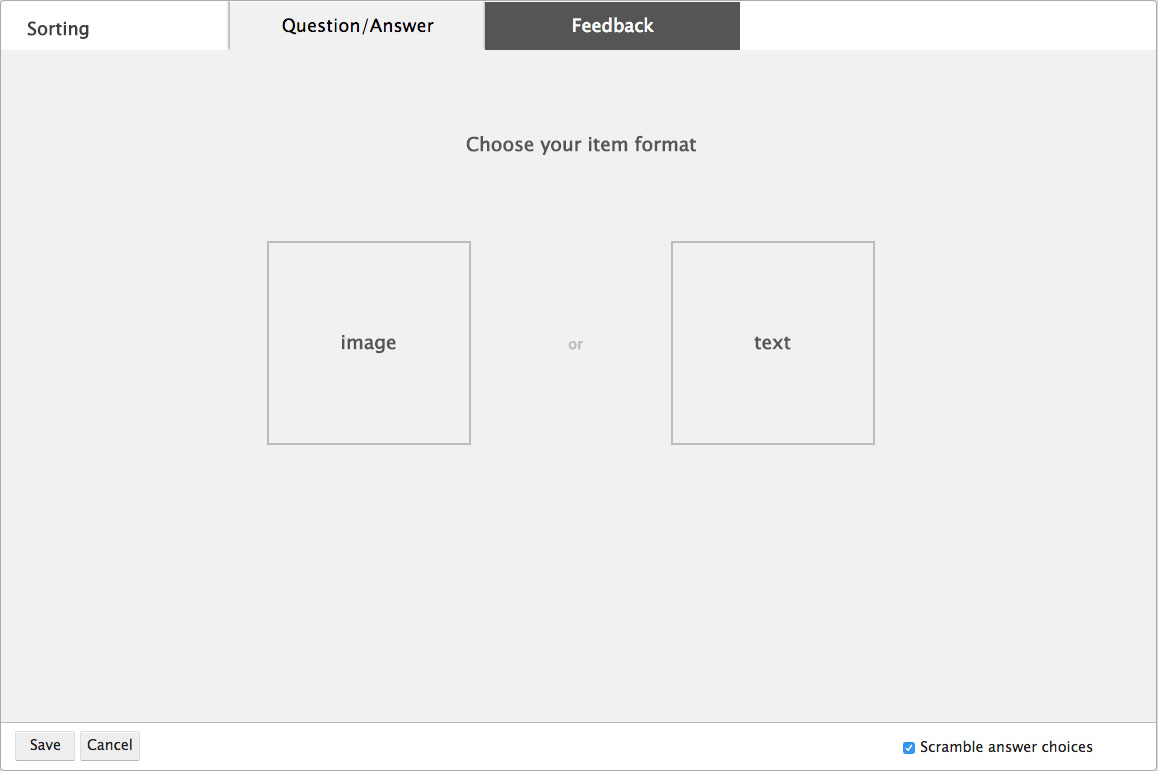
The Sorting Module Editor consists of two tabs: Question/Answer tab, in which authors create the categories and the items that students will sort, as well as set the question’s answer by correctly sorting the items; and the Feedback tab, in which authors can write feedback that the student sees depending on how she sorts the items.
The Sorting Module Editor also has a Save button, which you can use to save your work and exit the module, and a Cancel button, which will allow you to exit the module without saving.
Please note that the system will not allow you to save the module unless an answer has been programmed into the Question/Answer tab. Also, once you hit the Save button, the module will close.
Setting Up the Question
Set up for Sorting questions occurs on the Question/Answer tab, where you can create your categories and items, and tell the system how they are correctly sorted.
You can sort either text items or image items into categories; however, you can only sort one or the other, not both.
Creating Text Items
To set up a question in which students sort text items, do the following:
- Open the Sorting Module Editor. When prompted whether you want to sort images or text, select “Text.”
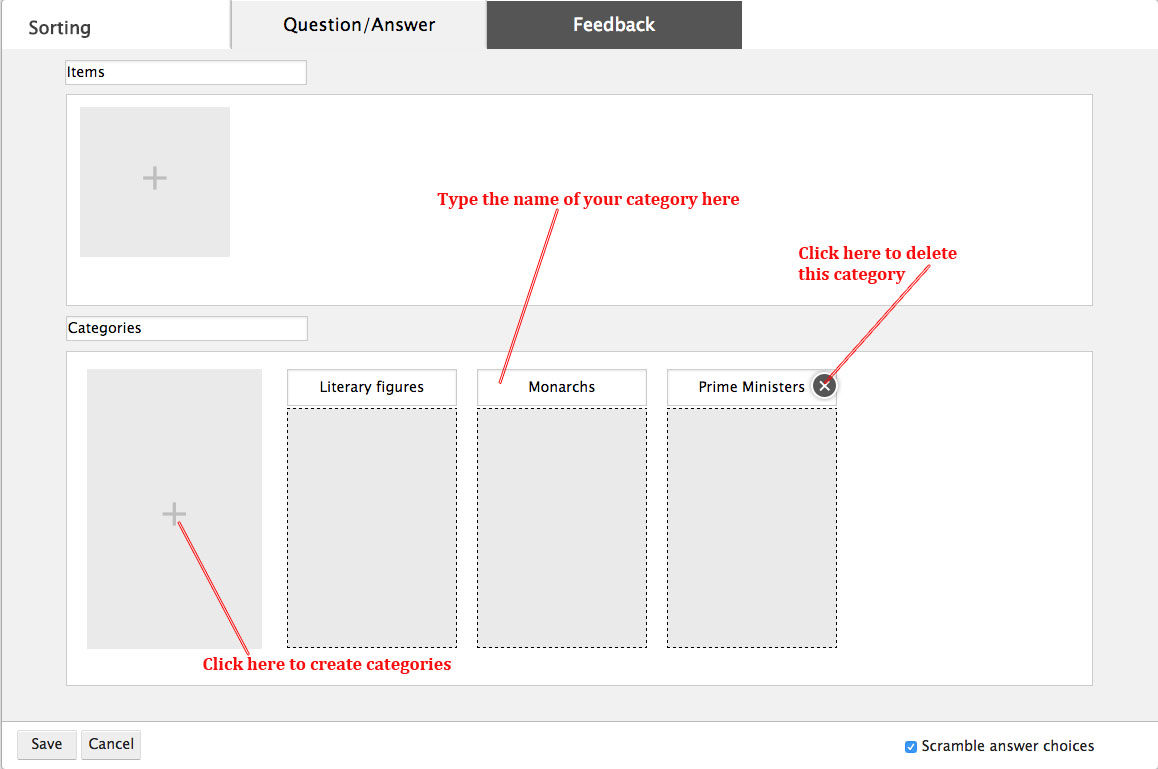
- Under the field that says “Categories,” create the categories you would like to sort items into. You can add categories by clicking on the button with the plus sign.
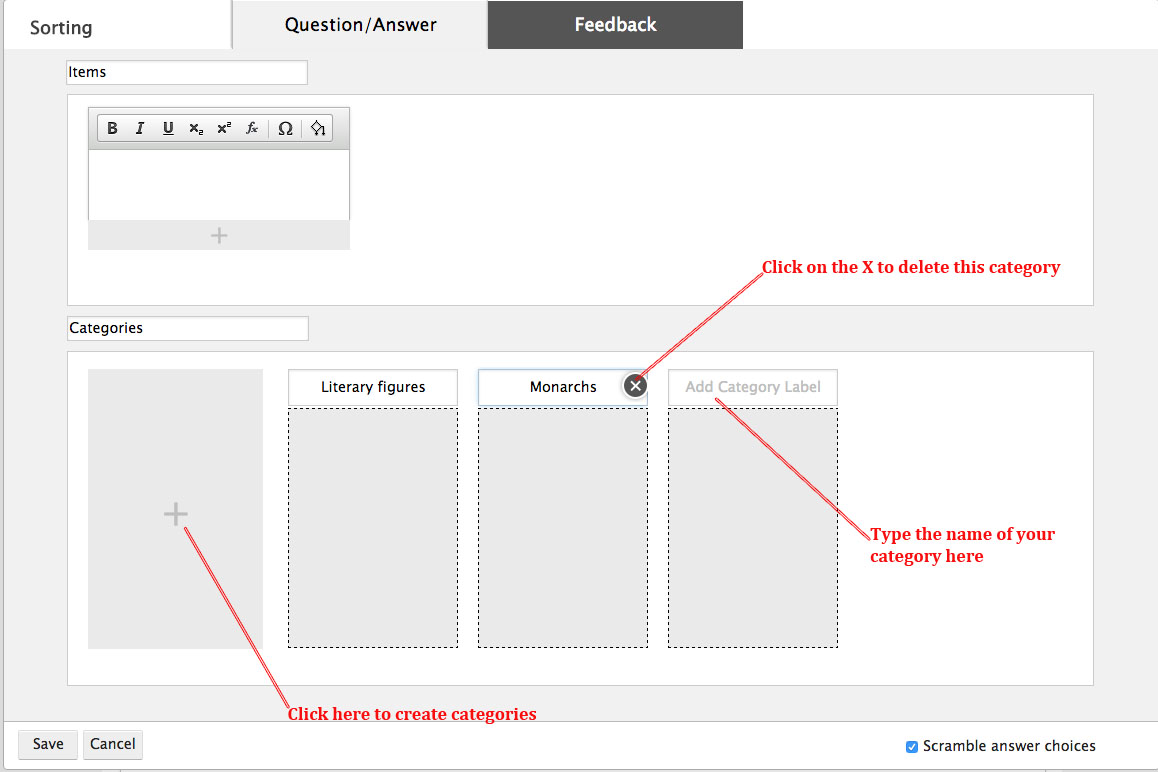
- Type your category’s name into the editable text field at the top of the category bucket. The text field has the words “Add Category Label” in it. Category names are limited to 23 characters.
- There is no limit to the number of categories you can add; however, check with your editor for best practices.
- Delete categories by moving your cursor over the right-hand corner of the category, where an X will appear. Click on the X to delete the category.
- Under the section that says “Items,” begin creating the items you want students to sort.
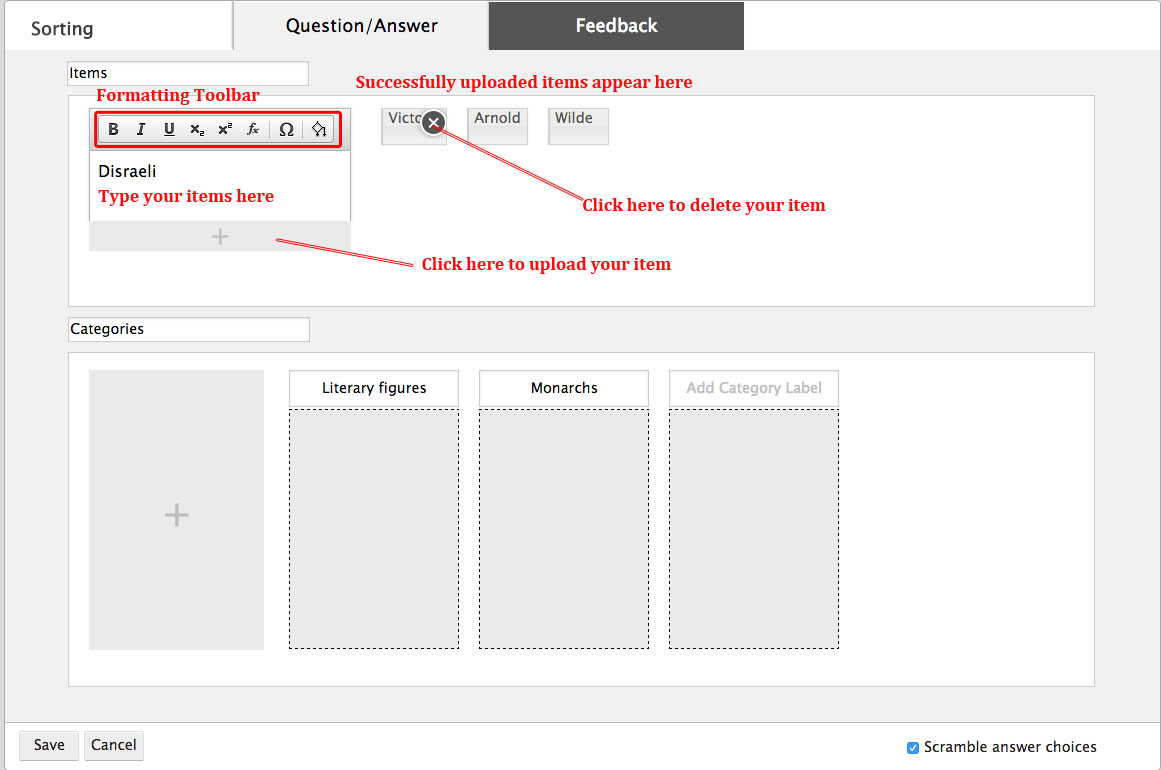
- Type your text item into the editable text field.
- Above each editable text field, there is a Formatting Toolbar. From left to right, the Formatting Toolbar allows you to do the following:

- Bold text
- Italicize text
- Underline text
- Add a subscript
- Add a superscript
- Insert a mathematical equation
- Insert a special character
- Insert an algorithmic variable (for an in-depth look at algorithmic variables, please refer to the Algo documentation)
- Click on the + button underneath the editable text field to upload your text item. Successfully uploaded text items will appear to the right of the editable text field.
- To delete uploaded items, move your mouse over the item you would like to delete so that an X appears in the top right hand corner. Click on the X to permanently remove the item.
- There is no cap to the number of items you may add. However, check with your editor for best practices.
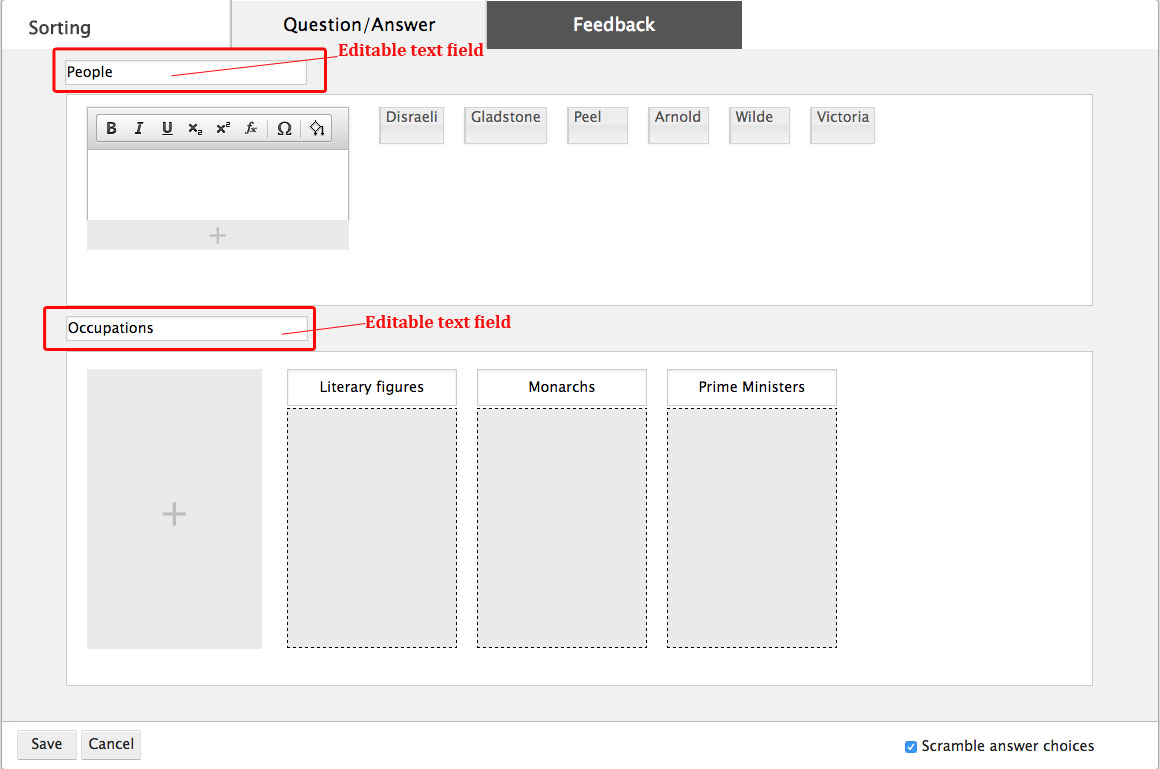
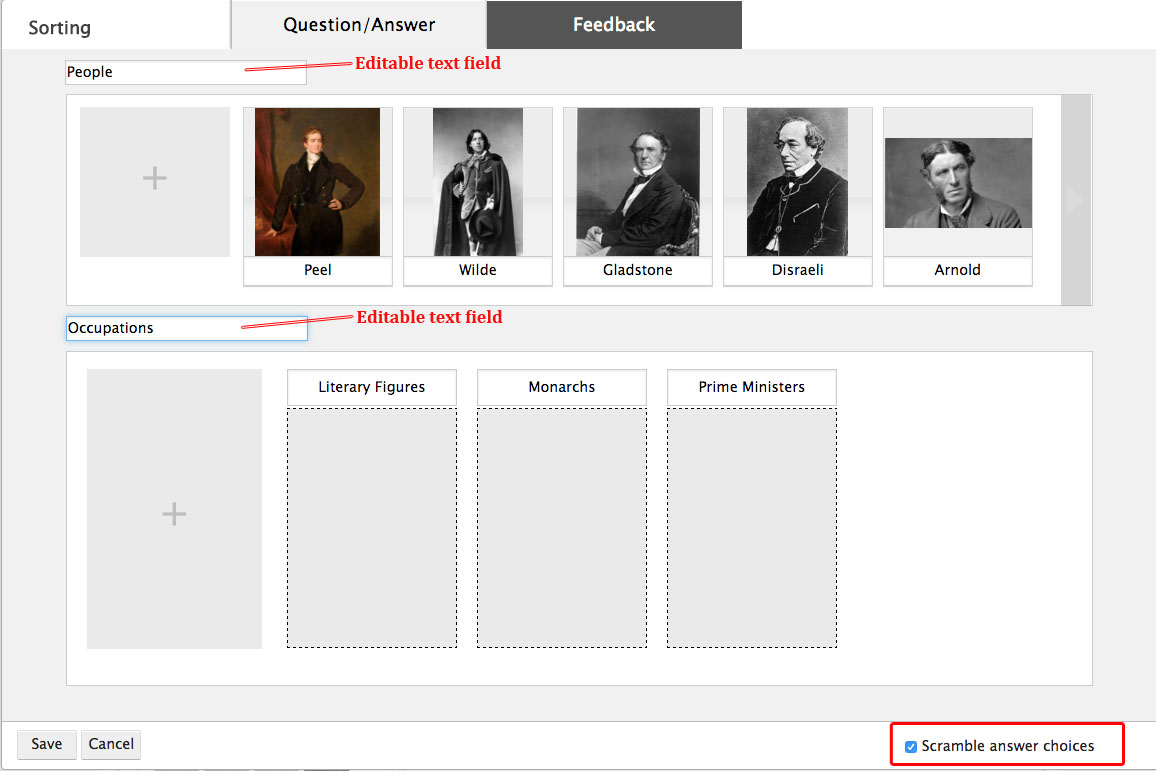
- If desired, you can edit the labels students see for Items and Categories. In this example, we will edit the labels so that they read “People” (for items), and “Occupations” for categories.
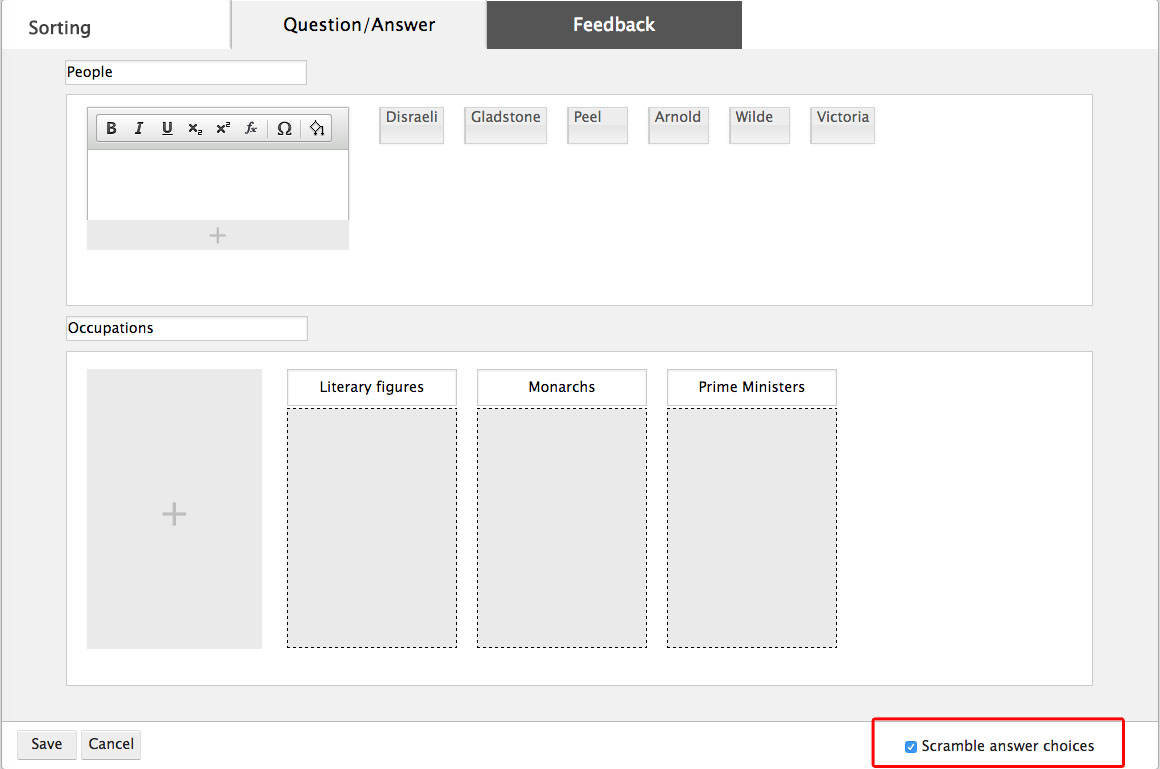
- Determine if you want the system to randomize the items students see, so that the items appear in a different order every time a student opens up the question. To randomize items, check “Scramble answer choices” in the bottom right hand corner of the module editor.
Creating Image Items
To set up a question in which students sort image items, do the following:
- Open the Sorting Module Editor. When prompted whether you want to sort images or text, select “Image.”

- Under the field that says “Categories,” create the categories you would like to sort items into. You can add categories by clicking on the button with the plus sign.
- Type your category’s name into the editable text field at the top of the category bucket. The text field has the words “Add Category Label” in it. Category names are limited to 23 characters.
- There is no limit to the number of categories you can add; however, check with your editor for best practices.
- Delete categories by moving your cursor over the right-hand corner of the category, where an X will appear. Click on the X to delete the category.
- Add the image items you want students to categorize.
- Under the items section, click on the + button.
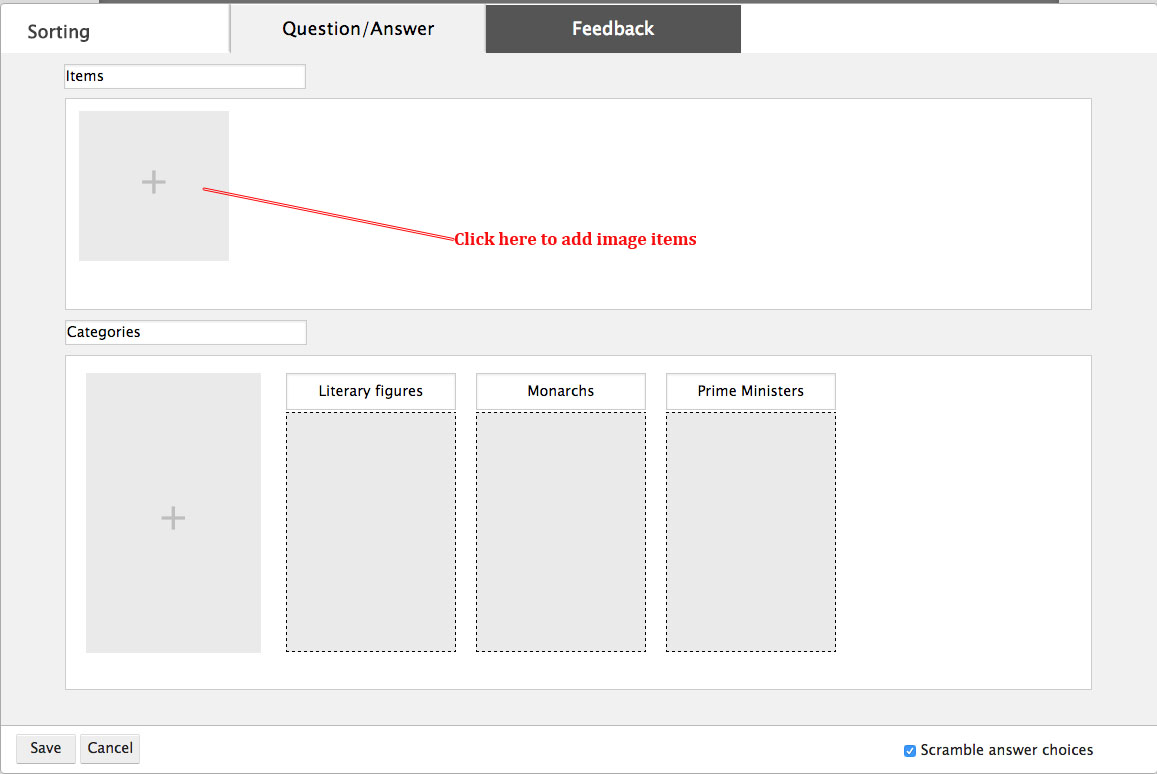
i. The + button will open up the Image Upload Window, pictured below, which allows you to access all of the images uploaded to the image folder associated with your account:
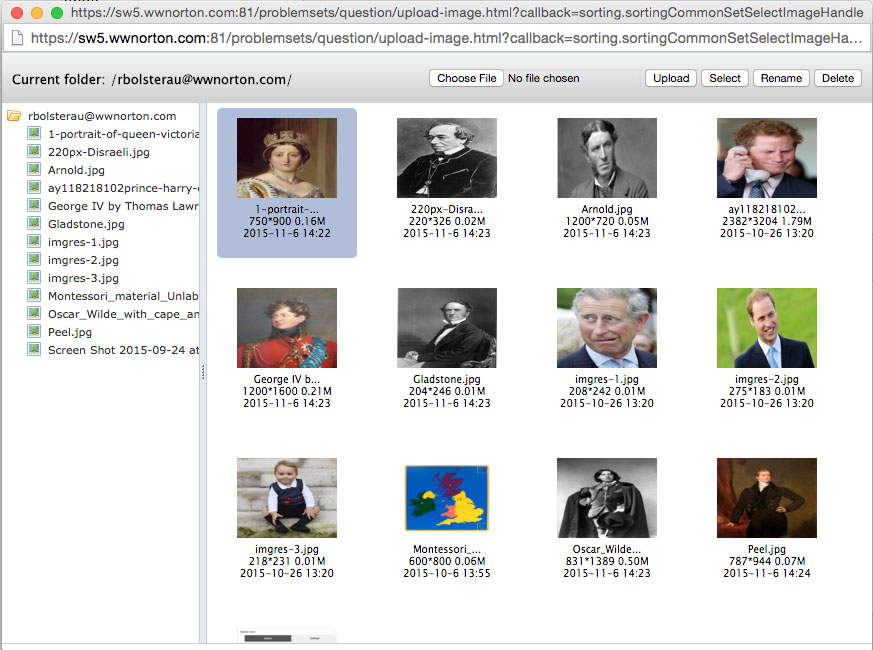
ii. Upload your image, or choose from among the images in your folder.
- Upload your image by clicking on the “Choose File” button at the top of the window. Once you select the image from your computer, click on the “Upload” button in the top right corner to upload it to your SW5 folder.
- Select a previously uploaded image from your folder by clicking on the appropriate thumbnail.
- You can rename or delete images that are uploaded to your folder using the “Rename” and “Delete” buttons at the top right corner of the window.
- You can only access images that are uploaded to the folder associated with your account. You cannot access images that are uploaded by another user.
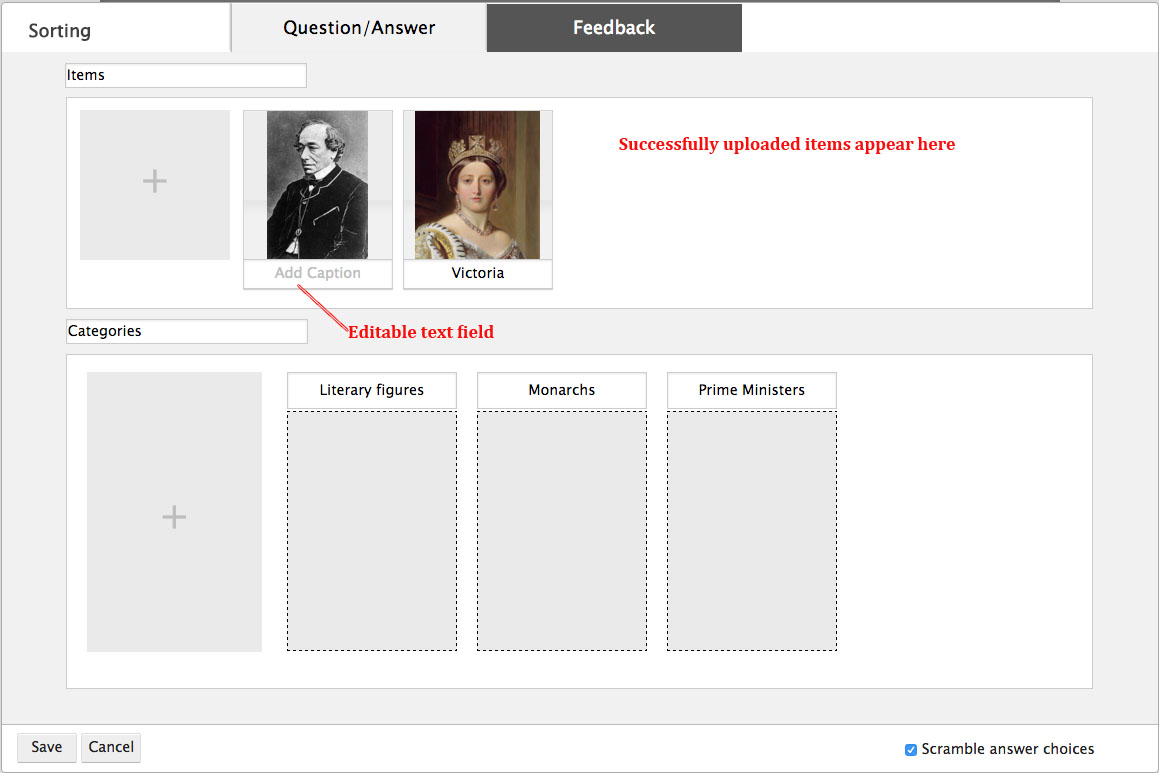
iii.Double click on the image you would like to use. Once you double click on the image, your image will be successfully uploaded as an item in the Sorting Module Editor. Successfully uploaded items will appear next to the button with the +.
- Add a caption to your items so students can readily identify the image. Captions are limited to 15 characters.
- To delete an item, move your cursor over it so that an X appears in the upper-right-hand corner. Click on the X to delete the item.
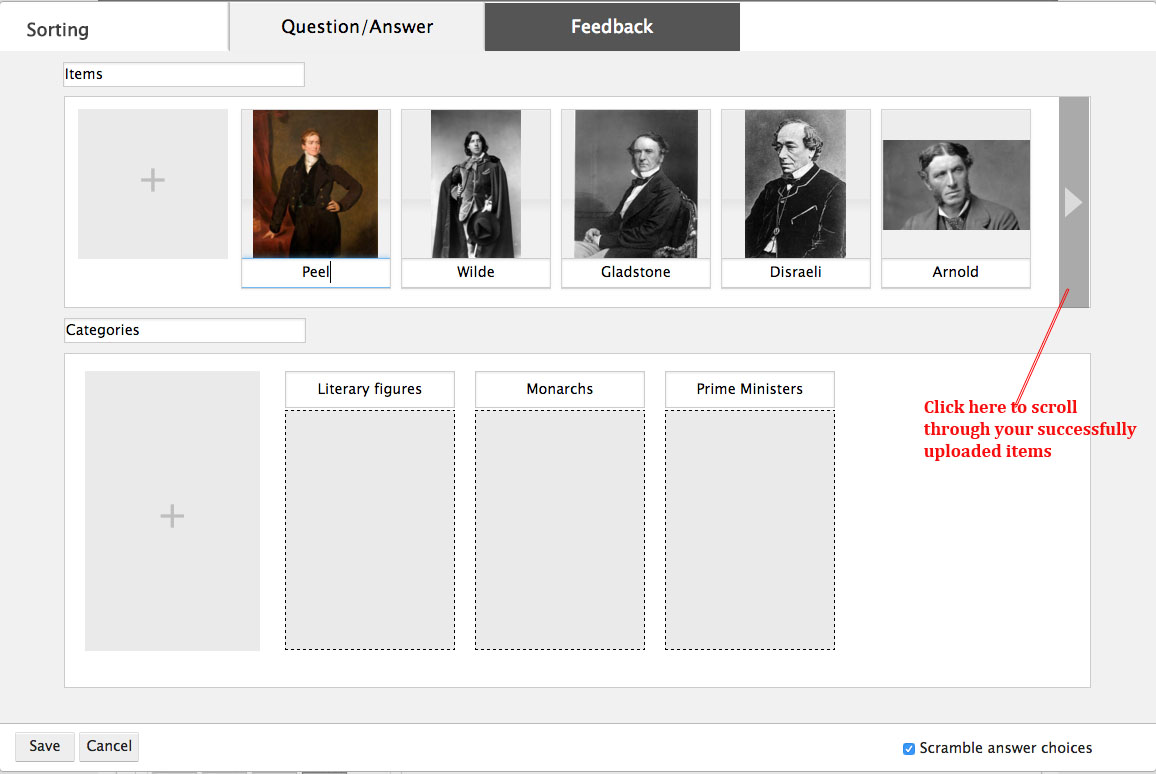
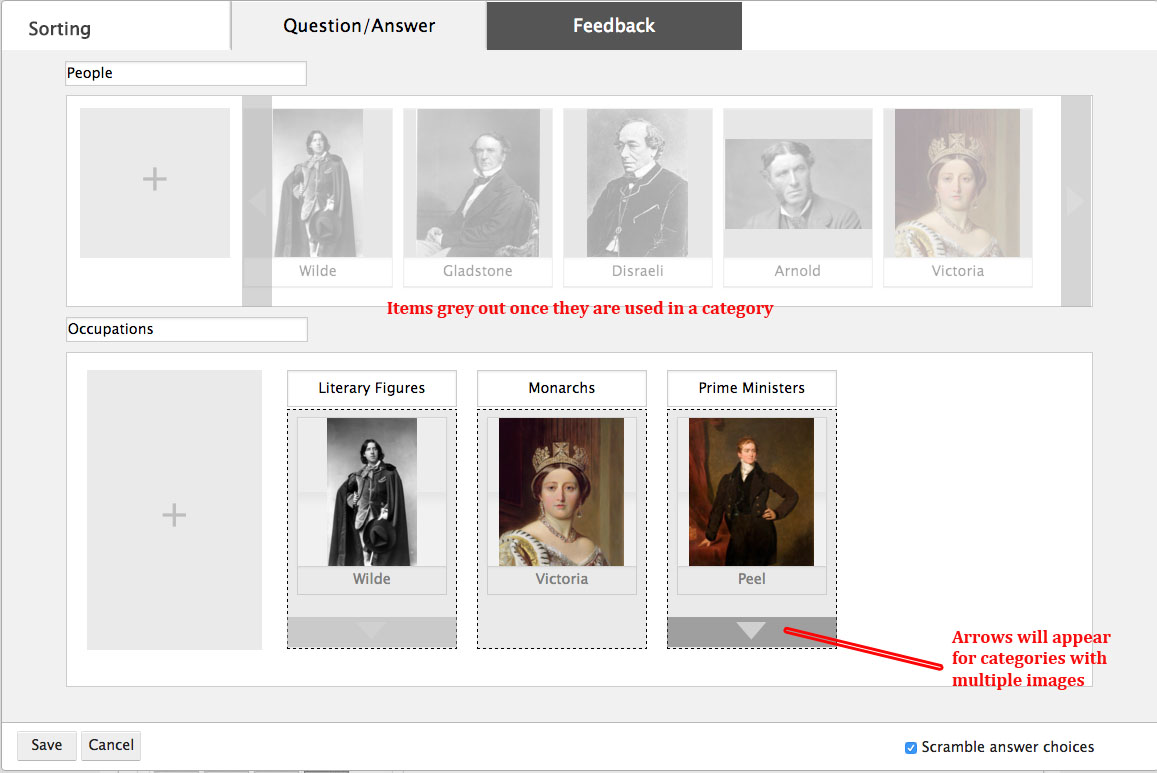
- There is no limit to the number of items you may add; however, check with your editor for best practices. If you add more than five images, an arrow will appear that will allow you to scroll through your successfully uploaded items.
- If desired, you can edit the labels students see for Items and Categories. In this example, we will edit the labels so that they read “People” (for items), and “Occupations” for categories.
- Determine if you want the system to randomize the items students see, so that the items appear in a different order every time a student opens up the question. To randomize items, check “Scramble answer choices” in the bottom right hand corner of the module editor.
Defining the Answer
When you have finished creating all the categories and items, you can build the correct answer in the Question/Answer tab. Do this by dragging each item into its correct category.
Things to keep in mind when setting the correct answer:
- As items are placed into categories, they will be greyed out. This ultimately means that a user can only use an item once per category.
- For categories that have a large number of text items, or multiple image items, arrows will appear in the category bucket, which will allow you to scroll through the items you placed in the category.
- To remove an item from a category, scroll over the item and click on the X that appears in the upper right hand corner of the item.
- You cannot drag items between categories. To remove an item from a category in the event of a mistake, click the X on the item in the category so that it returns to the item list; from there, drag the item into the appropriate category.
- You do not have to sort all of the items you uploaded into categories (this means some of your items can be distractors). However, check with your editor for best practices.
- Once the Answer tab is set, you can then successfully save the module. Saving the module will close the editor.
Creating Feedback
Smartwork5 determines whether a student’s answer is correct or not by recognizing the pattern you specify in the Answer tab. If a student matches the pattern in the Answer tab, the system recognizes the answer as correct. If the student fails to match that pattern, the system recognizes the answer as incorrect.
The Feedback section allows you to write Feedback that the student sees when she triggers these correct and incorrect patterns.
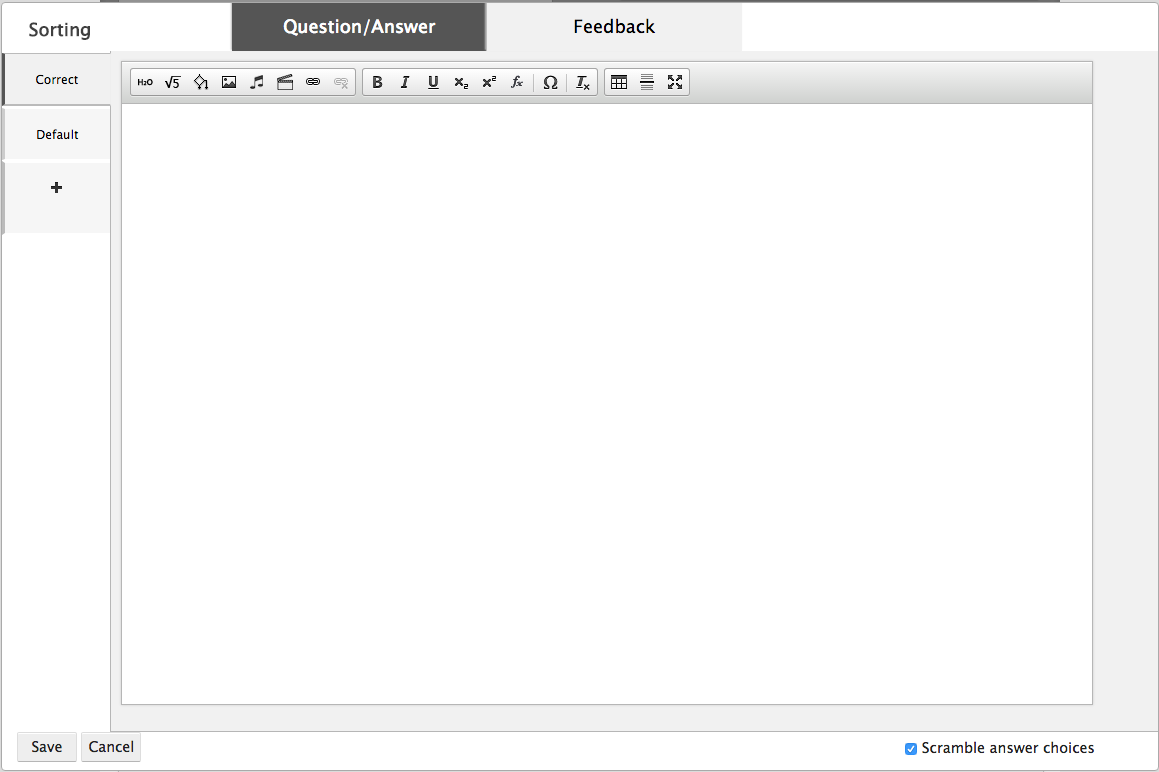
Each Feedback tab contains a text editor, which allows you to add text and other multimedia to the feedback.
Important Note: Copying and pasting text from a Word Document into Smartwork5 could insert formatting that will corrupt the module. Please enter the text directly into the Text Editor, or copy and paste from a plain text document.
The Media Palette allows you to insert multimedia into the Feedback tab.

From left to right, the Media Palette allows you to do the following:
- Insert static chemical equations
- Insert static symbolic (math) equations
- Insert algorithmic variables
- Insert image files
- Insert music files
- Insert video files
- Insert hyperlinks
- Remove the hyperlinks
The Text Formatting Palette allows you to format the text in answers, as well as add special characters.

From left to right, the Text Formatting Palette allows you to do the following:
- Bold text
- Italicize text
- Underline text
- Insert subscripts
- Insert superscripts
- Insert math formulas *This button is being phased out. To insert math formulas, please use the
- Insert special characters
- Remove any formatting applied to the text
Furthermore, the Feedback Formatting Palette allows you to do the following:

- Insert tables
- Insert line breaks
- Edit text in full screen mode
Correct and Default Feedback
The Feedback tab will initially have a tab for Correct feedback, which a student sees whenever she matches the pattern in the Answer tab. It will also have a tab for Default feedback, which a student will see whenever she creates an unspecific pattern that does not correspond to what is in the Answer tab. Default feedback will trap for all incorrect answers unless otherwise specified in a Specific Feedback tab, which will be discussed in the next sections.
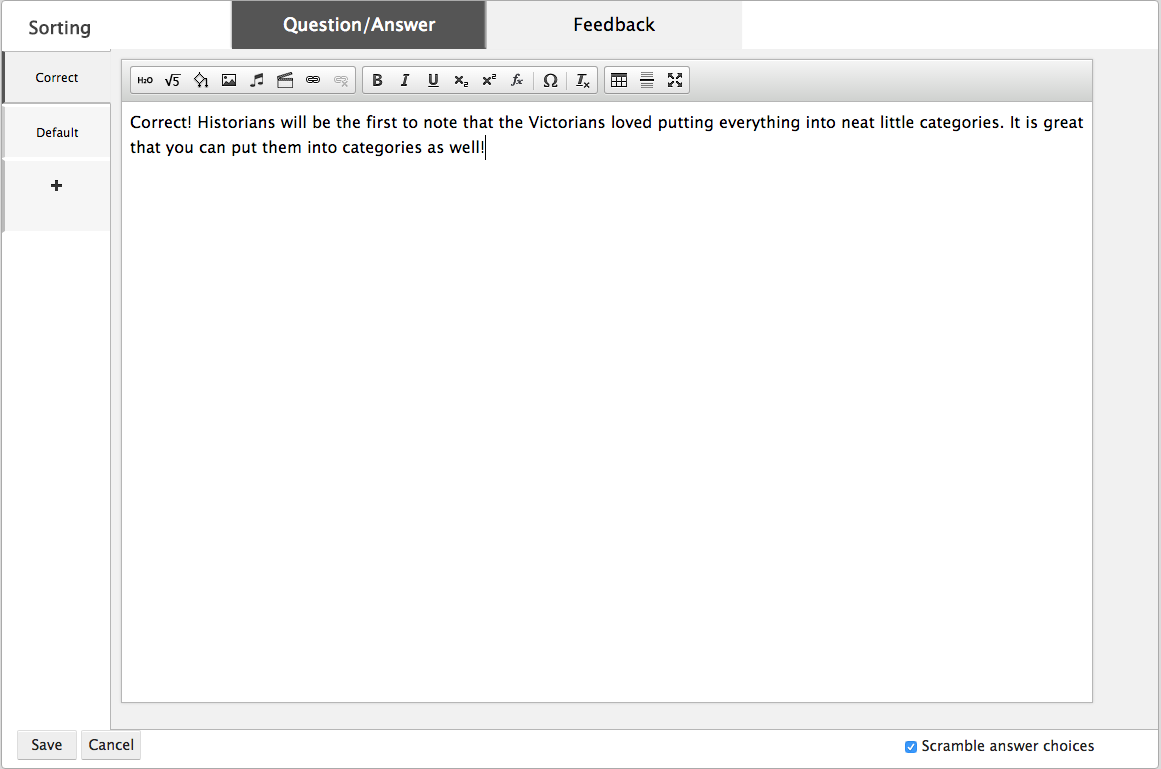
To set Correct feedback, do the following:
- Type up what you want the student to see when she places all the items into their proper categories. Add any multimedia you see fit using the palettes in the text editor.
- Save the question.
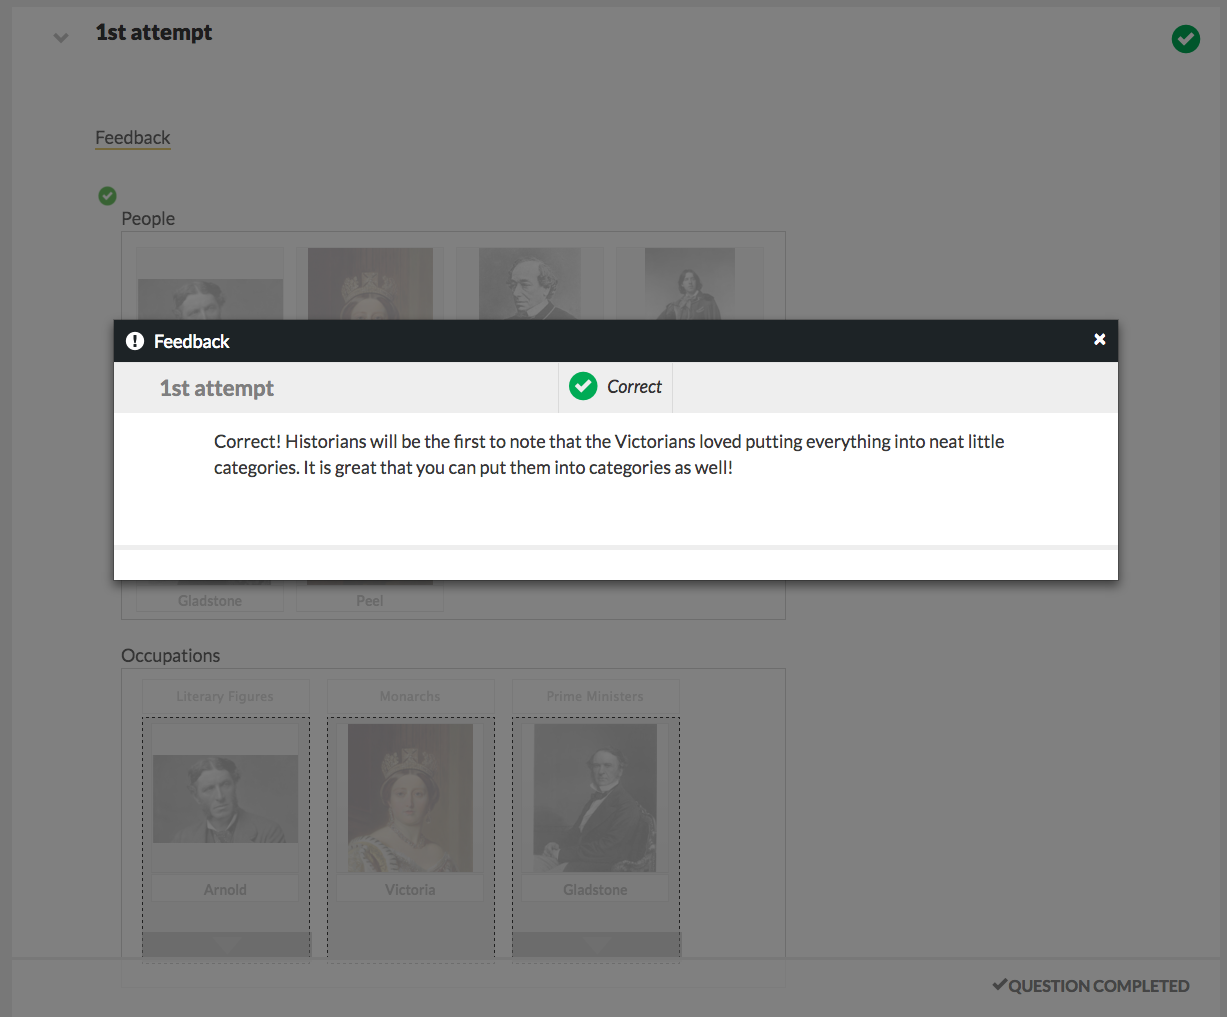
- Go to preview mode in the Question Editor. Check that the feedback is working correctly by recreating the correct answer in the preview window.
You should see the feedback that you wrote in the Correct Feedback tab:
To set Default feedback, do the following:
- Type up what you want the student to see when she places the items into the incorrect categories.

- Save the question.
- Go to preview mode in the Question Editor. Check that the feedback is working correctly by recreating a pattern that is NOT correct in the preview window.
You should see the feedback you created in the Default Feedback tab:
Creating Specific Incorrect Feedback
You can create feedback for specific incorrect answers by using the Specific Incorrect Feedback tabs.
When creating specific incorrect patterns, you can either use all of the categories and items or only use some of the categories and items. Feedback that only uses some of the categories and items can trigger Cascading Feedback, which will be discussed in the next section.
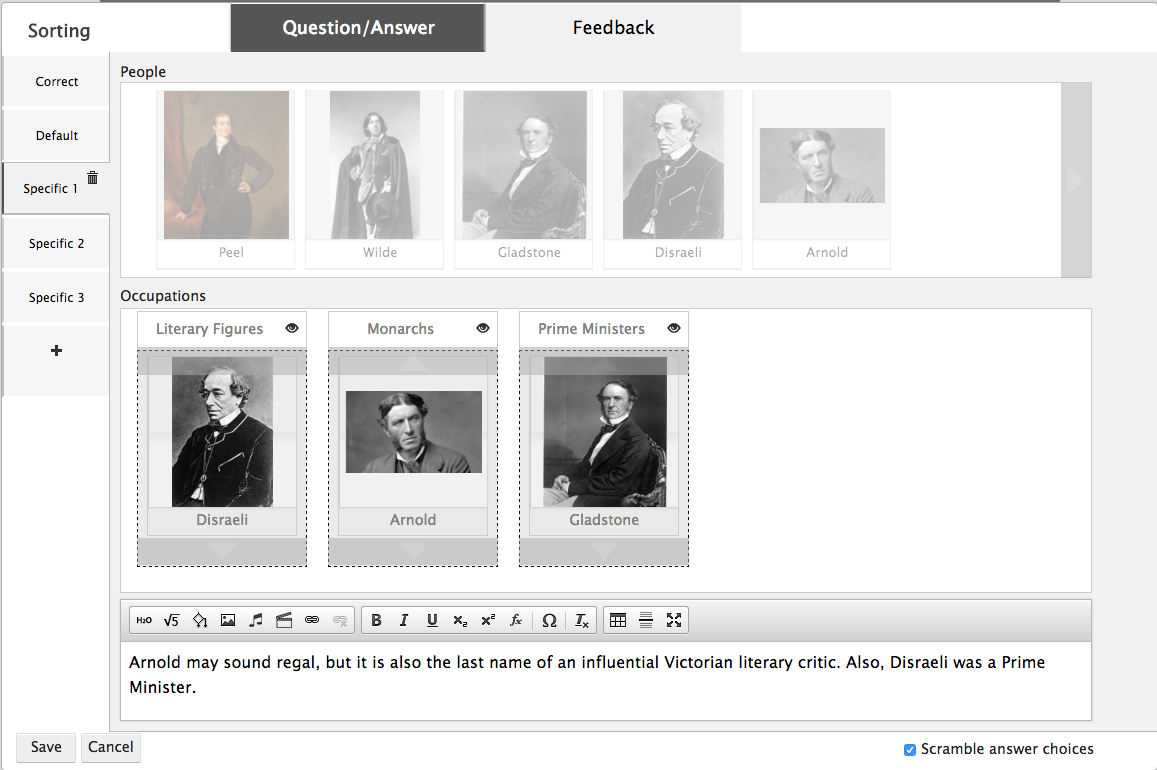
To set specific incorrect feedback using all of categories and items, do the following:
- Click on the tab with the plus sign to add a Specific Incorrect Feedback tab.
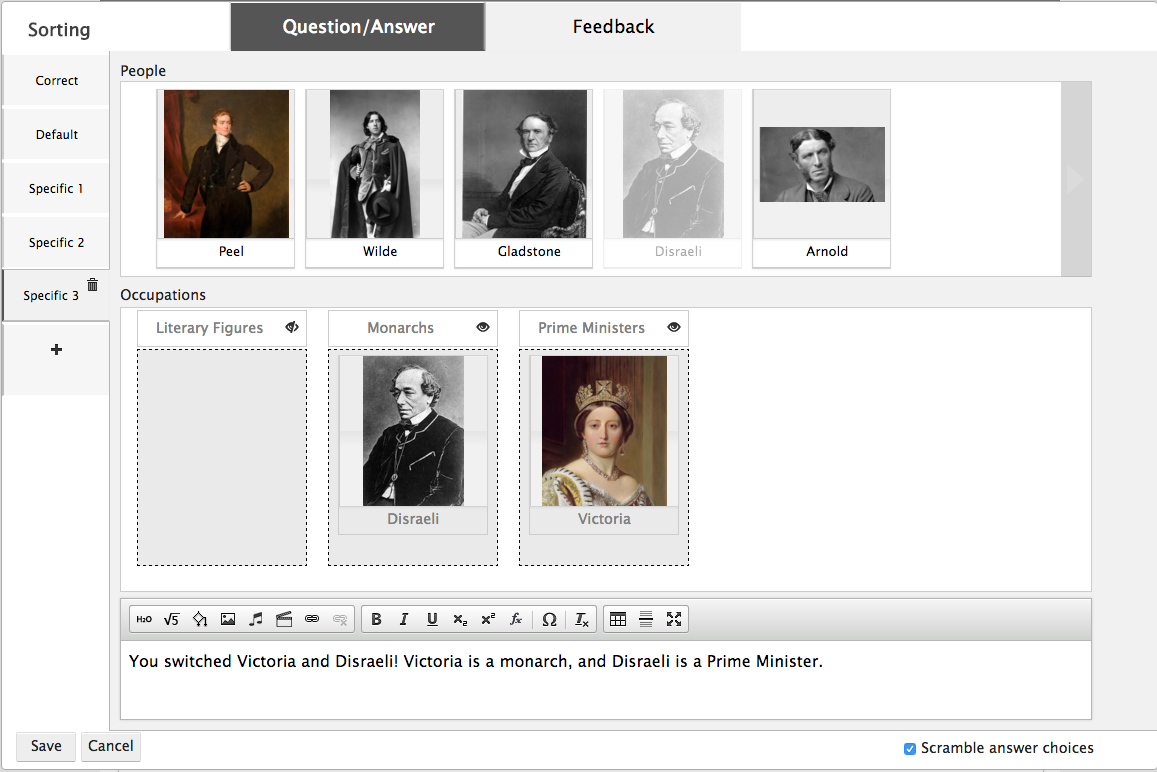
- In the tab’s Categories section, set the incorrect answer you want to trap for.
- Type up what you want the student to see when she sorts the items this way.
- Save the question.
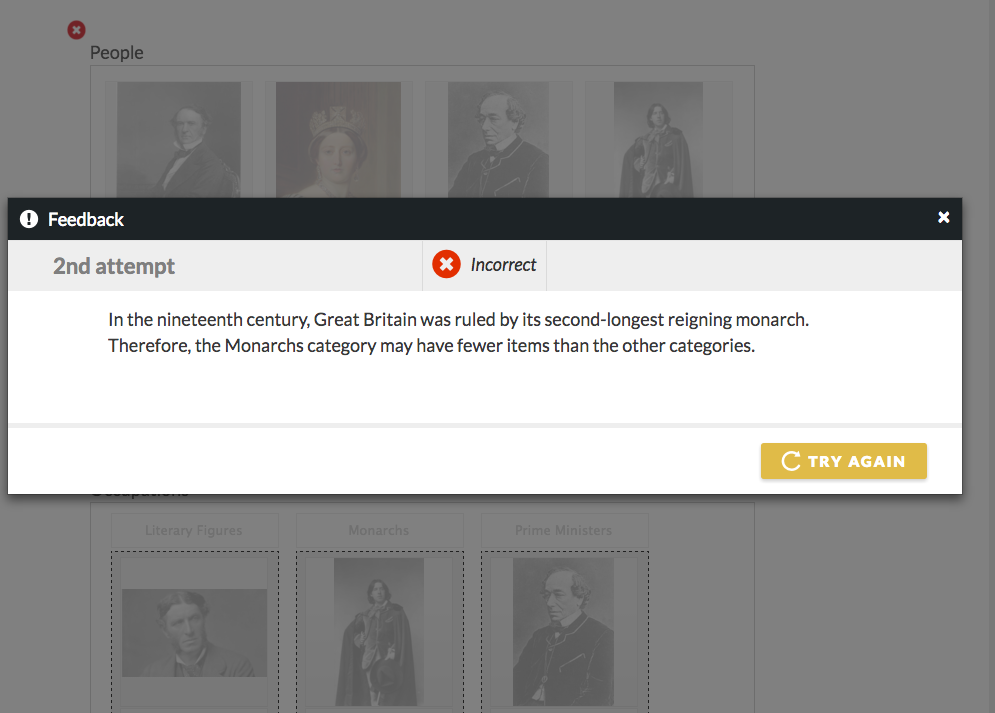
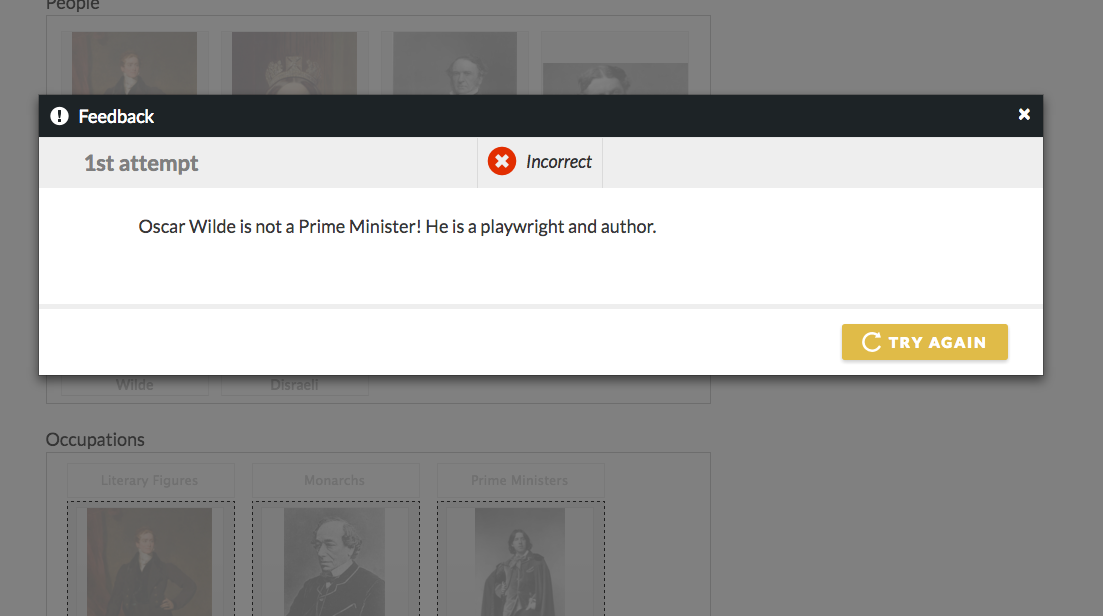
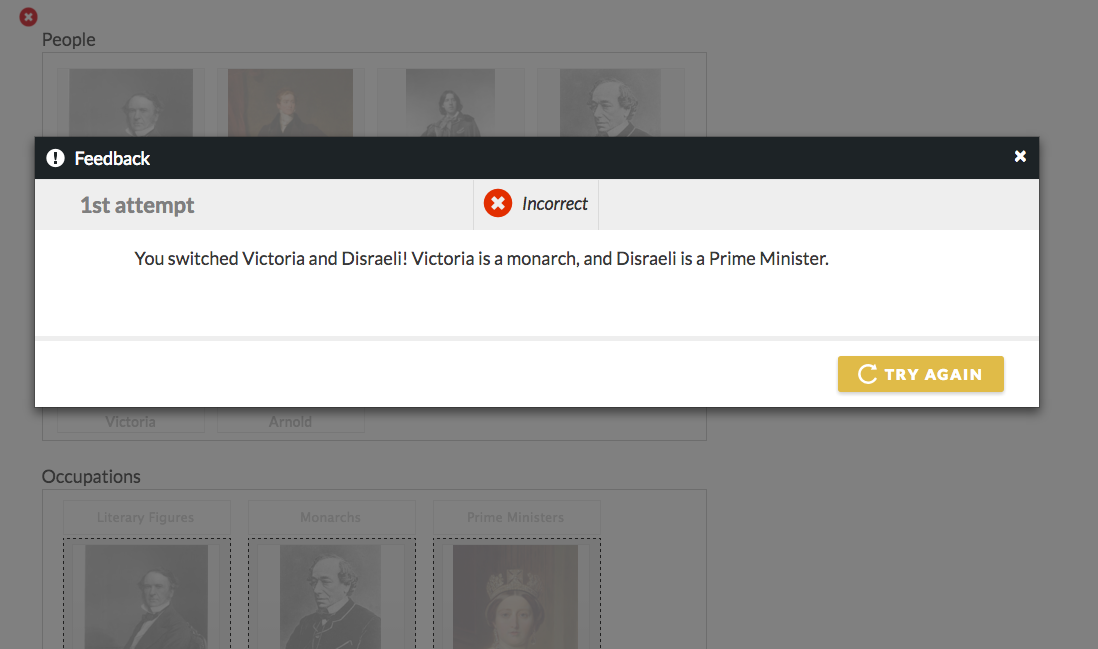
- Go to preview mode in the Question Editor. Check that the feedback is working correctly by sorting the items as you did in the Incorrect Feedback tab. You should see the Feedback you created in the Specific Incorrect Feedback tab:

Cascading Incorrect Feedback
Winking (Feedback that Uses Fewer than All the Categories)
In addition to creating incorrect feedback for patterns that use all of the categories and items, users can create incorrect feedback for patterns that only use some of the categories and items.
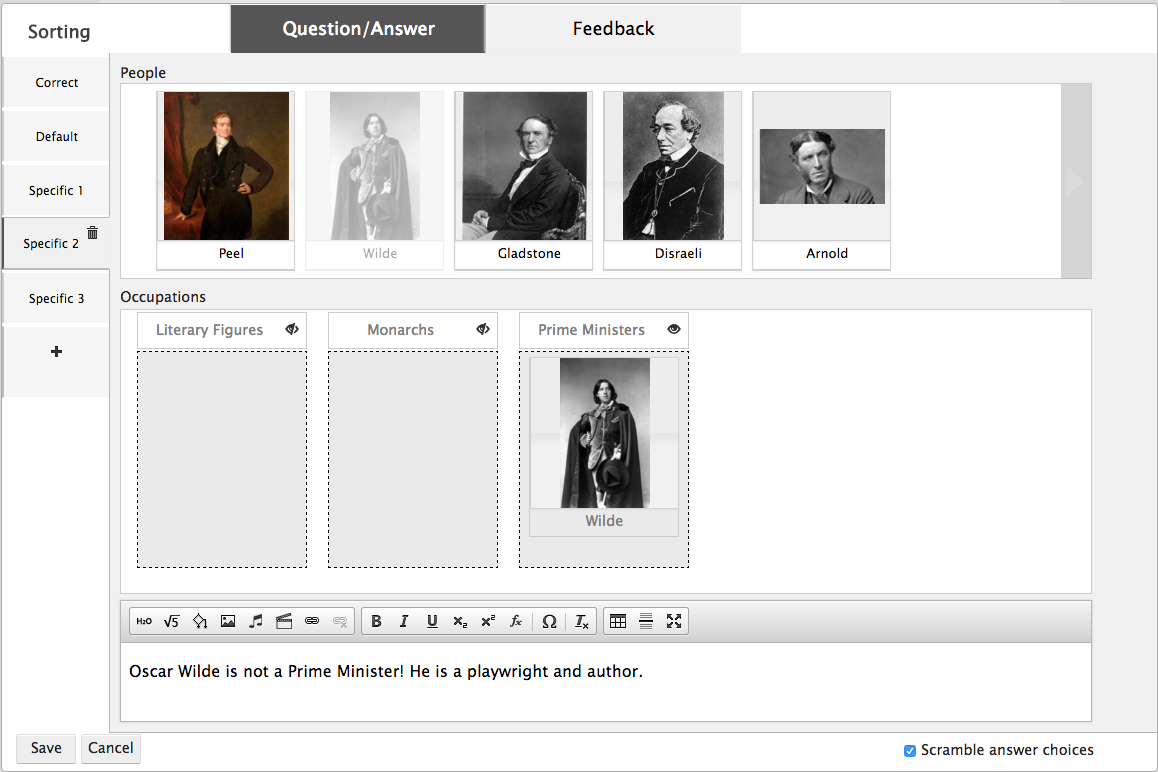
Unlike the Answer tab, each category in the Specific Feedback tab has little eyes. These indicate whether or not the system should ignore what a student places in the category. This is called Winking.
To tell the system to ignore what a student places in a category, authors should click on the eye so that a slash goes through the eye icon. This tells the system to focus entirely on what students place in the categories that are not winked.

A few things to keep in mind about Winking:
- If an author fails to wink out a category and leaves it blank in the incorrect answer tab, the system will assume that category was intentionally left blank. This means that in order to trigger that set of specific feedback, a student will have to leave that category blank.
- When creating specific incorrect feedback, items cannot be placed into categories that have been winked out.
Feedback that Uses One or Two Items
In addition to Winking out categories, authors can create feedback using fewer than all the items.
When creating feedback for only one or two items, it will not matter what additional items a student also places in the category. As long as the student places that specific item into the incorrect category, as defined in the incorrect feedback tab, she will trigger the specific incorrect feedback.
To create feedback using only one or two items, do the following:
- In the specific incorrect feedback tab, drag your items into an incorrect category. In this example, we will only use one item.
- Wink out the other categories you are not using.
- Write the text you want the student to see when she sorts this one item into that incorrect category.
4. After saving the module, go to preview in the Question Editor. Make sure that the feedback is working correctly by sorting that particular item into the designated incorrect category.
Cascading Feedback
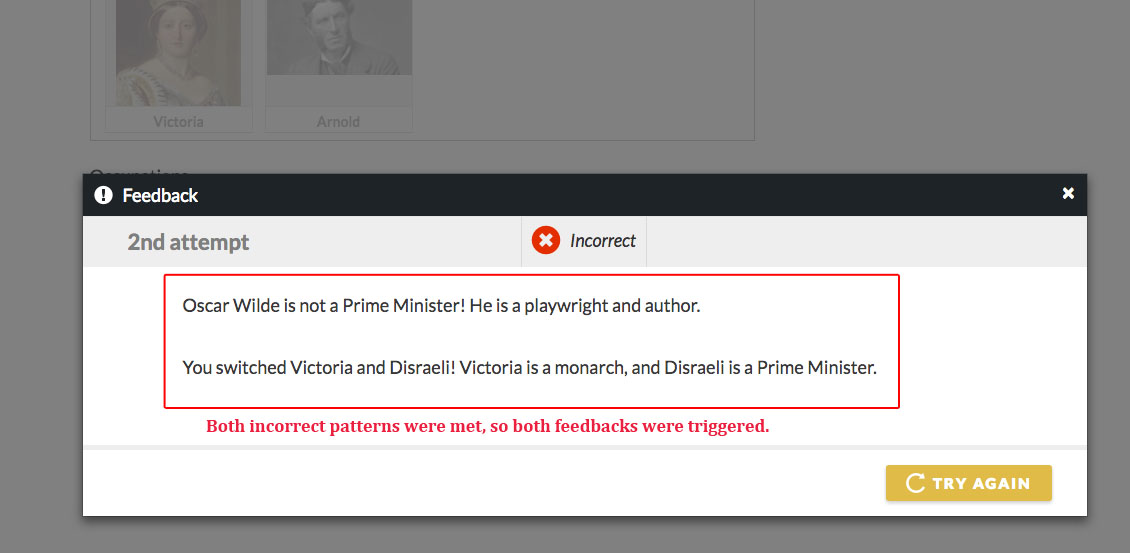
Because it is possible to create feedback for only some of the categories and items, the system will layer feedback if the student triggers multiple incorrect patterns. This is called Cascading Feedback.
The goal of Cascading Feedback is to minimize the number of attempts a student must make in order to arrive at the correct answer.
Cascading Feedback cannot be turned off.
Important Note: Cascading Feedback will NOT trigger if a specific feedback tab has tiles in only one category, and another specific feedback tab only has tiles in a different category. In order for Cascading Feedback to work, one of your Specific Feedback tabs must have tiles in more than one category. For example, Specific Feedback Tab 1 has tiles in Monarch category and only the Monarch category. Specific Feedback Tab 2 only has tiles in the Prime Minister category. If you try to trigger Cascading Feedback by fulfilling Specific Feedback 1 and Specific Feedback 2, it will not work. However, if Specific Feedback Tab 1 also has a tile in the Prime Minister category, Cascading Feedback will trigger. If you have questions about this, please contact your editor.
To create Cascading Feedback, do the following:
- On a Specific Feedback tab, create a pattern using one or more items and categories. For simplicity’s sake, this first example will only use one item and one category. Be sure to wink out the categories that are not being used in this pattern.

- After saving the module, go to preview mode in the Question Editor. Make sure that your feedback is working correctly by recreating the incorrect pattern in the preview window.

- Go back to the Module Editor and create another incorrect pattern with feedback. Be sure to wink out all of the categories you are not using.
- After saving the module, preview the question and make sure this new set of incorrect feedback is working correctly.
- When you confirmed that both sets of feedback are working correctly, refresh the preview, and recreate both incorrect patterns at the same time. The system will display both sets of feedback at once.